Cyclone Cast on Critical Ice Nova Assassin Gear, Jewels, and Flasks
Path of Building
Browse all our recommended gear from the comfort of Path of Building, which can be found here.
Included is all the recommended gear, skill trees, and gem links needed to make the build tick the way it should.
We use the Path of Building Community Fork for all of our builds, which is highly recommended. If you are encountering errors importing the build, please ensure you are using the Community Fork.
Gear Summary / TL;DR
These items strike a balance between power and cost-effectiveness. If you want to explore more options for Gear (both budget and high-end), Flasks, or get more information on alternatives and specialty items, please ensure you read the Gear, Jewels, and Flasks section in its entirety.
Our recommendation:
| Item Slot | Item Name |
| Head | +1 Maximum Power Charge 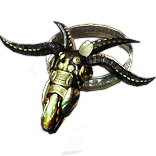 Hubris Circlet Hubris Circlet |
| Amulet |  Presence of Chayula Presence of Chayula |
| Chest | 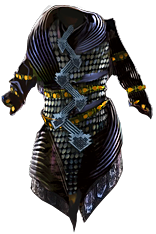 Shavronne's Wrappings Shavronne's Wrappings |
| Gloves | Rare 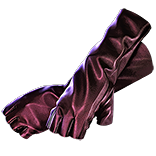 Fingerless Silk Gloves_ Fingerless Silk Gloves_ |
| Boots | Rare Tailwind Boots (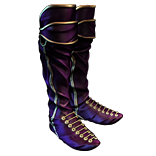 Sorcerer Boots or Sorcerer Boots or 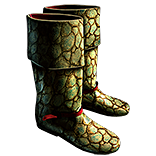 Two-Toned Boots (Fire and Cold Resistances) Two-Toned Boots (Fire and Cold Resistances) |
| Belt | Rare  Crystal Belt or Crystal Belt or  Mageblood Mageblood |
| Ring 1 |  Circle of Fear (Reduced reservation / Cold damage) Circle of Fear (Reduced reservation / Cold damage) |
| Ring 2 | Rare Ring |
| Weapon 1 |  Cospri's Malice Cospri's Malice |
| Shield | 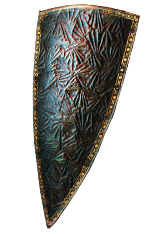 Prism Guardian Prism Guardian |
Armor
Chest
Low Life
 Shavronne's Wrappings is the required and standard choice for low life builds.
Life
A Unique chest is the best option and there are several great possibilities, such as:
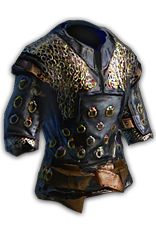 Loreweave is one of our go-to Unique chests and the best choice for bossing and maximizing damage, offering a selection of everything we need. Ensure that the Loreweave you purchase or roll has an 78% Maximum Resistances roll, as this is the most important affix that the item offers. After that, prioritize Global Critical Strike Chance and Elemental Damage. The Attributes and Life rolls are nice bonuses as well, but there is no need to prioritize them.
 Carcass Jack is an exceptional choice and arguably the best choice for all-round play. Boasting superior clear to
  Loreweave due to the area bonus, one can even consider using
  Concentrated Effect Support in the main link at all times with this chest equipped. If you want the most well-rounded item for an unbeatable price,
  Carcass Jack is likely your best bet.
 Tabula Rasa is an option for leveling and early mapping, but should be replaced by
  Carcass Jack if you can get a 5-Link version (minimum).
Helmet
Recommended Labyrinth Enchant:
 Ice Nova Damage Increased by 40%
Low Life
A  Hubris Circlet with high Energy Shield and an additional Power Charge is ideal.
- [Uncapped] Elemental Resistance
- % Increased Energy Shield
- +# to Energy Shield
- +1 to Maximum Power Charges
- Nearby Enemies have -9% Cold Resistance
Life
The  Enfeeble curse effect is not to be underrated. This can be a serious asset in helping you stay alive, especially if you can not yet afford top-tier gear. Despite what it might appear, the 40% Increase to
  Ice Nova is not as spectacular as it sounds, and while it is the best choice for bossing and the extreme end-game, you may feel squishy until you attain excellent gear.
  Enfeeble enchants are also much cheaper and the recommended choice when starting out.
As for helmets, there are a few great Unique options to consider:
 Starkonja's Head is the best overall option, and cheaply obtained at any point in a league. The Dexterity roll is of particular importance, as many of our core gems and items have sizeable requirements. The rest of the stats are great, granting large quantities of Life, Critical Strike, and Evasion.
 Devoto's Devotion offers superior clear speed and a large injection of Dexterity. The defenses are not as attractive as Starkonja’s, however, and the Attack Speed can actually be a negative in some cases (see Cast on Critical Strike Mechanics Explained later in the guide). That said, this item is unbeatable from a pure clearing speed perspective, making it worthy of consideration if that is your only priority.
A nicely crafted Rare is also a very competitive option. Use  Pristine Fossil and
  Frigid Fossil to craft an enchanted base yourself, and prioritize stats as follows:
- [Uncapped] Elemental Resistances
- +# to Maximum Life
- Nearby Enemies Have -9% to Cold Resistance (
 Frigid Fossil crafted)
 - +# to Attribute(s), as needed (Dexterity and Strength, in particular)
- % Increased Armour / Evasion / Energy Shield (base dependent)
- +# to Armour / Evasion / Energy Shield (base dependent)
Gloves
Low Life or Life
Rare  Fingerless Silk Gloves are the best choice for most of the end-game. Prioritize stats as follows:
- [Uncapped] Elemental Resistances
- +# to Maximum Life
- # to Dexterity (+only if needed for gem requirements)
- # to Accuracy Rating (+only if needed for 97%+
 Cyclone hit chance)
 - % Increased Cold Resistance / % Increased Damage Against Chilled Enemies (Incursion)
- % Increased Elemental Damage if You’ve Dealt a Critical Strike Recently (Crafted) / % Increased Global Critical Strike Chance
- % Increased Damage While Leeching (Crafted)
- % Increased Damage During Any Flask Effect (Crafted)
- % Increased Damage During Soul Gain Prevention (Crafted)
You can make a pretty incredible pair of multi-modded crafted gloves for this build, but it will cost several  Exalted Orbs for all the crafts. You will also need Dexterity on at least one Rare item, and gloves can be a convenient slot to have it.
 Atziri's Acuity (Life)
 Atziri's Acuity are the best Unique option, which improve your defenses and sustainability, as well as granting some additional Critical Strike. These are more of a luxury item and are very low priority, and should be one of the last upgrades sought after. We recommend waiting until you can afford a nicely Corrupted pair before purchasing a set of these. Some of the best options include:
- Curse Enemies with Enfeeble on Hit
- +1 to Socketed Gems
- % Increased Maximum Life
Boots
Low Life
A pair of Tailwind  Sorcerer Boots or
  Two-Toned Boots (Fire and Cold Resistances) are ideal. Prioritize
  Sorcerer Boots if your Resistances are capped elsewhere.
- % Increased Movement Speed (30%+)
- [Uncapped] Elemental Resistances
- You have Tailwind if you have dealt a Critical Strike recently (Hunter)
- % Increased Energy Shield
- +# to Energy Shield
Life
Rare boots are the go-to choice for most. Prioritize affixes as follows:
- % Increased Movement Speed (25%+)
- [Uncapped] Elemental Resistances
- +# to Maximum Life
You will also need Dexterity on at least one Rare item, and boots can be a convenient slot to have it.
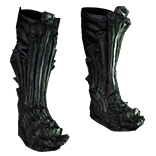 Bubonic Trail with 2 Abyssal sockets is an exceptionally strong item, and can be considered as very late-game luxury upgrade. You will need to socket at least one Abyssal Jewel into your Passive Tree to get the full bonus (1 of each: Searching Eye, Murderous Eye, and Hypnotic Eye), unless you are using a Stygian Vise in your belt slot. It is not worth using a Ghastly Eye Jewel for the Bubonic Trail damage bonus, as they have few useful damage affixes for non-summoner builds, and we do not use
  Tombfist or
  Lightpoacher to provide spare Abyssal sockets.
Weapons and Shields
Weapon 1 (All Variants)
 Cospri's Malice is mandatory and the item that breathes life into the build. In addition to triggering
  Frostbolts, which in turn generate more casts of
  Ice Nova, Cospri’s adds a nice amount of Critical Strike chance and flat Cold damage to our attacks.
Shield (Low Life)
 Prism Guardian is far and away the best choice to allow for maximum auras.
Weapon 2 (Life)
A second  Cospri's Malice is often the best choice or as competitive as a crafted weapon, and also allows for easier acquisition of Attack Speed to reach the
  Cast On Critical Strike Support trigger threshold after cooldown recovery has been acquired. Your links in this
  Cospri's Malice should not match your main-hand. Drop
  Life Leech Support for a new link that looks like this:
Shield Option (Life)
 Light of Lunaris is an option for a shield that provides good damage and allows the use of
  Shield Charge.
Accessories
Amulet
Low Life
 Presence of Chayula is the standard choice to allow for maximum stability.
Life
 The Pandemonius should be our go-to choice for amulet. Permanent Blind to enemies we hit, Cold Damage and Penetration, Cold Resistance, and a nice Dexterity implicit make this necklace an incredible pickup.
A Rare amulet can be used until  The Pandemonius can be afforded. Nothing fancy is necessary, as
  The Pandemonius is fairly cheap, and will be an early pickup. The following stats should be enough to get you started in maps; any damage, such as Global Critical Strike Chance/Multiplier, is just icing on the cake.
- Life
- Resistances
- Dexterity
Ring #1 (Unique)
Low Life
 Circle of Fear is required for the full gem setup. You will want one with these two affixes:
- Herald of Ice has (15-20)% reduced Mana Reservation
- (40-60)% increased Cold Damage while affected by Herald of Ice
Life
 Mark of the Shaper is an incredible choice for one of our rings. Your other ring must be an Elder item for this ring to be worth using, as the Spell Damage bonus is quite significant. The Volatile Anomalies that automatically spawn on kill can actually do fairly significant damage in certain situations; namely, bosses that spawn adds. The flat Lightning damage coupled with the Maximum Life and Energy Shield make this ring the complete package, and well worth the investment. Since your other ring has to be an Elder item out of necessity, you should purchase the other ring before upgrading to this piece.
 Berek's Grip can be used in in place of
  Mark of the Shaper until you can afford it. This item is fantastic for leveling and the Mana leech is useful for sustaining
  Cyclone until you have enough innate regeneration. It also offers superb damage for its very low requirement of Level 20.
 Gifts from Above can be used in place of
  Mark of the Shaper until you can afford it. It is extremely cheap, can be used from Level 28, and has a handful of effective stats. The Global Critical Strike is very nice to have if you are leveling with Cast on Critical Strike, and the Consecrated Ground actually provides surprisingly potent defensive smoothing.
Ring #2 (Rare)
Low Life
The  Opal Ring is the best possible base, but if you need resistances you should use a resistance base instead.
- [Uncapped] Elemental Resistances
- +# to Maximum Energy Shield
- +# to Accuracy (as needed)
- % to the Global Critical Strike Multiplier
- % Increased Spell Damage
- % Chance to Freeze / Adds # to # Cold Damage Against Chilled or Frozen Enemies
There are plenty of great damage affixes to work in as you can afford influenced items not limited to this list.
Life
An Elder Rare ring is the best possible option, as it will enable us to use  Mark of the Shaper once it is acquired. If you cannot afford an Elder ring yet, or one with a nice set of rolls, simply use a normal Rare ring with a base of your choosing. Opal is the best base for damage, while Resistance rings can be useful for filling out your defense. Prioritize the stats in the same way:
- [Uncapped] Resistances
- +# to Maximum Life
- Dexterity (if needed)
- Global Critical Strike Multiplier (Elder Suffix)
- Increased Cold Damage
- Life Gained for Each Enemy Hit by your Attacks (Elder Prefix)
- Cold Damage Leeched as Life (Fossil Craft)
Belt
Low Life
 Mageblood is the overall clear winner, if you can afford it.
The  Crystal Belt is a good alternative go-to for any Energy Shield build, including this one.
- +# to Maximum Energy Shield
- +# to Strength
- % Increased Damage with Hits against Chilled Enemies
- % Increased Cold Damage
Life
Our ideal belt is a Shaped Leather Belt that has the Increased Cooldown Recovery Speed affix. You will need a roll of 14% or higher, where we reach a  Cast On Critical Strike Support breakpoint that allows your linked spells to trigger more than an extra time per second, resulting in noticeably higher damage. Additional Increased Cooldown Recovery Speed beyond 14%, however, results in little benefit as another consistent breakpoint cannot be attained. Prioritize the rest of the stats as follows:
- +# to Maximum Life
- [Uncapped] Resistances
- Increased Cold Damage (Delve Mod)
- Increased Damage
- Energy Shield
The Shaped upgrade can be made relatively late in the build, so do not worry about buying an expensive belt right away. A standard  Stygian Vise Rare with just Life and Resistances will serve you perfectly well for the majority of the end-game, and well past Uber Elder.
Jewels
Ideal Jewels can be very expensive, but are not at all necessary to reach extreme highs with this build. Do not be afraid or ashamed of compromising a little bit, or crafting your own with Life and another damage affix before purchasing upgrades down the road.
 Militant Faith (Low Life)
 Militant Faith (in the name of Dominus) is used to transform The Agnostic into the powerful Inner Conviction keystone. From the POE Wiki:

It does not matter which seed of  Militant Faith is used, so long as it is converted by High Templar Dominus in the tooltip.
For reference, it is placed as shown below:

Since Inner Conviction grants a powerful more multiplier, it is highly recommended you obtain this as soon as you have your other core items online.
 Thread of Hope
Excellent for picking up some powerful notables in the Witch section of the tree. Can be very expensive but offers superb value for the socket. Passives in the “Large” Ring is the unique affix we are after.
 Watcher's Eye Options (Low Life and Life)
A  Watcher's Eye with the Discipline mod Energy Shield gained for each Enemy Hit while affected by Discipline mod adds a noticeable defensive increase and is +highly recommended in the late-game. The ideal second affix on Watcher’s Eye would be +(30-50)% to Critical Strike Multiplier while affected by Precision, which is a massive damage boost.
Cluster Jewels (Low Life)
You have some options for cluster jewels. In our Path of Building we included an example that uses a single Large Cluster and two Medium Clusters.
For Large Cluster Jewels, you’ll want to search for some with 12% increased cold damage as the small passives. It’s very valuable to have Dexterity on each of the small passives as well, as this build requires a high amount of Dexterity (210+). These notables are preferable:
- Blanketed Snow
- Prismatic Heart
- Widespread Destruction
- Disorienting Display
- Vengeful Commander
For medium cluster jewels, there are many options. In our examples we chose to use those with small passives that had 10% Increased Effect of non-damaging Ailments and 10% increased Area Damage. Our notable picks:
- Cold Conduction: To get reliably shocks on enemies
- Astonishing Affliction: Improved Freeze and damage on targets
- Vast Power: Very valuable; huge area of effect increase and damage boost
- Magnifier: Area of effect increase and damage boost
There are many other powerful combinations to experiment with, but these are a good baseline to get you started.
Unique Jewel options (Life)
 Tempered Mind can be a big help with Accuracy. It should be placed next to the Instability Power Charge node above the Witch wheel if used.
 Might of the Meek can be placed below the Scion starting wheel to add additional Maximum Life from the Constitution wheel.
 Unnatural Instinct can be placed above and to the right of the Scion wheel to assist with Accuracy, although this requires some re-allocation of our Passive Skill Tree to drop the existing Accuracy nodes. This will also net you some spell damage and Life, but is a very expensive piece to implement. This is not necessarily an upgrade, either, but some players prefer this pathing.
Normal Jewels
Any damage increasing stats not listed here are also perfectly fine to fill out a Jewel, or for use when starting out.
- % Increased Maximum Energy Shield (Low Life) / % Increased Maximum Life (Life)
- % to Critical Strike Multiplier with Cold Skills
- % Increased Critical Strike Multiplier for Elemental Skills
- % Increased Critical Strike Multiplier for Spells
- +# Increased Global Critical Strike Multiplier # % Increased Spell Damage While Holding a Shield (only with a Shield)
- % Increased Critical Strike Chance with Cold Skills
- % Increased Cold Damage
- % Increased Spell Damage
- % Increased Area Damage
- % Increased Damage
Abyssal Jewels
- +# to Maximum Energy Shield (Low Life) / +# to Maximum Life (Life)
- Adds Cold Damage to Spells While Holding a Shield (only with a Shield)
- Adds Cold Damage to Spells
- % to Global Critical Strike Multiplier
- Adds Lightning Damage to Spells While Holding a Shield (only with a Shield)
- Adds Fire Damage to Spells While Holding a Shield (only with a Shield)
- Adds Lightning/Fire Damage to Spells
- Damage Penetrates 2% of Elemental Resistances if you Haven’t Killed Recently
- % to Global Critical Strike Chance
Flasks
Swap in preferred affixes as needed.
Low Life
Here is our recommended Flask setup, although you can change them out based on personal preference of Flasks or Prefixes/Suffixes.
 Bottled Faith
 The Wise Oak (Cold must be your highest Resistance or equal to it)
- Experimenter’s
 Diamond Flask of the Owl
 - Experimenter’s
 Silver Flask of the Armadillo
 - Dabbler’s
 Quicksilver Flask of the Dove
 Mageblood
- Dabbler’s
 Granite Flask of the Order
 - Dabbler’s
 Bismuth Flask of the Armadillo
 - Dabbler’s
 Diamond Flask of the Owl
 - Dabbler’s
 Quicksilver Flask of the Dove
Life
Here is our recommended Flask setup, although you can change them out based on personal preference of Flasks or Prefixes/Suffixes.

- Seething
 Divine Life Flask of Staunching
  The Wise Oak
- Experimenter’s
 Diamond Flask of Warding
 - Surgeon’s Basalt Flask of Heat (Maximum Defense) or
 Atziri's Promise
 - Alchemist’s
 Quicksilver Flask of Adrenaline
Check out the main page of the guide or use the menu on the right side of this page to navigate to the other sections of the guide.


 Elemental Focus Support