All Around Miner - Glacial Cascade Mines Saboteur Gear, Jewels & Flasks
Summary – TL;DR
As per usual, nothing matters more than capping your Elemental Resistance before anything else. This means modifiers on gear are subordinate to Resistances as long as you’re not capped. Since you’ll be running a decent amount of Unique items, it’ll be important to look out for a lot of resistances on your Rare pieces!
We’re providing you with an extensive analysis further down the page but chose to start off with an overview / recommendation.
Our recommendation:
| Item Slot | Item Name |
| Head |  Crown of the Inward Eye Crown of the Inward Eye |
| Amulet |  The Pandemonius The Pandemonius |
| Chest |  Carcass Jack Carcass Jack |
| Gloves | Incursion Gloves with Cold damage against Chilled Enemies, Life and Resistances |
| Boots | 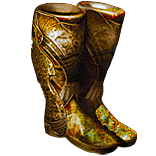 Atziri's Step Atziri's Step |
| Belt |  Stygian Vise with High Life and Resistances Stygian Vise with High Life and Resistances |
| Rings |  Vermillion Ring with High Life and Resistances Vermillion Ring with High Life and Resistances |
| Weapon | Rare with +1 to Physical Spells, Spell Crit and Ele as Extra Chaos |
| Shield | 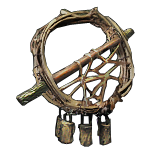 Harmonic Spirit Shield with Life, Spell Suppression and 2 Damage Mods Harmonic Spirit Shield with Life, Spell Suppression and 2 Damage Mods |
For crafting Rare items, you can check out all the affixes that can roll on an item base, depending on its level, influence, and many other factors, using our affix tool.
Armour Pieces
Helmet
No complicated Helmet slot this time around!  Crown of the Inward Eye is just too nice for this build not to use it. It provides you with some damage, some Energy Shield, Mana and a ton of Life which are all things we like a lot. Make sure to buy one with a high increased maximum Life, Mana and Global Energy Shield roll or use some
  Divine Orbs to get a 20% or higher one.
Solo Self-Found: While this Helmet requires you to kill Awakener, it is so incredibly common as a drop from him that we assume it to be fairly acquirable even earlier on. Up until that point, though, feel free to use any rare Life / Resist helmet.
Body Armour
Ideally and most optimally I think a  Carcass Jack suits the build best. It’s a solid chest piece regardless of its specific bonuses, as it gives a chunk of maximum Life, some resistances and pretty solid Evasion / Energy Shield. The Radius it gives your
  Glacial Cascade through the Increased Area of Effect of Area Skills is a pretty decent upgrade damage-wise and the Area Damage also isn’t too shabby. Try to get one with some decent rolls if you can!
Solo Self-Found: Carcass Jack is farmable by getting the ![]() The Scavenger cards. You can find these in Chateau, Channel or Underground River maps and very rarely in Blood Aqueducts. Until you find enough of these cards, whatever 6-Linked item you can find works, like a
The Scavenger cards. You can find these in Chateau, Channel or Underground River maps and very rarely in Blood Aqueducts. Until you find enough of these cards, whatever 6-Linked item you can find works, like a  Tabula Rasa for example.
Gloves
This is a flexible item, but in an ideal world you’re looking for the incursion modifier here that grants you Increased damage with hits against Chilled Enemies. This modifier always comes with at least 40% Cold Resistance so, in theory, as long as you find one with either another high Resist or high Life you can fill out the item by crafting the other, as long as it has the open affix you require it to have.
If you’re not going the Chilled Enemies affix route, or you can afford getting one with the mods combined, do note that you could be getting some Spell Suppression Chance here to lessen the pressure on your shield a bit, given you need quite high rolls to cap out on that.
- +# to maximum Life (at least 85)
- #% Increased damage with hits against Chilled Enemies
- +# to Elemental Resistances (until cap)

Boots
The boot slot is saved for  Atziri's Step. Even though often very cheap, these boots are super solid when it comes to survivability. They get you to the Spell Dodge cap under the effect of
  Vaal Grace, which is so nice while mapping and encountering something dangerous. Try to find one with a high Life roll if you can afford it!
Solo Self-Found: These boots drop off of regular Atziri and thus are easily target farmable. At the rate at which the game currently spits out Sacrifice Fragments through Heists, Deliriums, Metamorphs, Legions and what not, farming a pair of Atziri’s Steps should be easily doable.
Belt
So, since you’re taking Explosive Experts in your Ascendancy and 30% Critical Strike Multiplier is a lot of damage, you’re going to want to be able to Ignite. The easiest way to do this is to deal any source of Fire Damage while dealing a Critical Strike. Since we have a fairly solid amount of Critical Strike chance, an Abyssal Jewel with Fire Damage to spells is the most convenient way of getting there. Therefore, you need a  Stygian Vise in this slot to avoid wasting one of your jewel sockets to an otherwise mediocre jewel.
- +# to maximum Life (at least 90)
- +#% to Elemental Resistances (until cap)

Accessories
Amulet
This is where you have to make a choice. There are three options here actually. You either go for the budget, solo self-found friendly option and you find an amulet which has really solid Life, solid Critical Strike multiplier and maybe some additional resists. If it has an open suffix you craft Mine Throwing Speed (which is a 4% more damage multiplier).
If you want to be completely min-maxed, you could opt into an amulet with +1 Physical or Cold Skills, high Life, Multi and an open suffix for Throwing Speed which obviously is the ideal world, but it’d probably cost you over double digit Exalted Orbs. However, it can easily add over 20% more damage, while not losing any life or Throwing Speed (which is, again, a 4% more multiplier).
The third option you could opt into is a  The Pandemonius. The reason why I wouldn’t call it core is because the main defensive factors of this amulet are already present in the build (Blind & Chill). However, a catalyzed Pandemonius can add up to 20% more Damage, which is a lot. In effect, this probably equates to about 1 Million Sirus DPS you could be adding in this slot alone, with an amulet that is reasonably cheap.
I’d recommend a catalysed version of  The Pandemonius as it’s easy to get, incredibly strong, gets you some extra layers of defense and is a slot you can slot & forget about. Otherwise, here are the affixes for a rare necklace.
- +# to Level of all Cold / Intelligence Skills
- +# to maximum Life (at least 70)
- second +# to Level of all Cold / Intelligence Skills
- #% to Global Critical Strike Multiplier
- #% increased Mine Throwing Speed
- +#% to all Elemental Resistances
- #% increased Global Critical Strike Chance


Anoint
Sovereignity gets you more mana freedom & is a nice amount of damage. Sounds like a great pick to me!
Rings
You don’t need much on your rings, which means you’re opening up the possibility to run  Vermillion Rings. These should always have some high Life modifier with ideally some combination of Elemental and Chaos Resistance. This is most likely the only slot where you can find some Chaos Resistance. Worry not though, you can easily self craft these by just getting Life & 1 Resistance, using a
  Regal Orb and just crafting some hybrid Chaos Resistance. If you’re buying them, getting some form of Mana Regeneration on them (or on one of them) is helpful to your overall Mana recovery!
Note: Catalyzing these is incredibly potent. Life & Mana catalysts work for explicit Life rolls, Mana regeneration and % Life implicits.
- +# to maximum Life (at least 70 – before Catalysts)
- +# Elemental Resistance (until cap)
- +# to Elemental and Chaos Resistances (15 – Crafted)
- #% increased Mana Regeneration Rate (at least 40 – before Catalysts)

Weapon
Since the build is written with Solo Self-Found in mind, do note that your optimal sceptres are far from what I’m showing here. You could get stuff like Physical Damage as extra Element, Hatred effect, non-Chaos as Chaos Damage, and so on, but we’re going to keep it more straightforward. You don’t need any of those ludicrous options to deal damage, and after all, dealing damage is what we’re after here. First of all, it is advisable that your wand has at least some form of +1 to Glacial Cascade levels. Whether that is through +1 Physical, Cold or Spell skill gems doesn’t matter at all.
- +# to Level of all (Cold / Phys) Spell Skill Gems (3 is better than 2 of them, 2 is better than 1 of them)
- #% increased Spell Damage
- #% increased Critical Strike Chance for Spells
- +#% to Global Critical Strike Multiplier

Shield
This is the last piece of equipment you should be getting. This is, mainly, because it’s a very versatile slot and will be able to fix every problem your gear has whenever you’re done getting your other pieces. Ideally, as you can see in the Path of Building, you want this slot to be a source of Life, Spell Suppression and damage modifiers only. Stuff like +# to Level of all Cold/Physical Spell Skill Gems, #% chance to deal Double Damage, #% of Cold Damage as extra Chaos Damage are incredibly strong and are great scalers to your build. However, if you can’t afford / find gear pieces that fix your Resistances on your other pieces of gear, obviously a shield is a very potent place to fix these problems.
- +# maximum Life (at least 90)
- +#% chance to Suppress Spell Damage (Enough to cap)
- +# to Level of all Cold/Physical Spell Skill Gems (1)
- Gain #% of Cold Damage as Extra Chaos Damage (at least 12)
- #% chance to deal Double Damage (5)

Flasks
I believe flasks are highly preference-based. One isn’t just outright better than another one for specific / certain builds. Obviously, sometimes, there is a set in stone set of Flasks you should be using just because they synergize with your build so well. I wouldn’t say those really exist in this setup, but I’d strongly advise you to stick with the setup listed here.
The choice of skills almost forces you in to a  Taste of Hate. This Flask is just so incredibly strong defensively that once you’re playing a skill that benefits from it offensively you almost always wanna throw it in there. This is no exception. Over 10 percent more damage while giving you 20% more maximum HP versus incoming Physical Damage is just too good to pass up on. In Solo Self-Found this makes way for a Basalt Flask to take over the defensive capabilities of the ToH.
The  Cinderswallow Urn we’re suggesting you run has particularly high value in this build because of its necessity to inflict Ignites already. You’re not giving up anything for that, as Explosive Expert already made igniting mandatory. This makes Cinderswallow as good as it ever gets at no cost. It offers you all the sustain you’ll ever need while mapping, Onslaught, some extra critical strike chance and about 10% more damage. Very solid choice!
Otherwise, the none unique Flasks you want to run in this build are a  Diamond Flask which provides you with about 15% more Damage (and 20% Effective Critical Strike Chance). You just can’t go without one if you’re playing a Critbuild. Next up, you’re supposed to run a
  Quicksilver Flask because honestly mobility is just super important. Lastly, as you do sometimes get hit, a panic button in a
  Divine Life Flask is probably recommended.
Regardless of which utility Flasks you go for and whether you follow our recommendations or not, you’ll need to stick to the suffixes we have picked for you (Staunching, Heat, Warding). The affixes on your non-unique Flasks can be changed around, but I recommend the following setup (based on the Flask duration, charges, and affix priorities):
Our recommendation:
| Slot | Flask |
| 1 | Bubbling  Divine Life Flask of Assuaging Divine Life Flask of Assuaging |
| 2 | Chemist’s  Granite Flask of the Walrus Granite Flask of the Walrus |
| 3 | Chemist’s  Silver Flask of the Eel Silver Flask of the Eel |
| 4 |  Taste of Hate Taste of Hate |
| 5 | Chemist’s  Quicksilver Flask of the Cheetah Quicksilver Flask of the Cheetah |
Be sure to check out our Flask Crafting Guide to learn everything you need to know about how to set up your non-Unique flasks.
Jewels
Cluster Jewels
Cluster Jewels generally are not too amazing for your damage but because of the efficiency that Area of Effect has, we decided to throw in just 1 Medium Cluster Jewel that focuses on getting as much AoE as possible for as few nodes as possible.
If you are looking for the most optimal way to acquire your Cluster Jewels, or have any other questions whatsoever about them, such as how to craft or price them, we refer you to our complete guide on Cluster Jewels.
For your Medium Cluster Jewel, the only combination that we deemed worth of running was a Towering Threat combined with Vast Power. This gives you 8% increased maximum Life, 20% Area of Effect, 20% Area Damage and 10 Crit Multi for 7 skill Points. You want one of these especially because it gets you a decent chunk of Area of Effect whilst making the nodes efficient! More clear & more single target is always nice.

Watcher’s Eye
While I know a multitude of people who have migrated to SSF from Trade League over the past couple of years, very few are actually able to include a Watcher’s Eye in their builds. However, given its strength, I feel like it’s mandatory to give you guys the option to run one. Since you’re playing a miner with a spell skill that wants to use a Unique chest piece, you’re going to have a hard time capping your critical strike chance. A  Watcher's Eye with +#% to Critical Strike Chance while affected by Hatred does just that.
If you can’t acquire this Watcher’s Eye, but can get your hands on one that has either the “#% Increased Cold Damage while affected by Hatred” or the “Adds # to # Cold Damage while affected by Hatred”, they are definitely worth running too. In case you’re in SSF and you can’t get any of these, a regular Rare jewel will do fine.
Intuitive Leap
Since you’re traveling to Phase Acrobatics and you like Crit Multiplier, Resistances, Frenzy Charges and Maximum Life, an Intuitive Leap is incredibly efficient here. It saves you a decent amount of skill points while still netting you a lot of damage, life and resists!

Regular Jewels
Because you want to stay relatively tanky, I really like grabbing #% increased Maximum Life on every single one of my Rare jewels, of which this build requires two. Your best modifiers are Critical Strike Multiplier followed by any source of Increased damage. I suggest you grab jewels that have a Life modifier, one critical strike multiplier roll, and one other benefiting modifier.
- #% increased maximum life
- +#% to Critical Strike Multiplier with Cold Skills
- +#% to Critical Strike Multiplier with Elemental Skills
- +#% to Critical Strike Multiplier for Spells
- #% Increased Spell Damage
- #% Increased Spell Damage while holding a Shield
- #% increased Damage
- #% increased Cold Damage
- #% increased Mine Damage
- #% increased Area Damage


