Necromancer Aurabot Support Passive Skill Tree & Gem Links
Cluster and non-Cluster Variations of Supports
We opted to offer two variations for the Aurabot Support guide. The first one is just a regular version without any Cluster jewels and focuses on getting you a very solid character that does everything your group could ever expect you to do. The second version is a higher budget version that focuses on using Cluster jewels to get more aura effect scaling, which results in a lot more damage and defences provided to your group.
If you are new to playing these kinds of characters, we advise you to stick to the regular version, as the Cluster version can be very confusing to transition into.
Passive Skill Tree
League Starter – All Around No Cluster Jewels Variant
This particular way of building an Aurabot is a lot easier for newer players to understand. It doesn’t revolve around getting specific pieces which would then get replaced and changed as you find other pieces. It focuses on having a couple of necessary things, hardly any respecs in the passive tree, and being solid both when just starting out in early levels and when reaching the later stages of the endgame.
Assuming you followed the leveling section, you should have already allocated Charisma, Leadership, Sovereignty, and Influence. Besides that, there really aren’t a lot of things this build requires to function. You should focus on grabbing Elemental Equilibrium and Avatar of Fire to make sure you can apply Cold and Lightning resistance reduction through  Frost Bomb by converting its Cold damage into purely Fire damage.
The reason why you want to use  Frost Bomb to apply Elemental Equilibrium on bosses is because it also adds Cold exposure as soon as it gets dropped on top of an enemy. Since we are not running
  Anger, our Damage Dealer will be dealing almost exclusively Cold and Lightning damage. That’s why applying a reduction to those two elements as well as applying Cold Exposure becomes your best option to amplify your group’s damage output.
Once you have all of those notables, really the only thing you want to be pathing towards is Energy Shield. As you level up and you allocate Energy Shield, you should get up to 8K, making you fairly tanky. All in all, this makes this variation very easy to pilot and set up which makes it very potent as a league-starting option for Support characters.
We have made a Path of Building and a Passive Skill Tree for you to enjoy.
If you are seeking more information or a more thorough item breakdown, please refer to the gear page.
Progression Advice
Since it’s fairly vital you keep improving your build throughout the level-ups and keep carrying your team’s damage output, we will cover the post-leveling steps to go through.
As mentioned in the initial leveling section, the choices from 1 to 55 are fairly straightforward. Whenever you accumulate a couple of basic pieces of gear, you’ll be able to start being a fully online support character. We have created a Path of Building and a Passive Skill Tree link for a level 80 Character. As mentioned before, generally you’re just looking for the most efficient Energy Shield choices. Assuming you have invested a little bit into gear pieces, you should be sitting pretty at 6K Energy Shield and a reasonable amount of added offences and defences.
Cluster Variant
This variation of the support build has tremendous amounts of pressure on gear! Only swap to this in the very very late game when you have plenty of currency to optimize your build. As we make use of a lot of Cluster jewels that change your Mana reservations, some of your gem sockets are going to change. I’ll be listing the entire setup in the gem section to avoid confusion.
We have made a Path of Building and a Passive Skill Tree for you to enjoy.
Gem Links (Setups & Differences)
Unlike many other builds, gem setups on Aurabots depend a lot on the actual gear you have. The amount of reduced Mana reservation you currently have available will change which auras go where. I will give you a couple of examples that you should find easy to use.
Pre-Low-Life Setups
4-Link Auras & Smite
As we mentioned before, your initial auras pre level 55 are not going to change until we transition into Low-Life. These will carry your group through the leveling and make it so you don’t have to worry too much about potential changes to gear. We chose these two damage auras cause adding flat damage is generally better than adding scaling multipliers in the early stages of the game.
You will want to a 4-Linked item (from level 24 onwards) with:
Post Normal Lab
After normal lab, you’ll be giving your group increased Attack Speed (and Cast Speed) per aura you are running, thanks to Commander of Darkness. This means you want to augment the amount of auras you’re running even though you’re almost reserving all of your Mana already. The way to do this is by running the auras that reserve flat Mana and keeping them low level. By running this setup, we squeeze out an extra 6% Attack speed out of Commander of Darkness while not reserving almost any extra Mana.
Proccing Elemental Equilibrium
Make sure to have allocated Elemental Equilibrium in the passive tree and check if you have no flat Fire or Lightning damage to spells on any piece of gear before using this setup (don’t allocate Avatar of Fire yet as you are still running  Anger).
 Ice Nova
 Increased Area of Effect Support (optional)
Other Skills Before the Transition
Since you’ll have room for just one more aura between levels 24 and 55, we suggest you use a  Purity of Elements to help you manage your resistances throughout the leveling. Since your group members might also have a hard time keeping those close towards the maximum, they won’t mind you running that either. Besides that last aura, there are a few givens you want to run, such as
  Flame Dash possibly linked to
  Faster Casting Support.
Adding a ###item:Conquerors-Efficiency###
After completing the Wings of Vastiri quest in Act 8 you will be offered a ###item:Conquerors-Efficiency###. After socketing this into one of your empty jewel sockets, you will be able to add the  Grace aura to your build. This will keep you and your group safe while farming Blood Aqueducts and in early maps.
The transition to Low-Life
Prism Guardian Auras
Auras socketed in 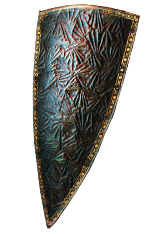 Prism Guardian use Life to reserve their cost. They however don’t get the Mana multiplier from Arrogance Support, which is what makes
  Prism Guardian so powerful. These auras initially cost 50% Mana and will now only reserve 16% of our Life pool. Whether you go for
  Anger or
  Hatred depends on the game state and the gear of your Damage Dealer at the point of transition. The more flat Cold Damage your Damage dealer already has (through, for example,
 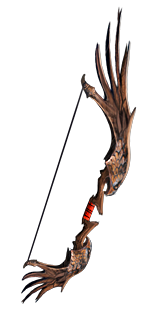 Windripper,
  Ice Bite Support, or
  Added Cold Damage Support), the better
  Hatred will become.
Alpha’s Howl Auras
Since  Alpha's Howl comes with extra levels to the socketed aura gems, you want to put your Purities in there because they’ll help the group get to resistence cap. You’d also prefer putting your
  Grace in here. However, if you can’t get the correct colours yet, you can socket these gems elsewhere and your setup will still work. They also don’t require to be linked whatsoever.
Another Arrogance Aura
Since your  Prism Guardian auras don’t reserve all your Life, you get to run one other aura on Life. This has to be our
  Discipline, because of its lower original cost. This 2-Link can be put in any piece of gear.
 Discipline
- Arrogance Support
Optimizing Commander of Darkness
As mentioned before, we want to run a low level  Clarity and
  Precision to optimize the Attack Speed our Damage Dealer gets from Commander of Darkness. These gems don’t have to be linked and can randomly be socketed by themselves anywhere in your gear. However, for perfect optimisation you’d want to make this a four link. If you don’t have another linked item available at this point,
  Smite and
  Generosity Support can also be linked separately elsewhere.
 Precision (Level 1)
 Clarity (Level 1)
 Smite
Smite Generosity Support
Proccing Elemental Equilibrium & Exposure
Since you want to proc the most optimal exposures and resistance reductions, this choice depends on whether you chose to run  Anger or
  Hatred. Most likely, you should already use
  Hatred in which case it is vital that you allocate Avatar of Fire so you can convert
  Frost Bomb into purely Fire damage and expose bosses to Cold while making them vulnerable to Lightning and Cold damage.
  Frost Bomb can be socketed anywhere and requires no links.
Additional Utility Skills
Just as you did in the leveling section, there’s a couple of utility skills you really can’t go without. First of all there’s  Flame Dash which can be linked to
  Second Wind Support if you have a 2-Link available.
Post Merciless Lab, when you should pick up Mistress of Sacrifice, it’s also important that you’re running a  Cast when Damage Taken Support link. We suggest the following:
 Cast when Damage Taken Support (Level 10)
 Bone Offering (Level 13) (through Essence Gluton this will grant you 8% Energy Shield regen whenever this procs)
 Immortal Call (Level 12)
Endgame Low-Life
When you finally optimize all of your pieces a little bit, there’s not much that’ll change but your setup will be less pressured on abusing  Prism Guardian which allows you to run either
  Awakened Generosity Support or
  Generosity Support on your damage Auras. This additional 50% Aura Effect to both
  Hatred and
  Wrath relates to approximately 33% more effect of those auras. It’s definitely something you will notice!
Prism Guardian Auras
This is where you will, contrary to before, only be putting two auras instead of three. That allows you to link  Awakened Generosity Support and scale up your auras a lot more than you did before.
Alpha’s Howl Auras
Assuming that at this point in the game, you’ll have the means to be colouring our  Alpha's Howl correctly. So, you’re going to swap our
  Discipline in here to get that little bit extra Energy Shield through the helmet’s aura level scaling. Disclaimer: if you’re running your Purities in an
  Alpha's Howl, and you have all the correct aura nodes, getting level 21 Purity gems will give you 1% additional maximum resistance which is about a 7% damage reduction versus Elemental Damage and a fairly significant upgrade.
Haste and Grace
As you swapped your  Discipline to our Helmet to gain more gem levels, you’re now linking
  Vaal Grace to a Arrogance Support. Disclaimer: you will need a fairly highly leveled (15+ at level 85) Arrogance Support to be able to make this swap. As your last big reservation aura, you need to socket
  Haste. It does not matter whatsoever where the 2-Link
  Vaal Grace goes or where the single socket
  Haste goes.
 Vaal Grace
- Arrogance Support
Optimizing Commander of Darkness
As you leveled up, you’re now no longer restricted to running a low level  Precision and have gained more Life from leveling to combine this with a Arrogance Support. You’re still keeping
  Clarity at Level 1 because it really doesn’t do much more than just giving extra attack speed from Commander of Darkness.
 Precision (Level 20)
 Clarity (Level 1)
- Arrogance Support
 Generosity Support
Proccing Elemental Equilibrium & Exposure
Since you want to proc the most optimal exposures and resistance reductions, this choice depends on whether you choose to run  Angeror
  Hatred here. Most likely, you should be picking
  Hatred here in which case it is vital that you allocate Avatar of Fire so you can convert
  Frost Bomb into purely Fire damage and expose bosses to Cold while making them vulnerable to Lightning and Cold damage.
  Frost Bomb can be socketed anywhere and requires no links.
Smite for an additional Lightning Damage Aura
This was mentioned before, but since it can’t be overstated:  Smite is huge and you should be trying to keep it up as much as possible. Since it scales off gem levels and doesn’t reserve any Mana, we opted to link it to
  Empower Support and (Awakened)
  Generosity Support.
 Smite
Smite Awakened Generosity Support
 Empower Support (Level 3 or 4)
Additional Utility Skills
No changes here. These remain exactly the same as they did in the early part of this variant.
Just as you did in the leveling section, there’s a couple of utility skills you really can’t go without. First of all there’s  Flame Dash which can be linked to
  Second Wind Support if you have a 2-Link available. Post Merciless Lab, when you should be picking up Mistress of Sacrifice, it’s also important that you’re running a
  Cast when Damage Taken Support link. We suggest the following:
 Cast when Damage Taken Support (Level 10)
 Bone Offering (Level 13) (through Essence Gluton this will grant you 8% Energy Shield regen whenever this procs)
 Immortal Call (Level 12)
Cluster Variant
Your Throughput Auras (in Prism Guardian)
No changes here whatsoever compared to the regular endgame Low-Life setup. Still putting the auras that give you most throughput here while linking them to an  Awakened Generosity Support.
4-Link in a Corrupted Helmet (in Alpha’s Howl)
Here’s your first change. Since we stack so much Aura effect anyway, the difference in gem levels on your Purities hardly matters anymore. Therefore, you’re opting to put other gems here to maximize the helmet’s corruption.
 Precision
 Generosity Support
 Anger
Anger Enlighten Support (Level 3)
4-Link for Arrogance Support Auras (in Sin Trek)
- Arrogance Support
 Purity of Fire
 Purity of Ice
 Enlighten Support (Level 3)
4-Link Vaal Auras and 2-Link Arrogance Support Aura (in Shavronne’s Wrappings)
Since we’re picking up a really significant amount of Skill Effect Duration in those Cluster Jewels, we now don’t really mind having multiple Vaal Auras, and as we have a  Soul Catcher and 20 seconds per Vaal Aura, they should permanently be up anyway. Them being socketed in the Body Armour here is merely convenience and most of the links can be swapped around, however I prefer just giving you a simple setup you can blindly copy.
 Vaal Grace
 Vaal Haste
 Vaal Discipline
 Enlighten Support (Level 3)
Next up, in your Body Armour, you’ll be linking another aura to Arrogance Support.
 Purity of Lightning
- Arrogance Support
3-Link Smite (in Ephemeral Edge)
 Smite, again, is a vital setup of your build. Linking it to
  Empower Support and
  Awakened Generosity Support for maximum effectiveness of the Lightning Damage aura is recommended.
 Smite
Smite Awakened Generosity Support
 Empower Support (Level 3 or 4)
Additional Utility Skills (in Rare Sorcerer Gloves)
Since we’re a little socket-starved here, we’re going to make a few minor adjustments. We are dropping  Second Wind Support and levels on
  Flame Dash because of its Mana cost. There are two separate 2-Link setups here.
 Cast when Damage Taken Support (Level 10)
 Bone Offering (Level 13) (through Essence Gluton this will grant you 8% Energy Shield regen whenever this procs)
 Flame Dash (Level 1 – 20 Quality)
 Frost Bomb


