
POEGuy's Explosive Arrow Ballista Hierophant Gear & flasks (PoE Curse of the Allflame)

Summary
The endgame setup should look something like this:
| Item Slot | Item Name | Rarity | Notes |
| Head | Rare Helmet (budget) or  Viridi's Veil (best) Viridi's Veil (best) |
Rare/Unique | Check the Gear Page for details |
| Amulet | Rare Amulet with +1 to Level of All Fire Skill Gems (budget) or  Replica Dragonfang's Flight with +3 to Level of All Explosive Arrow Gem (best) Replica Dragonfang's Flight with +3 to Level of All Explosive Arrow Gem (best) |
Rare/Unique | Check the Gear Page for details |
| Chest | Rare Body Armour (budget) or 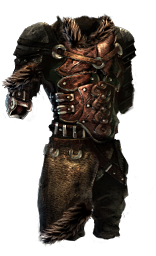 Daresso's Defiance (best) Daresso's Defiance (best) |
Rare/Unique | Check the Gear Page for details |
| Gloves | Rare Gloves (budget) or 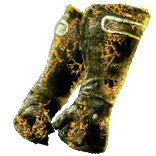 Breathstealer (best) Breathstealer (best) |
Rare/Unique | Check the Gear Page for details |
| Boots | Rare Boots (budget) or  Dawnstrider (best) Dawnstrider (best) |
Rare/Unique | Check the Gear Page for details |
| Belt | Rare Belt or  Replica Headhunter or Replica Headhunter or  Headhunter or Headhunter or  Mageblood Mageblood |
Rare/Unique | Check the Gear Page for details |
| Ring#1 | Magic Ring | Magic | Check the Gear Page for details |
| Ring#2 | Rare Ring | Rare | Check the Gear Page for details |
| Weapon | 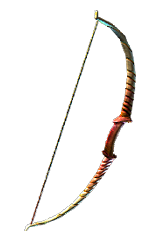 Quill Rain Quill Rain |
Unique | Try to get one with close to 100% projectile speed. If you buy a foulborn version, make sure it has the “100% attack speed”! |
| Quiver |  Skirmish Skirmish |
Unique |
Armour Pieces
Helmet
For the helmet, we use Viridi's Veil. This helmet grants us immunity to Critical Strikes and makes enemy hits against us unlucky. On top of that, it provides additional Elemental Resistances, Armour, and + levels to our Aura and Spectre gems.
To benefit from the Critical Strike Immunity, you must equip a magic ring in your left ring slot.
Until you get Viridi's Veil, you will use a random Rare Helmet with life/resistances.
Body Armour
For a low-budget option, go with a 6-link rare body armour with high armour, life, and resistances. If possible, use Ichors and Embers to roll modifiers that can benefit our build.
Later on, switch to the unique body armour Daresso's Defiance. It grants us permanent Onslaught with no downside, since the Hierophant maintains 4 permanent Endurance Charges at all times. It also increases the effect of Onslaught by 100%, giving us 40% increased attack speed and movement speed. On top of that, it provides high Armour and Evasion, as well as a decent amount of Life.
For maxing later, you can look for one with the following corruptions: +1 to the level of socketed gems, +2 to the level of all AoE gems, +2 to the level of all Projectile gems, or +2 to the level of all Duration gems.
Gloves
For a low-budget option, go with Rare Gloves. Look for life/resistances/attack speed. If possible, use Ichors and Embers to roll modifiers that can benefit our build.
Later on, switch to Breathstealer. These special gloves can have an additional anoint. Anoint “Lava Lash” (Clear, Clear, Golden). They also provide additional elemental resistances, attack speed, high Armour and Evasion, as well as multiple mini buffs. You can think of these gloves as a “pocket Headhunter” that grants random buffs whenever you kill rare monsters.
Boots
For the boots, we use Dawnstrider. These boots will save us a bunch of Passive Skill Tree points. We use it mostly because of the “Ancestral Bond” Keystone. They also redirect up to 5% of damage from hits to a nearby totem. Combined with our Totem Mastery, which redirects an additional 5%, we gain a solid 10% extra damage mitigation. They also provide 30% increased Movement Speed and a good amount of Life.
If you want to fully min-max the build later on, look for a useful corruption.
Weapon
With the bow, we use Quill Rain. This cheap bow grants us 100% attack speed, which is crucial for the build. In addition, we can get up to 100% increased damage for free by allocating a specific Bow Mastery “Increases and Reductions to Projectile Speed also applies to Damage with Bows”. Check the image below:
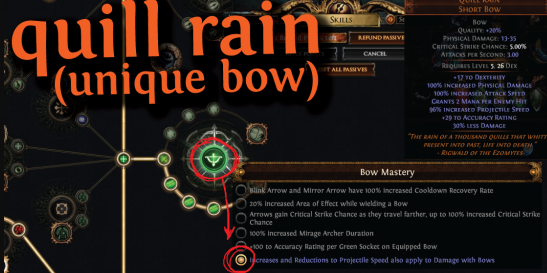
- If you buy a foulborn version, make sure to have the “100% attack speed” on it!
Quiver
For the quiver, we use Skirmish. This quiver grants us +1 additional totem! Since it’s very cheap and not highly sought after, it’s easy to find versions with strong single or double corruptions. The best in slot corruptions would be Spell Suppression, Bow Attacks Fire an Additional Arrow, or Point Blank (which saves you one passive point).
Jewellery
Amulet
For the amulet, we use a Rare Amulet with Life/Resistances/+1 to Level of All Fire Skill Gems. Later, you can go for a +2 Amulet or a Replica Dragonfang's Flight with +3 to the Level of All Explosive Arrow Gems. Make sure to buy one with good rolls, use a  Blessed Orb on the implicit, and anoint it.
Anoint Divine Judgement (Sepia, Teal, Black)
Ring#1
For the first rings, we use a Magic Ring with Life and Flat Accuracy. Its important to use this ring in your left ring slot as it will trigger the critical stike immunity granted by Viridi's Veil. The ring must be magic!
If you can’t find a ring like this on the market, you’ll need to craft it yourself. The craft is very simple! Buy a good ring base depending on your needs (an Amethyst Ring is usually a great choice), then use  Orb of Alteration until you roll either a Life or an Accuracy modifier. Once you hit one of them, use the Crafting Bench to add the other. Don’t forget that you can also use
  Orb of Annulment if needed.
You can use 20x “Abrasive Catalyst” to boost the accuracy further if needed.
Ring#2
For the second ring, we use a Rare Ring with Life/Resistances/%Increased Elemental Damage with Attack Skills/%Increased Fire Damage. Play with the rolls and modifiers to best suit your budget.
You can use 20x “Catalysts” to boost them further depending on what you need.
Belt
For the belt, we use a Rare Belt Life/Resistances/%Increased Elemental Damage with Attack Skills.
To fully min-max the build, you can upgrade it with either a Headhunter or a Mageblood, depending on your personal preference.
If you still want to have fun on a budget, feel free to use a Replica Headhunter instead.
Jewels
For the jewels, to avoid mistakes, it’s essential to place them exactly where the Skill Tree in Path of Building (PoB) indicates:
 PoB, Passive Skill Tree & Gem Links
The build uses the following Jewels:
At league start, since you won’t be using any unique jewels early on, use rare jewels with % increased Maximum Life along with other useful modifiers such as resistances, increased Totem Damage, increased Elemental Damage, or increased Fire Damage.
However, make sure you do not have any source of “# to # Added Fire Damage to Attacks” (flat added Fire Damage) on your items, as this will prevent your Elemental Equilibrium Keystone from working correctly.
 The Light of Meaning with 6% Increased Fire Damage
 Lethal Pride Timeless Jewel with “10% chance to Intimidate Enemies for 4 seconds on hit” // [Optional] can add other useful nodes like % totem damage, %elemental damage, %chance to deal double damage, etc.
Know that I made a mini-guide for new players on how to buy one. You can find it here: HERE Watcher's Eye look for: “+#% to Chaos Resistance while affected by Purity of Elements”, [Optional] can also add 7% or 8% “chance to Evade Attack Hits while affected by Grace”
- [Optional; In case you struggle with the EE Keystone] A rare Abyss Jewel with flat Cold Damage to Attacks, or/and flat Lightning Damage to Attacks, and some Life. We need it to trigger the Elemental Equilibrium Keystone.
Again, make sure you do not have any source of “# to # Added Fire Damage to Attacks” (flat added Fire Damage) anywhere on your items, as this will prevent your Elemental Equilibrium Keystone from working correctly.
Tattoos & Runegrafts
The Tattoos are very flexible. Use as many as you can based on your current attributes. If you need to remove a Tattoo, simply use an Orb of Scouring.
Here are some recommendations:
- Tattoo of the Ngamahu Warrior (5% increased Fire Damage).
- 1x Tattoo of the Tasalio Warrior ( 5% chance to Blind Enemies on Hit with Attacks )
- *You do not need more than one. Because our totems attack incredibly fast, 5% is more than enough to trigger the Blind debuff.
- Tattoo of the Ramako Sniper ( 5% Increased Projectile Speed; I remind you that we have a mastery that converts projectile speed into increased damage! )
- Tattoo of the Hinekora Storyteller ( +3% to Chaos Resistance; helps with Chaos Resistance )
- Tattoo of the Ramako Archer (5% increased Global Accuracy Rating)
Runegraft of Gemcraft
(+1 to Level of all Non-Exceptional Support Gems)
Flasks
| Slot | Flask | Notes |
| 1 |  Divine Life Flask Divine Life Flask |
Get one with the “Grants Immunity to Corrupted Blood” modifier |
| 2 |  Granite Flask Granite Flask |
Boosts our Physical Damage Reduction |
| 3 |  Jade Flask Jade Flask |
Boosts our Chance to Evade Attacks |
| 4 |  Quicksilver Flask Quicksilver Flask |
Improves Movement Speed |
| 5 |  Amethyst Flask Amethyst Flask |
Increases Chaos Resistance / If you have at least 50% Chaos Resistance, then you can drop this flask and go instead for a  Sulphur Flask Sulphur Flask |
Suffixes and Prefixes on the flasks are very flexible. You can roll the flasks yourself using Orb of Alterations.
For the Suffixes look for: “% Increased Armour During Effect, % Increased Evasion Rating During Effect, % Increased Movement Speed During Effect”, “Reduced Effect of Curses on you”.
For the Prefixes look for: “% Increased Duration”, “% Increased Charge Recovery”, “% Increased Maximum Charges”.
Apply quality to your flasks! All flasks should have 20% quality. You apply quality using  Glassblower's Bauble.
Automate your flasks! All the Magic Utility Flasks should have the Enchant: “Used When Charges Reach Full”.
You can get this enchant either by applying  Instilling Orb or by using your Crafting Bench.