Pohx's Righteous Fire Chieftain Build Guide (Poe Secret of the Atlas 3.26)
This guide will not be updated anymore due to the writer moving away from PoE Vault. We are leaving it up as a reference in case it might be revived in a later patch.
Introduction
This version focuses on being a very tanky mapper while maintaining the best clear speed compared to the other variants. The explodes that will occur from the Chieftain Ascendancy does enough damage to even wipe out tanky Rares & Map Bosses. It doesn’t come without a downside though, this version will have the worst recovery until you start to acquire Maximum Fire Resistance. On the flip side all you have to do is stack Fire Resistance & the Ascendancy will cover your Cold & Lightning Resistance.
 Righteous Fire has been in Path of Exile since Closed Beta. It has had many variations ranging from Juggernaut, Occultist, low life Guardians, Hybrid Inquisitors & now I bring you the Chieftain.
You can expect to charge through your enemies & burn them to death while maintaining the absolutely fantastic defences a Chieftain brings you. For tougher targets, we’ll be cursing with our  Punishment & Throwing
  Fire Trap. Don’t forget for full single target, we want to stand still to gain the full effect of Ramako Sun’s Light.
The FAQ section can be found on my RF Wiki
Build Overview
In this section, We’ll be outlining the pros, cons, and general playstyle for the Righteous Fire Chieftain. This will allow you to determine if this is the right build for you!
PROS
+ League Starter – You may not be able to level right away with this skill but have no fear you can get started right in Act 2 around level 17 to 20.
You also don’t need levelling gear.
+ Easy Playstyle – Righteous Fire only needs to be activated once per instance. After that, I’m mainly pressing 3 buttons.  Shield Charge,
  Frostblink and
  Punishment & throw
  Fire Trap at tough targets.
+ Extremely Tanky – 90% Maximum Elemental Resistance, 1.5k+ Life Regeneration. Easy access to Chaos Resistance and 5+ Endurance Charges.
+ SSF Friendly – This build doesn’t need any uniques to progress the atlas. The boss damage might lack a bit but you can totally farm more gear to overcome the endgame.
CONS
– Damage – The build doesn’t get the best single target. Don’t let that put you off from playing it though. You can still Fly through maps but I’d say going past 2-4 Million damage (Guardian/Shaper DPS) Is when it can get pricey.
– Map Mods & Melee – You’ll want to avoid certain map mods like “No Regeneration, – Maximum Resistance & Less Recovery” Being Melee can be tricky for newer users. When you’re not very well geared, you will have to pay a bit more attention to some rare monsters.
– Bossing – Of the 3 Variants this version has the worst time bossing on a budget mainly because we get our Damage from standing still and it can be difficult to tank bosses on a budget. (You can absolutely acquire your void stones on Life & Resistance gear)
Playstyle
Activate Righteous Fire (Every time you go into a new zone) Shield charge or walk it’s your preference really. Occasionally use your  Flammability on blue & rare packs of monsters. Later on we replace this with
  Punishment. When encountering tougher enemies you’ll be chucking
  Fire Trap while dancing around them or just straight sitting on their faces if you’re tanky enough.
For bossing on say Guardians I usually try to stand right next to them and  Frostblink through them to chill and dodge the heavy hits. You can alternatively keep them on the edge of your ring from
  Righteous Fire and throw
  Fire Trap from a safer distance.
Damage Scaling & Defensive Layers
Our Primary damage scaling is going to be broken down into 4 parts where you can typically find these stats. There are more than I can list but these are the most common stats.
Note:  Righteous Fire scales off maximum Health so it’s important to keep up with the health rolls on items. (You can often ignore the life mod on a chest if you take the 15% Max life mastery) Note: that life does not scale your
  Fire Trap so you don’t want to neglect your other damage modifiers.
High Sources of % Increased Damage.
- % Fire Damage (Sceptre, shield, passive tree, jewels)
- % Burning Damage (Jewel, Passive Tree)
- % Elemental Damage (Passive Tree)
- % Minion Damage (Passive Tree & Weapon) (because of Spiritual Aid)
Large amounts of Damage over time Multiplier
- % Fire Damage over time Multiplier (Passive Tree, Sceptre, Jewel)
- % Damage over time Multiplier (Passive Tree, Sceptre, Jewel)
+ To level of Gems
- +1 to Level of all spell skills (Sceptre and Amulet)
- +1 to Level of all fire spell skills (Sceptre, Shield and Amulet)
(Only Scales Fire Trap. So DOT Multi is preferred, this is a bonus stat)
PoB and Passive Skill Tree
The PoB community fork created by Localidentity is the only version being kept up to date, so make sure you have the correct version: PoB Community Fork.
This Comprehensive PoB will carry you through each stage of leveling, from both a League Start perspective & SSF environment.
Gearing
Note: Each piece ideally will want to be on the highest armour base you can get along with a high Life Roll.
| Item Slot | Item Name | Rarity |
| Head | Here we’ll be looking for an Armour Elder Helmet with Gems that are supported by level 16/18/20 Burning Damage & Level 16/18/20 Concentrated Effect. For this, we use Harvest Reforge Life. The level doesn’t matter in particular as long as you can get these modifiers. Beyond this, getting the + level to AoE gems craft will be huge for your  Fire Trap. In the very late game, we look for similar mods on an Archdemon Crown for the bonus +2 Gems Fire Trap. In the very late game, we look for similar mods on an Archdemon Crown for the bonus +2 Gems |
Rare |
| Amulet | A life amulet with a Damage Over Time Multiplier and resistances will do plenty when starting out. Getting +1 to level of all fire/spell gems is also great here if you’re using a rare. The base will be either  Turquoise Amulet, Turquoise Amulet,  Jade Amulet or Jade Amulet or  Marble Amulet depending on whether you need the extra attributes or not (Note you might want to use a Marble Amulet depending on whether you need the extra attributes or not (Note you might want to use a  Lapis Amulet in the early game just for the extra int till you get to that part of the tree). Lapis Amulet in the early game just for the extra int till you get to that part of the tree). |
Rare |
| Chest |  Cloak of Flame is going to be our primary way of mitigating Physical Damage. Other alternatives are going with a Pure armour body. Cloak of Flame is going to be our primary way of mitigating Physical Damage. Other alternatives are going with a Pure armour body.  Lightning Coil can work but is much harder to fit in the build due to the resistance penalty (Don’t forget to use the 15% Maximum Life if no life modifiers are on body armor). Lightning Coil can work but is much harder to fit in the build due to the resistance penalty (Don’t forget to use the 15% Maximum Life if no life modifiers are on body armor). |
Unique |
| Gloves | Again we want Pure Armour. This is one of THE Most important places to get a High % Life Regen roll. It can roll all the way up to 21%. Since gloves are our least likely gear to replace, I’d recommend spending some currency on them. This is also a great place to get Dex & Chaos resistance. For the Exarch Influence (Use the embers) to acquire Ignite Proliferation, as that will massively enhance your clear. | Rare |
| Boots | 30% Movement Speed Boots with % Increased Life Regeneration Rate and high Life. This is also a great place for Chaos Resistance. Much later into the game, I prefer to use  Annihilation's Approach, although this is usually gated behind 90% Maximum Resistance & Rational Doctrine Annihilation's Approach, although this is usually gated behind 90% Maximum Resistance & Rational Doctrine |
Unique |
| Belt | The highest source of FLAT Life regen, which pairs extremely well with our Gloves. You’re looking for Life/Life regen & potentially res/chaos resistance. For uniques  Immortal Flesh is honestly going to beat most rares due to the Armour bonus & MASSIVE Life regen. For the super late game, we can go with an elder crafted Immortal Flesh is honestly going to beat most rares due to the Armour bonus & MASSIVE Life regen. For the super late game, we can go with an elder crafted  Stygian Vise. Stygian Vise. |
Unique |
| Rings | An easy source of Life & Resists, we can craft minimum frenzy charges for some free damage too. This is usually where I get most of my chaos resistance. Harvest Reforge chaos = Guaranteed chaos roll.  Essence of Delirium a high end crafting option for players aiming for more damage. Essence of Delirium a high end crafting option for players aiming for more damage. |
Rare |
| Weapon | Here we want High sources of Fire Damage Over Time Multiplier & Increase Fire Damage. For a more expensive weapon, we can look for + Fire Gems with Multi or High Increase and craft the missing stat. The 2 best modifiers to bench craft are Fire Multi & Fire damage & Ignite chance. | Rare |
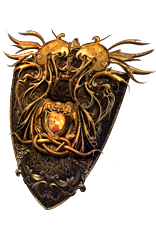
| Shield |  Rise of the Phoenix & Rise of the Phoenix &  Dawnbreaker are fantastic (I prefer Dawnbreaker are fantastic (I prefer  Dawnbreaker since max res is easy to get) but we’ll be switching to an armor based Shaper Shield with % Recover life on block. This should be an excellent form of recovery when you get surrounded. Dawnbreaker since max res is easy to get) but we’ll be switching to an armor based Shaper Shield with % Recover life on block. This should be an excellent form of recovery when you get surrounded. |
Unique |
Ascendancy, Bandit & Pantheon Powers
You can read about the Ascendancy, Bandit choice, and Pantheon Power recommendations for this build on our dedicated page.
Levelling
If this is your first character, you need to get some gems from the Witch before we start playing the Marauder. Level a Witch to level 4 to get these gems. Note: you need to complete the “Breaking some eggs” and the “Medicine Chest” quest.
The following gems you can purchase on your Witch Mule:
 Rolling Magma
 Elemental Proliferation Support
 Frostblink
 Flame Wall
 Summon Phantasm Support
 Holy Flame Totem
Levelling trees & Gem setups can be found in the Path Of Building link.
Early on we’ll be using  Rolling Magma linked with
  Elemental Proliferation Support and later on also supported by
  Combustion Support Once we get
  Flame Wall we’ll be shooting into the flame wall for bonus damage.
We’ll also be using  Holy Flame Totem linked with
  Added Fire Damage Support &
  Summon Phantasm Support
Picking up Reservation Skills like  Determination ,
  Vitality ,
 Purity of Elements when they’re available to us will go a long way.
For mobility, we’ll be using  Frostblink all the way from Act 1 to the endgame.
In act 3 I like to pick up  Flammability and link it to
  Lifetap Support (later on we’ll be switching to
  Punishment)
You also have the option for switching to  Armageddon Brand after completing the Library quest, this will be less single target but faster clear and no more reason for
  Flame Wall
I have created a full leveling guide for you, so if you get stuck or are not sure what to do, please watch the video below.
Switching to Righteous Fire
This can be done at a minimum of level 17 after reaching our first Fire Mastery. To help reach the fire resistance cap we can use 2 ruby rings & craft fire resistance on our gear from our bench at our hideout. To help acquire ruby rings we can vendor an iron ring + red gem to make a ruby ring.
The setup here depends on how many sockets we actually have access to, but they will be listed in order of priority so if you only have a 4-link or 5-link don’t worry.
 Righteous Fire
 Elemental Focus Support
 Burning Damage Support
 Efficacy Support if you want more aoe use
  Increased Area of Effect Support
 Lifetap Support
 Swift Affliction Support
4-Link Fire Trap ( Requires Act 3 Library quest Completion)
This setup can be used all the way to the very endgame.
 Fire Trap
 Swift Affliction Support If you can’t find 3 greens use
  Controlled Destruction Support
 Lifetap Support
 Trap and Mine Damage Support
Questions?
If you have any questions about my build, please join the ARPG Vault Discord where a team of moderators will answer you.
Closing Notes
If you’ve gotten this far with the guide, I’d like to sincerely thank you & hope you decided to play the RF Chieftain, you can check out my Twitch Stream, where I am live almost daily. For other daily content including build updates, be sure to check out my Youtube Channel


