Tbxie's Storm Brand Hierophant Gear, Jewels & Flasks (PoE Necropolis)
Summary – TL;DR
As per usual, nothing matters more than capping your Elemental Resistance before anything else. This means modifiers on gear are subordinate to Resistances as long as you’re not capped. Since you’ll be running a decent amount of Unique items, it’ll be important to look out for a lot of resistances on your Rare pieces!
We’re providing you with an extensive analysis further down the page but chose to start off with an overview / recommendation.
Our recommendation:
| Item Slot | Item Name |
| Head | Corrupted +1 Power Charge 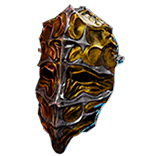 Willclash Willclash |
| Amulet |  Badge of the Brotherhood Badge of the Brotherhood |
| Chest | 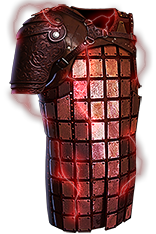 Inpulsa's Broken Heart Inpulsa's Broken Heart |
| Gloves | Rare Gloves with Resistances, Life & Necessary Attributes |
| Boots | 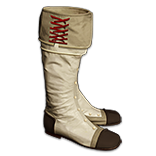 Replica Inya's Epiphany Replica Inya's Epiphany |
| Belt |  Darkness Enthroned with Life, Damage, Resists & Attribute Jewels as necessary Darkness Enthroned with Life, Damage, Resists & Attribute Jewels as necessary |
| Rings |  Call of the Brotherhood Call of the Brotherhood |
| Weapon |  Tulfall Tulfall |
| Shield | 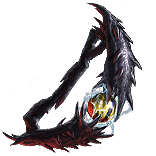 Malachai's Loop Malachai's Loop |
For crafting Rare items, you can check out all the affixes that can roll on an item base, depending on its level, influence, and many other factors, using our affix tool.
Disclaimer
I usually don’t have build guides that rely on very specific & gimmicky things in gearing making most of my guides very accessible for veteran and new players alike. However, this guide does do some fun things with Gear to make combinations which are otherwise useless to most builds. We therefore expect you to have the cornerstone pieces of this build before playing it.
Armour Pieces
Helmet
This is a very straight forward item as we’re using a corrupted unique  Willclash as one of the sources of maximum power charges the build requires. This can either be purchased, or self-corrupted. The average amount of corrupts necessary to hit this helmet is 40 however, as averages are only averages, this could vary very hard. I personally purchased a ton of well-rolled Willclashes and corrupted them myself until I hit it. If you’re opting into a non-grand spectrum version, to start this from virtually nothing, you don’t need this maximum power charge.
Body Armour
There’s a few solid options here, but  Inpulsa's Broken Heart is the one that offers most clear here. If you want, you can opt into a conversion chest such as Cloak of Flame or Lightning Coil or even go for
 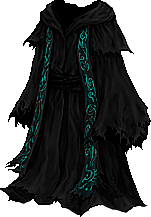 Cloak of Defiance. I personally felt plenty tanky without those and opted for the explosions of Inpulsa’s.
Gloves
The rare items this build uses are used to fix resistances & attributes. It is therefore incredibly hard to tell you exactly what you should do on specific items. You’re going to have to check what you need outof specific slots & work from there. I personally started with a pair of Gloves with a fractured Tier 1 resistance. No matter what, you’re going to be using Chaos Resistance Essences (envy) on them because you’ll need to make sure your Chaos Res is at least 0%, because you’re quite fragile to DoT’s. You’ll keep hitting the essences until you hit another good suffix (Tier 1 Strength, Dexterity or another resist) and you’ll finish off by crafting Life. Obviously, you could keep spamming until you hit a good life roll with that suffix and craft something like Damage while Leeching, but that’s a bit more advanced gearing tech.

Boots
Rarely I see myself mentioning a Unique item in the boot slot. In this case however, while stacking so many Power Charges,  Replica Inya's Epiphany is just too good to pass up on. This pair of boots is super cheap, so you can probably easily pick one up with an enchant, while still grabbing max rolls on the other affixes. It gives you 50% movement speed, 50% increased damage, 5% Life Regen per second and a good amount of Life. Pretty solid piece of equipment!
Belt
Depending on the current state of the game,  Darkness Enthroned can be a really good item. For me, it allowed me to grab Life & Resistances on jewels, mimicking a really solid belt, while still getting a single damage modifier. You could however easily aim for 4 stat jewels, if you’re looking to spend a bit more, which pushed DE even further ahead of a rare belt. If need be, a normal, rare belt, with some attributes & life can also work.
Accessories
Amulet & Rings
Your amulet slot is going to be locked in by  Badge of the Brotherhood. This gives you 10 Frenzy Charges, which is absolutely bonkers. As for your rings, the build wants to convert its damage to Cold, so
  Call of the Brotherhood rings are mandatory. Don’t forget to Catalyse them in order to achieve 96% conversion!
Anoint
As you have 9 Minimum Power Charges, you need to anoint Infused to get your 10th Maximum Power Charge. As mentioned before, the 11th Power Charge is too expensive to find.
Weapon
Easy pickings here. You’re using a  Tulfall from start to finish. It just adds an absolutely ridiculous amount of Flat Cold damage and no longer has a downside because of our Minimum & Maximum Power charges juggle.
Shield
Another easy slot.  Malachai's Loop was tailor-made for a build like this. Make sure your Minimum & Maximum Charges are equal. If you somehow end up in a non-equal situation, make sure you pick up the Charges Mastery that makes you immune to shock.
Flasks
I believe flasks are highly preference-based. One isn’t just outright better than another one for specific / certain builds. Obviously, sometimes, there’s a set in stone set of Flasks you should be using just because they synergize with your build so well. I wouldn’t say those really exist in this setup, but I’d strongly advise you to stick with the setup listed here.
When playing this build, I was considering a ton of unique Flasks to either boost damage or defenses. However, it ended up feeling very unnecessary. I want to, however, give a shoutout uto the absolutely best flask in the game (and also very expensive flask) which is Progenesis, the Flask from Uber Maven. If you can fit this in, it’ll increase the survivability by a lot, as far as I could tell. I however do not think it is necessary.
I went for a  Granite Flask to boost my Determination a bit. Obvioulsy, don’t sleep on Flask modifiers (suffixes) as they are super strong in builds which can keep Flasks up indefinitely, such as fast mappers like this one. Next up, I went with a
  Diamond Flask and
  Sulphur Flask for damage. These push up your damage numbers which implies you’ll be able to clear screens more easily. Lastly, most importantly, speed. Getting a good
  Quicksilver Flask and
  Silver Flask is really important! Those round out your entire Flask-belt in the way I recommend setting it up.
Regardless of which utility Flasks you go for and whether you follow our recommendations or not, you’ll need to stick to the suffixes we have picked for you (Staunching, Warding). The affixes on your non-unique Flasks can be changed around, but I recommend the following setup (based on the Flask duration, charges, and affix priorities):
Our recommendation:
| Slot | Flask |
| 1 | Flagellant’s  Granite Flask of the Armadillo Granite Flask of the Armadillo |
| 2 | Flagellant’s  Diamond Flask of Incision Diamond Flask of Incision |
| 3 | Flagellant’s  Quicksilver Flask of the Cheetah Quicksilver Flask of the Cheetah |
| 4 | Flagellant’s  Sulphur Flask of the Iguana Sulphur Flask of the Iguana |
| 5 | Flagellant’s  Silver Flask of the Owl Silver Flask of the Owl |
Be sure to check out our Flask Crafting Guide to learn everything you need to know about how to set up your non-Unique flasks.
Remarks: This setup does not run a Life Flask, nor a Bleed Immunity. If you feel the need to run a Life Flask, which is a bit awkward due to Petrified Blood, you can skip the Sulphur Flask.
Jewels
Jewels are basically what make this build. Without them, the end-game version of this build wouldn’t exist. I’ll start by mentioning the standard jewels.
Grand Spectrums
Let’s perhaps first explain a bit more thoroughly how these work as they’re usually confusing for newer players. Grand Spectrums add a certain effect per total Grand Spectrum equipped. This means that a GS which gives you ONE Minimum Power Charge per Grand Spectrum will give you THREE Power Charges if you run three Grand Spectrums. It doesn’t matter which Grand Spectrums you’re equipping, as long as you have three in total, that one GS with Minimum Power charge per Grand Spectrum will give you three.
This means that theoretically, either at start or at absolute bonkers gear, one of these should suffice. Let’s do some math together. Our maximum power charges are 10. They are obtained from the following sources: 3 from the base game (this is the standard), 1 from a corruption on your Helmet (4), 2 from your Shield (6), one from Hierophant’s Ascendancy (7) and three from the 3 maximum charges in the tree. Now, in order for the build to function properly, we need 9 minimum charges. We’re getting 4 of those from Hierophant, one from the tree (Disciple of the Forbidden) always. So we need to find another 4. One Grand Spectrums fixes that in combination with a Militant Faith, more thereover here underneath.
Militant Faith
The next piece of the puzzle. You need to buy a Militant Faith and you don’t care about the type of Faithful as you’re not allocating any of their keystones. The only thing we require it to do is offering you a minimum power charge on a notable which doesn’t brick your build. The most optimal is Deep Thoughts (in my current PoB, I have it on Presage, you can drop those 3 nodes, if you swap your Enlighten around and unlink it from Vitality & onto Zealotry). You can look at Timeless Jewels and their outcomes in Path of Building to check which seeds are available on the market.
Ideally, if you have a choice of seeds, you buy a Dominus one with 2 of the following modifiers:
- Increased Area Damage per 10 Devotion
- Increased Elemental Damage per 10 Devotion
- Increased Effect of non-curse Auras per 10 Devotion
Watcher’s Eye
Another fairly potent upgrade is a Watcher’s Eye that grants flat critical strike chance while affected by Hatred. Usually, these are fairl expensive. You can opt into a Cast Speed while affected by Zealotry too. It’s less damage, but generally beats a rare jewel.
Cluster Jewels
Again, I have to emphasize that picking up additional benefits to your Cluster Jewels is very important to achieve Resistance & Attribute requirements. You’ll be running 1  Large Cluster Jewels and 2
  Medium Cluster Jewels.
Large Cluster Jewels
Your Large Cluster Jewels needs Blast Freeze only obtainable on Cold or Elemental Clusters. Additionally, I recommend going for a Widespread Destruction for maximum Area of Effect and a Prismatic Heart.Try and find copies that also give you some Resists or Attributes like shown underneath.

Medium Cluster Jewels
These are mainly focused on scaling Area of Effect. AoE is an important modifier because it helps Herald of Ice clear but also helps your Winter Orb projectiles overlap for maximum damage. You want a Magnifier & Vast Power notable on both of your Mediums. Again, try to find some with extra beneficiaries such as Attributes & Resistances.


