Boss Impaler - Spectral Throw Champion Gear, Jewels & Flasks
Summary – TL;DR
As per usual, nothing matters more than capping your Elemental Resistance before anything else. This means modifiers on gear are subordinate to Resistances as long as you’re not capped. Since you’ll be running a decent amount of Unique items, it’ll be important to look out for a lot of resistances on your Rare pieces!
We’re providing you with an extensive analysis further down the page but chose to start off with an overview / recommendation.
Our recommendation:
| Item Slot | Item Name |
| Head | Spectral Throw Deceleration Helmet with Life / Enemies take 9% Increased Phys Damage / Resistances |
| Amulet |  Turquoise Amulet with Crit Multi, Physical Damage to Attacks, Life and -9 Mana Cost Turquoise Amulet with Crit Multi, Physical Damage to Attacks, Life and -9 Mana Cost |
| Chest |  Astral Plate with -15 Mana Cost, Attack Crit, Life and Resistances Astral Plate with -15 Mana Cost, Attack Crit, Life and Resistances |
| Gloves |  Gripped Gloves with Dexterity, Life and Resistances Gripped Gloves with Dexterity, Life and Resistances |
| Boots | Two-Toned Boots with Tailwind, Resistances, Movement Speed and Life |
| Belt |  Ryslatha's Coil Ryslatha's Coil |
| Rings | Rare Rings with Physical Damage, Vulnerability on hit, Resistances, Life, Intelligence and -Mana Cost |
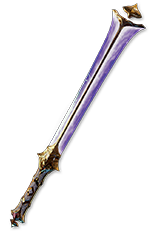
| Weapon1 | High pDPS – Attack Speed – Crit Chance Sword |
| Weapon2 |  The Saviour The Saviour |
For crafting Rare items, you can check out all the affixes that can roll on an item base, depending on its level, influence, and many other factors, using our affix tool.
Armour Pieces
Helmet
You’re going to be looking for a Helmet that has the “30% reduced Spectral Throw Projectile Deceleration” enchant. This will make your  Spectral Throw hit multiple times on the return point which means that if you position correctly, for it to hit your target at the very end of its range, it’ll hit a lot more before finally coming back to you. Additionally, you’re looking for a warlord modifier “Nearby Enemies take #% increased Physical Damage” combined with as much Life and Resistances you can find.
So, the affixes you want are:
- 30% reduced Spectral Throw Projectile Deceleration
- Nearby Enemies take #% increased Physical Damage
- +# to maximum Life (at least 80)
- Elemental Resistances (at least 40)

Body Armour
You need a Body Armour that has both Elder modifiers “Socketed Attacks have -15 to Total Mana Cost” and “Attacks have #% to Critical Strike Chance” with as much Life and Resistances as you find. While this can be annoying to craft, it certainly is advisable to use Fossils to acquire this Body Armour. Try to get an Elder Astral Plate as base to craft on, as you really like those 12% All Elemental Resistances it offers.
- Socketed Attacks have -# to Total Mana Cost
- Attacks have #% to Critical Strike Chance
- +# to maximum Life (at least 70)
- +#% to Elemental Resistances

Boots
Tailwind is an attack speed multiplier which we really like and enjoy. Therefore, a piece of Tailwind boots is very recommended. Since the build struggles getting Life and Resistances, you’re going to need a pair with a decent amounts of those.
- You have Tailwind if you have dealt a Critical Strike Recently
- +# to maximum Life (at least 80)
- #% increased Movement Speed (at least 20)
- Elemental Resistances (until cap)

Belt
Other than  Headhunter a
  Ryslatha's Coil is the best in slot here. Getting about 17% damage out of a belt slot is really strong! Since Ryslatha’s is generally relatively cheap, try to get as good of a roll as you can possibly get!
Accessories
Amulet
The most potent modifiers you can find on an amulet are Tier 1 Physical Damage to attacks and Critical Strike Multiplier. Because you need to reduce your Spectral Throw’s Mana cost to zero, you’re going to need to find one with an open prefix so you can craft the -9 Mana Cost. Lastly, you want to find Life wherever you can so this is not an exception.
- Non-Channelling Skills have -# to Total Mana Cost (9)
- Adds # to # Physical Damage to Attacks (ideally 23)
- +#% to Global Critical Strike Multiplier (at least 35)
- +# to maximum Life (at least 80)

Anoint
Blade Master is absolutely the best notable damage-wise and since there is very little utility to anoint elsewhere, I think this should be your pick. The other option would be Discipline and Training, which would net you just shy of 300 Life. It is pretty much just preference at the end of the day. Blade Master is a lot of damage while Discipline and Training is a pretty decent chunk of Health.
Rings
You will need a lot of things on rings which means they will most likely get a little bit pricey. You want as much Physical Damage on both of your rings, which are ideally  Steel Rings as possible while getting a single high Intelligence roll, a “Curses Enemies with Vulnerability on Hit” modifier and as much Life and Resistances as you can find. On top of that, at least one of them needs to have an open prefix so you can craft -9 Mana cost of skills on it and needs to be Catalyzed (with Fertile Catalysts) to push that to 10. The priority is as follows:
- +# to Intelligence (as much as needed)
- Curses Enemies with Vulnerability on Hit
- +# to Elemental Resistance (until cap)
- +# to maximum Life (at least 50)
- Adds # to # Physical Damage to Attacks


Weapons
You’re just looking to find the highest pDPS Foil you can find while maintaining 6.8% Critical Strike Chance and 2 Attacks per Second. For that to be a thing, you need around 27% Increased Attack Speed, Critical Strike Chance, and a decent amount of Physical Damage rolls.
- #% Increased Attack Speed (at least 25)
- #% Increased Critical Strike Chance (at least 22)
- Combinations of #% Increased Physical Damage & Adds # to # Physical Damage to push the foil as high up as possible

For your second weapon,  The Saviour is the uncontestable BiS! This item adds up to 100% more Damage to your already significant DPS through its clones.
Flasks
I believe flasks are highly preference-based. One isn’t just outright better than another one for specific / certain builds. Obviously, sometimes, there’s a set in stone set of Flasks you should be using just because they synergize with your build so well. I wouldn’t say those really exist in this setup, but I’d strongly advise you to stick with the setup listed here.
In this particular case, I’d argue a  Dying Sun is fairly mandatory. It amplifies you clear speed by a bunch and it makes it so much easier to not feel clunky on single target! Definitely a must have Flask in this setup! Plus, nowadays, Dying Sun is incredibly cheap so it’s got that going for it.
Again, as mentioned at the start of the guide, we’re not holding back on investment to make Spectral Throw as strong as it can be. Obviously, the strongest two Flasks in the game cannot be missing here.  Bottled Faith gives you 34% More Damage which is uncontestable as a DPS flask and
  Cinderswallow Urn is just there to be a super useful Silver Flask. The extra sustain & critical strike chance are pretty big for this build!
As your first non-unique flask a  Diamond Flask is mandatory. Diamond Flasks are generally too overpowered for critical strike builds and offer no less than 15% more damage on this build. The last Flask is a bit of preference again but since we aren’t the most tanky build and there’s no source of instantaneous recovery, I think a
  Divine Life Flask with a Seething or Bubbling Prefix could suit you well for those panic-button-moments.
In order to run this Flask setup successfully, you need to get a jewel with “Corrupted Blood cannot be inflicted on you” because otherwise you need a Staunching Flask to remove bleeds. As long as you don’t have one of those, you can run a  Silver Flask of Staunching instead.
Regardless of which utility Flasks you go for and whether you follow our recommendations or not, you’ll need to stick to the suffixes we have picked for you (Warding, Heat). The affixes on your non-unique Flasks can be changed around, but I recommend the following setup (based on the Flask duration, charges, and affix priorities):
Our recommendation:
| Slot | Flask |
| 1 | Bubbling  Divine Life Flask of Heat Divine Life Flask of Heat |
| 2 | Chemist’s  Diamond Flask of Warding Diamond Flask of Warding |
| 3 |  Bottled Faith Bottled Faith |
| 4 |  Dying Sun Dying Sun |
| 5 |  Cinderswallow Urn Cinderswallow Urn |
Be sure to check out our Flask Crafting Guide to learn everything you need to know about how to set up your non-Unique flasks.
Jewels
Cluster Jewels
After the removal of Deep Cuts, Cluster Jewels are in a more balanced state (and cheaper state) for Impale-focused builds. Therefore, you’re only running a single Cluster Jewel setup in this build, which nets you approximately 40% of your DPS. Pretty worthwhile I’d say.
If you are looking for the most optimal way to acquire your Cluster Jewels, or have any other questions whatsoever about them, such as how to craft or price them, we refer you to our complete guide on Cluster Jewels.
Since this build really likes skill points, and has plenty of other expensive items, I’d advise you find a  Large Cluster Jewel with 3 Notables. The best ones to use are Drive The Destruction, Run Through and Smite the Weak. These are very interchangeable though. Feel free to check their respective damage increases / decreases in Path of Building to check if other options can be sufficient for your pleasing.

For your Medium Cluster Jewels, we opted for the obvious choice. Eye to Eye and Repeater both are incredibly solid notables and are just far ahead of the other options! I doubt you often see people running Projectile Damage focused Medium Jewels and pick up anything else than those two.
- Repeater
- Eye to an Eye

Watcher’s Eye
Impale Builds and Watcher’s Eyes go hand in hand. There are a TON of modifiers that are super strong for your build, but since the one modifier that is a must have on a  Watcher's Eye in this build generally is at least 30
  Exalted Orbs I guess just getting the “Impales you inflict last 2 additional hits while using Pride” will do you just fine. This adds 26% DPS to your build so this definitely is a key piece! If you really want the most optimal one, “#% chance to deal double damage while using Pride” is the second-best modifier here.
Regular Jewels
Since you’re looking for Life and damage, and you get to combine Projectile Damage with modifiers that it is rarely paired with (such as attack speed with swords or Physical Damage) you can often find 4 stat jewels at reasonable prices. Look for the following modifiers, in addition to preferably a #% increased maximum Life roll.
#% Increased Attack Speed with Swords
#% increased Global Critical Strike Multiplier
#% Increased Attack Speed while Dual Wielding
#% Increased Projectile Damage
#% Increased Attack Damage while Dual Wielding
#% Increased Global Physical Damage
#% Increased Attack Speed


