TbXie's Essence Drain Contagion Trickster Gear, Jewels & Flasks (PoE Trial of the Ancestors 3.22)
Summary – TL;DR
As per usual, nothing matters more than capping your Elemental Resistance before anything else. This means modifiers on gear are subordinate to Resistances as long as you’re not capped.
We’re providing you with an extensive analysis further down the page but chose to start off with an overview / recommendation.
Our recommendation:
| Item Slot | Item Name |
| Head | 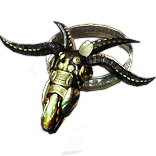 Hubris Circlet with Life – Chaos Res – Spell Suppression and as much Energy Shield as you can find Hubris Circlet with Life – Chaos Res – Spell Suppression and as much Energy Shield as you can find |
| Amulet |  Turquoise Amulet with Life – +1 Chaos Skills & Maximum Energy Shield Turquoise Amulet with Life – +1 Chaos Skills & Maximum Energy Shield |
| Chest | 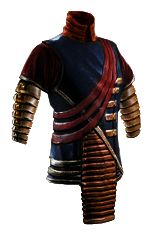 Sadist Garb with Evasion, Energy Shield & Suppression Sadist Garb with Evasion, Energy Shield & Suppression |
| Gloves | 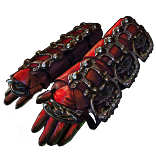 Murder Mitts with Dexterity, Life, Spell Suppression & Chaos Res Murder Mitts with Dexterity, Life, Spell Suppression & Chaos Res |
| Boots |  Atziri's Step Atziri's Step |
| Belt |  Leather Belt with Life & a lot of Resistances Leather Belt with Life & a lot of Resistances |
| Rings | Rare Rings with Life – Resistances & Mana Regeneration |
| Weapon | Rare Wand with Chaos DoT Multi – +1 Spell Skills – Spell Damage – Damage over Time Multi |
| Shield | Rare 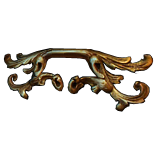 Titanium Spirit Shield with Life – Spell Block & ES Recovery when you Block Titanium Spirit Shield with Life – Spell Block & ES Recovery when you Block |
For crafting Rare items, you can check out all the affixes that can roll on an item base, depending on its level, influence, and many other factors, using our affix tool.
Armour Pieces
Disclaimer
With the insane buffs to Spell Suppression on the tree, for right side archetypes, and Spellbreaker, you will need less Suppression on Gear. Getting more than 100% is never useful & should not be itemized for.
Helmet
This slot is a little bit special. You ideally want to grab a  Hubris Circlet but that requires you to get decent Spell Suppression rolls on other items. This is because if you lack Suppression to get to cap, you can pick up the “Instinct” wheel close to Shadow to help out. This wheel however only works if you have Evasion on your Helmet, Boots & Gloves so you would have to get some evasion on your helmet. In this case, opt for a
  Deicide Mask. Eventually, the difference is negligible so if you opted for the latter option, feel free to stick with it throughout your characters lifespan. Other than the some Energy Shield, I would recommend picking up Life, Spell Supression & Chaos Resistance.
- +# to maximum Life (at least 90)
- +#% chance to Suppress Spell Damage (until cap)
- +#% Chaos Resistance (any)
- +#% Elemental Resistances (until cap)
- +#% increased Energy Shield

Body Armour
Early game, when you don’t have many options available, a re The Restless Ward can carry you for a decent amount of time.
Optimally, you’re running a  Sadist Garb, as that is the best Evasion / Energy Shield body armour piece. You have two options here, you either go for Tier 1 Life with as much ES/EV you can find or you forego Life and pickup the Life Mastery that gives you 15% Increased Maximum Life if you have none on your body armour. They’re both about equal, so in ideal scenarios you get the maximum amount of ES/EV on your chest piece.
- +# to maximum Life (at least 90)
- Gain #% of Maximum Life as Extra Maximum Energy Shield (10)
- +#% chance to Suppress Spell Damage (until cap)
- Any Suffixes to finish it off such as +1 to Socketed Intelligence Gems

Gloves
For optimal efficiency, you want to find a really high Dexterity roll here. If you can’t find Dexterity on a pair of Gloves, you’ll have to run a rare pair of boots other than running an optimal unique pair. Other than Dexterity, you need some maximum Life ideally.
_A bit like the helmet, you could be running  Fingerless Silk Gloves here if you don’t need the evasion to use the “Instinct” Wheel in the tree. The difference is again negligible though.
- +# to maximum Life (at least 80)
- +#% chance to Suppress Spell Damage (until cap)
- +# to Dexterity (at least 40)
- + #% to Chaos Resistance (any)
- + #% to Elemental Resistances (until cap)

Boots
With the new introduction of Suppression,  Atziri's Step are close to impossible to beat. Just grab them and be happy with that slot.
Belt
Your belt slot basically just serves as the main source of resistances for the build. Since you’re running Ailment Avoidance, Chaos Resistance, Dexterity and even Uniques to dodge over Elemental Resistances elsewhere, your belt will most likely be a slot where you require a pretty serious amount of Resists. Late game, opt for extra Chaos Damage or Increased Maximum Life.
- +# to maximum Life (at least 130)
- +#% to Elemental Resistances (until cap)

Accessories
Amulet
Because an Amulet is one of the rare slots where you can increase both defenses and damage you’re going to look to do so! The best way of scaling your damage is by grabbing a +1 to Chaos Skill Gems modifier on your amulet! Try finding one that also has Life and Maximum Energy Shield
- +# to maximum Life (at least 80)
- +# to Level of Chaos Skill Gems
- #% increased maximum Energy Shield

Anoint
The most damage you can find is by anointing Acrimony. Since we are literally unkillable already, might as well grab some Damage.
Rings
Similar to your belt slot, you’re going to be looking for Life and Resistances here. Additionally, just to make your life a little bit more smooth and Mana-proof, grabbing some Mana Regeneration is very nice!
- +# to maximum Life (at least 80)
- +#% to Elemental Resistances (until cap)
- #% increased Mana Regeneration Rate

Disclaimer
Jewellery can be thrown into the Lake of Kalandra nowadays, allowing for absolutely insane upgrades. Make sure to play around with this as it can get you like 240 Life, 30% DoT Multiplier or 60% Chaos Damage on Rings and +4 to Chaos/Spell Skills on amulets!
Weapon
A weapon for a Chaos build (and especially a Chaos DoT build) almost always uses multimoded weapons as its just so strong to get all the affixes you want and after you grab those there aren’t any other you’d want. Therefore, the lack of total affixes doesn’t hurt you whatsoever! Look for a +# to Level of all Spell / Chaos Skill Gems and #% to Damage over Time Multiplier. Afterwards multimod on Chaos Damage over Time Multiplier and Spell Damage and you’ll have a perfect weapon for the build.
- +# to Level of all (Chaos) Spell Skill Gems
- +#% to Chaos Damage over Time Multiplier
- #% increased Spell Damage
- #% increased Damage over Time

Shield
Your Shield is the hardest piece you’re going to acquire. Ideally, you want a Life/Spell Block shield that somehow also is Shaper Influenced and rolled a Recover #% of Energy Shield when you block. The latter honestly is a luxury but one that makes a really serious difference. Before that pops up, gets available or within budget, feel free to just grab a Life / Spell Block Titanium Spirit Shield and be happy with it!
- #% Chance to Block Spell Damage
- +# to maximum Life (at least 90)
- Recover #% of Energy Shield when you Block
- #% increased Energy Shield
Flasks
I believe flasks are highly preference-based. One isn’t just outright better than another one for specific / certain builds. Obviously, sometimes, there’s a set in stone set of Flasks you should be using just because they synergize with your build so well. I wouldn’t say those really exist in this setup, but I’d strongly advise you to stick with the setup listed here.
Given the way we try to build this character, we opted to stick with Magic Flasks to keep the budget smaller. However, Flasks are a vital part of your characters defenses and should not be overlooked when building a character. The first Flasks that help a great deal with this endeavous are the  Granite Flask and
  Jade Flask as they provide you with a nice chunk of basic Armour and Evasion to scale off of. Obviously, pairing them with the correct suffixes is mandatory. Next up, the Quartz Flask is here because it caps suppression & gives you Phasing. If you don’t need it for either of those effects, it’s always replacable by something like a
  Taste of Hate. The
  Quicksilver Flask is in the setup to allow you to navigate through maps switfly and lastly we do op to run a Life Flask on this build, as we do think it otherwise might lack recovery in lengthier fights. If you’re not doing bosses, or more sturdy encounters, you probably wont need this flask as you should have plenty of recovery through maps.
Our recommendation:
| Slot | Flask |
| 1 | Experimenter’s  Quicksilver Flask of the Cheetah Quicksilver Flask of the Cheetah |
| 2 | Experimenter’s  Quartz Flask of Opossum Quartz Flask of Opossum |
| 3 | Experimenter’s  Jade Flask of the Owl Jade Flask of the Owl |
| 4 | Chemist’s  Granite Flask of the Impala Granite Flask of the Impala |
| 5 | Bubbling  Divine Life Flask of Assuaging Divine Life Flask of Assuaging |
Be sure to check out our Flask Crafting Guide to learn everything you need to know about how to set up your non-Unique flasks.
Jewels
Rare Jewels
Since I personally really like to be safe, which is why I recommend getting life on all of your Jewels. The best scaler is definitely Chaos DoT Multi, which you really want on all of your jewels. Other than that, any damage mod works as a 3rd and potentially 4th mod.
- #% increased maximum Life
- +# to Chaos Damage over Time Multiplier
- #% Increased Chaos Damage
- #% Increased Spell Damage
- #% Increased Spell Damage while holding a Shield
- #% Increased Damage
https://i.imgur.com/gFJdb4u.png


