GhazzyTV's Poison Animate Weapon Necromancer Gear Progression
Introduction
While the PoB shows you what gear we believe belongs in which budget, it might still be a bit unclear in what order we think you should prioritise what.
On this page, we will do our best to explain what we prioritise when, and why. With that out of the way, let’s dig into the gear progression.
Campaign
During the campaign with this build, you will for the most part pick up items that have the links and colours you desire and hit them with an  Orb of Alchemy or an Essence with an appropriate modifier to make them rare. You will be hoping for a resistance when doing this, and should you end up having an open suffix on the item the crafting bench will let you add on a second resistance roll or an attribute roll, depending on your current needs.
Keeping your resistances as high as possible, ensuring you have the attribute rolls and getting some life modifiers is all you need to worry about at this stage.
Low Budget
We are going to make the assumption that you have kept your attributes in order and resistances capped going into this budget, and will be working with that assumption. If you do not have capped resistances when hitting maps, you need to get that sorted as soon as possible.
Early Gear
The first order of operations, as it is with most builds, is to acquire a six-link. Whether you go for a  Tabula Rasa or a corrupted chest is up to you. A corrupted chest offers more stats and should not be underestimated, but both options are perfectly fine.
In addition, we will be filling all of our item slots.
Getting your hands on the Transfigure Gem “…Of Ranged Arms” will be your absolute main focus as this will enable the entire build by turning your melee Animate Weapons in to ranged ones.
Rings – Anything that gives resistance is good. If you can get a  Bone Ring with resistance(s) and/or dexterity, that is cool. If not, fix it later.
Amulet – Dexterity implicit + Dexterity, life/resistances as high as you can get for a cheap price
Wand – Convoking base – This early we take what we can get. Minion damage/crit chance/attack speed/+1 all/+1 minions. +1 modifiers are super strong but are likely too expensive. Skip if they are expensive. If there’s an open suffix; bench-craft trigger socketed spell to automate your Desecrate and Bone Offering.
Shield – Any armor base. You could make your life-recovery shield this early if you want, but we will come back to this later in the gear progression. Take what you get.
Boots/gloves/belt – life, resistances and whatever else you can get for cheap. Make sure your boots have Movement Speed or things will feel VERY bad.
Flasks are more important than they might seem, bleed removal and an instant life flask are extremely crucial and in the end-game having modifiers that gives you more armor is just as important.
Getting a bit more specific with it
The Transfigure Gem “…Of Ranged Arms” is mandatory to make the Animated Weapons ranged which is the core function of this build. The progression guide here will assume you’ve now gotten your hands on one.
The first thing we do now that we have all of our slots filled is to make a good shield. We want an armour base with shaper influence, preferably something like 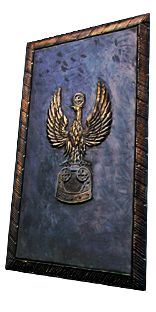 Pinnacle Tower Shield. We want it to have recover #% life on block, and life. If we can get any resistances here, we’re super happy. If we get an extra armor roll, we’re super happy. You can either purchase one or craft it yourself.
The guide linked below will show you how to make a shield with the recover mod, it’s not complicated and the only expensive part is the base.
Recover shield
Ghastly Eye Jewels & Darkness Enthroned – Getting poison chance sorted.
Since the rest of our gear is now functional, we want to cement our core mechanic: Poison.
The way in which we do this is  Ghastly Eye Jewel. We need our jewels to handle a few things, and there are some considerations to be made here.
The first thing to understand is that chance to poison support gem provides us with 40% chance. This means our jewels, only needs to handle 60%.
Assuming we get a  Darkness Enthroned of 75% improved effect or better, that means two jewels with 15% in the belt becomes:
15×1.75 = 52.5% chance to poison. This means we can cap in three jewels for low budget.
For the Medium budget, we will only need 40% from jewels. This could be used to make budget decisions that last. If you want.
You do NOT need to get 15% jewels, as they are overkill later on. Solve it however you want.
The priority list for Ghastly Eye Jewels goes as follows:
Poison chance – until cap. Preferably 15% for two, third can be 14.
Minions deal #% increased damage if you have used a minion skill recently – this is the best damage mod we can get
Maximum life – Higher life is always good. Only ever skip this modifier in favor of getting the poison % chance sorted, once that’s covered you ultimately never want to have any rare item without a life modifier.
Flat physical and flat chaos – Budget alternative to recently mod mentioned above, but it is inferior. Make a budget call here on what suits you.
After fixing your ghastly eye jewels, look to fix your flasks.
This concludes low-budget progression.
Medium Budget Gear Progression
You will ideally want 2x bone rings for minion resistance. This creates some socket pressure, as we have nowhere to put convocation. As a result, we need to put a convocation modifier on either wand or shield. Until you have that, you will need to run an Unset ring.
Severed in Sleep
The first thing we want in this budget step is to acquire a  Severed in Sleep this scales our damage significantly and makes inflicting Wither stacks so much faster.
Helmet
Making sure you have +2 levels of all minion skill is just as crucial on this slot as a proper life modifier. For the medium budget and higher you’ll also want to make sure you have a high rolled modifier providing “+#% chance to Suppress Spell Damage” as we are adding yet another layer of extremely effective defense by having 100% chance to suppress spell damage taken. Do note that this modifier can only roll on items that have a dexterity (evasion) base but can also be found on hybrid items that are a dexterity (evasion) + either intelligence (energy shield) or strength (armor) base.
The Covenant
This body armor will spike your damage tremendously. In nearly any and all circumstances, a 4-linked Covenant will beat a six-linked chest. That does not mean you don’t want this bad boy six-linked, but I’m mentioning it so that you’re aware a 4-link is worth considering and a 5-link is always going to be better than what you have.
Gloves
Similar to our helmet we aim for a high life and spell suppression modifiers here, in higher budgets you can craft a pair using the  Deafening Essence of Fear for even more minion damage. Eldritch implicit modifiers should be minion damage and spell suppression, the higher the tier of the spell suppression the better as we are going for 100% and will be the biggest struggle of the gear progression on this budget and forward.
Unset Ring – Replace this with Bone Ring once you have a convocation modifier on a gear piece!
Since we’re now socket starved, we will be replacing the worst of our previous rings with an  Unset Ring. What exactly you get on this item is not super important, high life roll combined with resistances and/or attributes to alleviate those modifiers on other items.
Amulet & Inveterate Anoint
The unique  Replica Dragonfang's Flight with +3 level of all Animate Weapon Gems works wonders here and in this budget we’ll help our spell suppression by putting the Inveterate notable with oils on it.
Flasks
If you didn’t properly sort your flasks with both prefixes and suffixes, it’s time to spend some time rolling or buying them properly now.
Shield.
You can stick with your recovery shield, or you can choose to upgrade to a 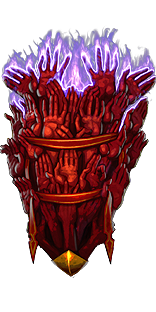 The Surrender. Surrender is obviously a better shield, but it can be expensive and it will not make into High Budget. As such, it’s entirely a temp item.
If, and it’s a big if, 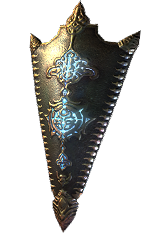 Aegis Aurora is cheap you can justify grabbing one already now as it will beat both previous shields and it will come with us into High budget.
The decision here is entirely on you, but I’m partial to the Aegis if it’s a viable option.
Ghastly Eye Jewels
If you have any truly awful Ghastly Eyes, this is a good time to look for better ones. You do not have to replace any at this stage, but if you do, make a conscious note that with the heavy use of Energy Shield to cast our spells it’s not bad to have that on these jewels, though I would put a higher priority on Life as per usual.
Green Nightmare
 The Green Nightmare provides a massive boost to our spell suppression and should not be discarded as one of the earlier investments, but do focus on your damage output first and when you decide to focus on defensive scaling outside of attributes and resistance caps you’ll want to make sure every rare item has a life modifier and every item that can should have a spell suppression roll.
The Rest
The remaining differences between low and medium budget are now the priority of your progression before you take the next step in to higher budget.
This concludes the medium budget.
High Budget Gear Progression
We are following the same structure as in our medium budget with a simple comment: “Bigger, better, higher rolls on every single item you currently have”. The other differences is a much nastier geared Animate Guardian as you can see in the PoB. Awakened support gems, a bigger amulet and the addition of  Amanamu's Gaze to further scale our damage output is also included in this very expensive version of the build.
Ashes of the Stars
The Transfigure Gem “…Of Ranged Arms” provides us with 1 extra maximum summoned Animated Weapon per 10% quality, that makes the  Ashes of the Stars an excellent choice as a perfect 30% rolled gives you 3 extra weapons which results in a BIG damage increase.
Unset Ring
As we lost most of the attributes on our amulet with the Ashes of the Stars swap, we need to make up for those attributes somewhere. The simplest solution for this is to look for an unset ring that has the following minimum mod tiers:
Tier 1-2 to strength
Tier 1-2 to dexterity
If you can get an energy shield roll or an intelligence/all attribute roll as well, that is great.
It’s important that you search for this ring with the maximum quality set to 0, as we want to attribute catalyst it later to bump these attribute stats up by 20% each.
Aegis Aurora vs The Surrender
The  Aegis Aurora will provide us with extra Energy Shield to keep using our abilities when we block incoming hits and gives us +5% to our maximum cold resistance.
  The Surrender is another option here and is entirely preferential. Surrender gives you more armor, block and better life sustain whilst the Aegis helps you sustain your energy shield which we are using to cast our abilities. Do keep in mind that damage over time effects will affect your Energy Shield pool due to Mind Over Matter which is why some people prefer to not take that Keystone and use The Surrender over the suggested PoB set-up that I personally prefer.
Amanamu’s Gaze
This spicy jewel will provide us with an incredible boost to our minion’s damage over time, which includes poison. It also comes with some decent attribute values, but getting a good attribute roll here is usually incredibly expensive. Plan around the bottom roll, and be pleasantly surprised if you get something better.
Large Cluster Jewel
It’s time to start hunting for the first of our large cluster jewel. We’re going to start off by looking for the cheaper of the two jewels.
What we are looking for here are the modifiers:
35% increased effect
Minions have 3% increased attack and cast speed
+6-8 to life. 10 is better, but will likely be noticeably more expensive. If the difference is small, get a 10.
This is not a very cheap combination as it’s one of the end-game meta cluster jewels used by a handful of high-end minion builds. What’s important to note here is that you are looking at the HIGH budget version and should not be playing this if you don’t have considerable amounts of currency to use. Skipping the life modifier will render your character significantly squishy and skipping the effect and/or the attack speed modifier will result in loosing absurd amounts of damage. This jewel is insane.
Small Cluster
Having gained access to two small sockets, we are immediately going to be looking to fill them up. What we are looking for here are 1× 2 passive small jewels of the base “6% increased Mana Reservation Efficiency of Skills”. The notable we want to roll on this cluster is “Uncompromising” as it will lower the reservation required to use the Determination aura, this makes the small cluster fundamental for your auras to function. Luckily this specific modifier only requires the jewel to be of item level 50 which should drastically lower the cost of buying one of these and crafting it yourself by simply spamming  Orb of Alteration and
  Orb of Augmentation on it.
Boots
Movement speed should never be neglected on boots, ever.
For this build we are yet again making sure the item will have a high rolled modifier of spell suppression as we never want to go below 100% of that.
Life modifier becomes the third priority on this slot followed by any lacking attributes and/or resistances. Don’t ignore chaos resistance if you get the chance to squeeze that in to any of your rare items.
Eldritch implicit modifiers can provide extra life regeneration but more importantly “#% increased effect of Bone Offering” to further scale your block chance towards the cap (75%).
Gloves
Exactly like the gloves with the exception of not being able to roll movement speed and the eldritch implicit modifiers should be “Minion Damage” and “Spell Suppression”.
Bone Ring
At this point, your minions are likely going to need the extra resistances, so it’s time to acquire a  Bone Ring.
The other modifiers should be for offensive scaling: Minion #% damage and/or Minion #%.
For defensive scaling: Any lacking attributes and/or resistances to hit the cap this includes chaos resistance. If you happen to end up with an Energy Shield roll that’s just a good thing.
Final Notes
This is also when you shoot for a  Darkness Enthroned with as close to 100% as your budget permits, and as always ideally maximum roll.
It’s also time to upgrade your flasks to very Tier 1 prefixes and suffixes. Flask uptime and effect are both huge, so don’t skimp here.
If you have not yet rolled Eldritch implicit on the boots we made earlier, do so now.
This concludes Ranged Animate Weapon gear progression. I hope you have as much fun with the build as I have!


