Gear, Jewels and Flasks (PoE Affliction)
Path of Building
Information for the completed build can be found here: https://pobb.in/NVQMNEeeBhUG
Item overview and explanations
These items strike a balance between power and cost-effectiveness. There is unusually little room to experiment with items in this build as it is so unique heavy.
There are very likely options at much higher investment, but that is beyond the scope of this guide.
If you are a newer player and crafting scares you, please check out this guide from Velyna as it goes over a lot of very important things and might be helpful to you: https://www.poe-vault.com/guides/beginners-guide-to-crafting-and-upgrading-in-path-of-exile()
Gear
| Item Slot | Item Name | |
|---|---|---|
| Head | 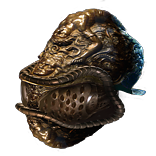 Abyssus Abyssus |
|
| Amulet |  Carnage Heart OR Carnage Heart OR  Replica Dragonfang's Flight Replica Dragonfang's Flight |
Unique |
| Chest | 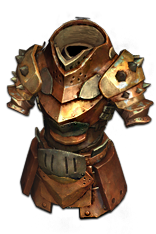 The Brass Dome OR Rare The Brass Dome OR Rare  Astral Plate Astral Plate |
Rare/Unique |
| Gloves | 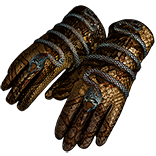 Offering to the Serpent Offering to the Serpent |
|
| Boots |  Dawnstrider Dawnstrider |
|
| Belt |  The Magnate The Magnate |
|
| Rings | Rare  Amethyst Ring Amethyst Ring |
|
| Weapon | 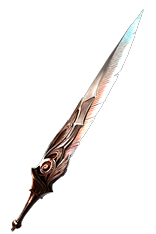 Replica Dreamfeather Replica Dreamfeather |
|
| Shield | 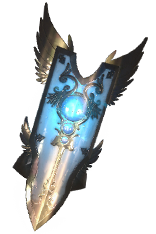 Emperor's Vigilance Emperor's Vigilance |
Armour
Helmet
We reccomend an  Abyssus here. It provides amazing crit multi, flat physical damage and attributes. This comes with a minor downside of increased physical damage taken, but we mitigate that so well it’s a relatively small problem.
Chest
The clear choice for this build is  The Brass Dome. It provides unparalleled amounts of armour as well as complete immunity to Critical Strikes
Boots
Our boots of choice is Dawnstrider. The increased buff effect and lingering duration of ancestral totem buffs are massive and these boots are cheap
Until they are available, armour boots with life, movement speed and resistances will serve you just fine.
Gloves
Our choice for this slot is  Offering to the Serpent to enable overleech for the build. They also come with an upside of some attack speed and damage while leeching. The key thing here though, is the overleech.
These gloves drop from sidebosses in the Cortex and as such will likely not be available early on, despite usually being very cheap.
Until you can get these gloves, you can opt for  Haemophilia gloves for explode or a pair of rare gloves. Spiked gloves are likely ideal in that case, but any armour base will do. You would be looking for the following modifiers:
- +to Maximum Life
- Attackspeed
- Armour
- Resistances (Until capped)
- Adds # to # physical damage to attacks
Remember not to spend much here, as you want to replace them anyway.
Weapon
The clear winning choice here is  Replica Dreamfeather as it synergises well with our high armour and its bonuses are actually applied to
  Shield Crush. You want to opt for as high rolls as possible on essentially everything here, but keeping the accuracy roll above 300 should be prioritised.
As this is a replica, it comes from grand heists. This means it’s uncertain how available it will be on League start as that heavily depends on how many people are interested in doing Heist. If it’s entirely unavailable, I suggest you get hold of a  Prismatic Eclipse instead as it’s the cheapest readily available weapon that synergises with our main attack.
Since this weapon is not that sought after, it is very possible to buy many of them and corrupt them in the hopes of hitting “Melee hits have a #% chance to fortify”.
This is a late-game min-maxx option, but it is incredibly powerful as it saves us five skill points and allows us to invest in other places instead. I absolutely would settle for a lower rolled version of this weapon, if I could get it with corruption.
Shield
Our clear and only real choice here is  Emperor's Vigilance. This shield provides great base armour, plenty of energy shield and gives us Glancing Blows. It is one of the three crucial items to make the build function and as such should be prioritised really high in your purchase list.
Unfortunately, it is also fairly coveted on Leaguestart and could be somewhat expensive. It drops in price fairly rapidly as the league goes on, but you might struggle to afford it early on. As such we will provide some alternatives.
 Lioneye's Remorse is the most readily available high armour shield
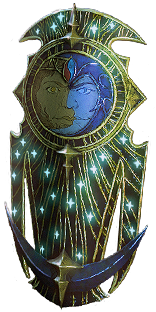 Magna Eclipsis Serves as a decent middle ground and is a vendor recipe.
- A Rare
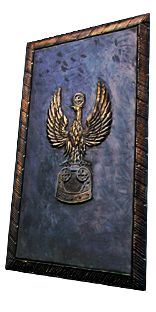 Pinnacle Tower Shield or the like with very high armour will work quite far into progression.
Accessories
Amulet
The primary cheap recommendation here is  Carnage Heart. It provides us with a majority of our attribute needs, some pretty acceptable elemental resistance and a decent increase in damage while we are leeching. This truly shines after we acquire our gloves, but it’s pretty decent before that as well and it is dirt cheap. You want to acquire a carnage heart with certain specific modifiers, as that removes the need for dex on the rings, provided you fix your implicit roll with Blessed Orbs, which of you will:
- A minimum all-attribute roll of 32
- Decent elemental resistance roll, preferably higher than 15.
- Highest possible damage while leeching the other two permits.
Rings
Our preferred ring base in this build is  Amethyst Ring.
As the build has so much elemental resistance on the tree and through endurance charges, we can allow ourselves to start running Amethysts straight off the bat.
As most of our other gear is very spesific unique items, we need to rely on our rings to carry resistances for us. As such our early rings should focus entirely on providing the following:
- Elemental Resistance (Until capped)
- Chaos resistance (until comfortable)
- Life (crafted life is more than fine)
The later stage rings follow the same priority list, except that they also need to provide us with Dexterity.
Belt
Our primary choice for this slot is  The Magnate
It does a number of things for us. It provides us with a chance to deal both Double and triple damage, increases our flask charges gained and provides us with resistance.
It is important to note that Chance to double and triple damage are rolled separately, and a triple would simply overwrite a double. Regardless, it is great.
Jewels
This build utilises several jewels that do fairly specific things, keeping with the trend most of these are also unique.
We will address each of them in order of importance.
1: #  Seething Fury This jewel provides us with an immense amount of damage when combined with
  Emperor's Vigilance.
Flat critical strike chance, Critical strike Multiplier and Attackspeed all in one jewel. This is one of the most important purchases you will ever make in this build, after the shield. Prioritise this extremely high.
2: #  Natural Affinity This nifty little bugger provides us with a stacking buff that makes us take less and deal more damage the longer we stand still, up to five seconds. As our playstyle naturally happens to be placing our feet in the ground and going at it, this works well for us.
3: # # Large Physical Cluster Jewel. This jewel provides us with a massive boost to a majority of our stats and greatly boosts both offence and defence. It also gives us somewhere to socket two of our other jewels. The affixes we most want on this jewel are as follows:
- Martial Prowess – This provides us with accuracy, attack speed and damage. Truly amazing node.
- Prodigious Defense – This node effectively gives us +6% attack block, +6% spell block and 30% increased attack damage. Unrivalled and amazing.
- Feed the Fury – This node clocks in at a truly breathtaking 15% attack speed. It also comes with the benefit of 30% increased attack damage.
4: #  Watcher's Eye This jewel comes with an absolutely incredible amount of potential affixes this build can utilise. In the interest of not being here all year, we will simply list the two modifiers we think you should be looking for. There are great options here for other affixes that might be cheap, however, and this should be kept in mind. Regardless, our primary recommendations here are:
- Gain a Flask Charge when you deal a Critical Strike while affected by Precision. This should be your first choice, this node alone is worth the jewel slot.
- Impales you Inflict last 2 additional Hits while using Pride. This affix provides us with a massive damage boost but is of lower importance than the previous mod.
5: #Thread of Hope. We want a ToH of the Very Large Ring variant. We utilise this to save ourselves some points pathing to Safeguard. In addition, it gets us some options once we go past level 95, in the form of Discipline and training and the life nodes next to it. You will have to decide for yourself that late if you want more life, or if you want something else.
6: # Brutal Restraint Denoted Service in the Akhara of Nasima
This jewel provides us with Second Sight which is an insane damage modifier for this build. It also provides us with enough Dexterity that we no longer need a high roll on our ring/s. There are several valuable potential modifiers here, key among which are:
- 25% increased Critical Strike Chance
- 8% increased effect of Non-Curse Auras from your Skills
- 5% increased attack speed
- 5% increased movement speed
Do note that due to this jewel requiring you to spend 3 points to allocate the jewel socket and the notable we convert, it is rather difficult to fit into the build until after you have a corrupted  Replica Dreamfeather with fortify on hit. The reason this matters is that we can drop our point investment in Fortify at that point.
You could also alternatively “just” level to 98, but that is a chore for most players.
Should this jewel not interest you, and you would like to go in a more defensive route, I would still advise you to get a corrupted replica Dreamfeather with fortify on hit eventually, should you enjoy this build enough to get to this point.
Flasks
As this build utilises three utility flasks, you can get the affixes we need on whichever one of the flasks you want. Do not feel locked into the specific flask-affix choices the PoB makes, as long as you get them all it’s fine. Across your flasks you want to have:
- #% increased Armour during Effect
- #% increased Attack Speed during Effect
- #% increased Critical Strike chance during Effect
If you are struggling against damage over time, you can drop the crit roll for either Ignite or Shock Immunity.
- Seething
 Divine Life Flask of Alleviation. You want Bleed/CB immunity and Instant on your life flask. No questions.
 Lion's Roar Decent damage and knockback, which serves as a bit of a defensive layer
- Masochists
 Basalt Flask
 - Masochist’s
 Silver Flask
 - Masochist’s
 Diamond Flask


