POEGuy's Siege Ballista Hierophant Gear & flasks (Poe Mirage)
Summary
This build is very easy to set up because it utilizes many cheap uniques (even at league start). Having a lot of uniques means you can construct the build faster, and it also saves you headaches when fine-tuning your character.
The only items that might cause problems at league start are the amulet and the boots, but we have plenty of cheap alternatives for those!
If you need an in-depth explanation of the gear, click here.
The setup should look something like this:
| Item Slot | Item Name | Rarity | Notes |
| Head |  Fractal Thoughts Fractal Thoughts |
Unique | |
| Amulet |  Astramentis ( Astramentis ( Hyrri's Truth for Low and Medium Budget) Hyrri's Truth for Low and Medium Budget) |
Unique | If you are using  Hyrri's Truth, do not enable the level 30 Precision Aura! Hyrri's Truth, do not enable the level 30 Precision Aura! |
| Chest | Crafted Rare Body Armour (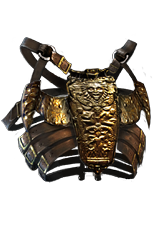 Briskwrap for Low and Medium Budget) Briskwrap for Low and Medium Budget) |
Rare | Check the Crafting Guide to learn how to craft these to avoid overpaying! |
| Gloves | 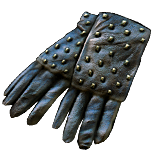 Hrimsorrow Hrimsorrow |
Unique | |
| Boots | 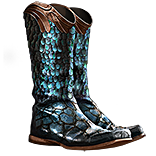 Garukhan's Flight (Rare Boots with T1 Dexterity, Life and Movement Speed for Low and Medium Budget) Garukhan's Flight (Rare Boots with T1 Dexterity, Life and Movement Speed for Low and Medium Budget) |
Unique | |
| Belt | %Increased Dexterity Synthesised belt ( Stygian Vise with T1 Dexterity, Life, and Resistances for Low and Medium Budget) Stygian Vise with T1 Dexterity, Life, and Resistances for Low and Medium Budget) |
Rare | Check the Crafting Guide to learn how to craft these to avoid overpaying! |
| Rings | 2x %Increased Dexterity OR flat Dexterity Synthesised rings (Rare Rings with T1 Dexterity, Life, and Resistances for Low and Medium Budget) | Rare | Check the Crafting Guide to learn how to craft these to avoid overpaying! |
| Weapon | 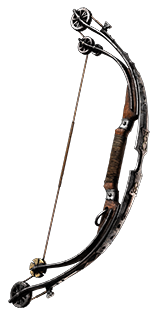 Iron Commander Iron Commander |
Unique | |
| Quiver |  The Poised Prism The Poised Prism |
Unique |
We are a Dexterity stacker – don’t forget that. The more Dexterity you have, the more damage you’ll deal and the tankier you’ll become. All our items revolve, in some way, around Dexterity.
Armour Pieces
Helmet
For the helmet, we use  Fractal Thoughts. This is an excellent helmet for Dexterity stacking. The most critical modifiers are: 15% increased Dexterity, 1% increased Damage per 10 Dexterity, and % Critical Strike Multiplier (aim for a high roll if possible). This helmet also grants us a lot of Evasion Rating, which helps improve our dodge chance.
Remember, the increased Dexterity bonus is conditional! Your Strength must be higher than your Intelligence to receive that bonus.
Body Armour
We have two options:
1) For the Low and Medium Budget option, go with a  Briskwrap. This body armour is cheap and effective. The most important modifiers are: 15% Increased Dexterity & 1% Increased Damage per 15 Dexterity.
[REMINDER] Since this armour lacks any life modifiers, make sure to allocate the conditional “15% increased maximum Life” mastery (check the image below).

2) For the high-end option, go with a Crafted Rare Body Armour. This body Armour will make our build quite tanky!
Our easy-to-follow crafting guide for the body armour at the bottom of this page (scroll down to Section 8).
Gloves
For the gloves, we use  Hrimsorrow. These gloves convert 100% of our physical damage into cold damage (we now deal elemental attacks). They are always cheap! Later, you can try to get a pair with useful corruptions, such as Critical Strike Chance for Attacks, Attack Speed, or Maximum Life.
Boots
For the boots, we use  Garukhan's Flight. These boots grant us life based on our Dexterity! The more Dexterity you have, the more Maximum Life you gain. They also provide 30% increased movement speed, flat Dexterity, immunity to Burning Ground, and extra regeneration while moving. These boots are excellent for this build!
For league start, a budget alternative would be random rare boots with Tier 1 Dexterity, good Life, and Movement Speed. Once you have enough currency, swap them for Garukhan’s Flight.
Weapon
For the bow, we use  Iron Commander. This is a vital piece for the build, mainly because of this line: “Siege Ballista has +1 to Maximum Number of Summoned Totems per 200 Dexterity “. Simply put, the more Dexterity you have, the more Ballista totems you can summon. Be sure to keep an eye on your Dexterity at all times and aim for key totem breakpoints (like 1400 dex, 1600 dex, 1800 dex, 2000 dex). As you might have guessed, getting extra totems is a big deal!
Don’t forget to use a  Blessed Orb on the implicit.
Quiver
For the quiver, we use  The Poised Prism. The most important modifier is: “Adds 1 to 2 Cold Damage to Attacks per 10 Dexterity.” Try to get one with good resistance rolls as well.
Remember to use  Blessed Orb on the implicit.
Jewellery
Amulet
For the amulet, we use  Astramentis. This is a beginner-friendly amulet that will solve all your attribute problems (no need to worry about Strength and Intelligence) and will also give you a big Dexterity boost. Make sure to buy one with good rolls, use a
  Blessed Orb on the implicit, apply 20x
  Intrinsic Catalyst, and anoint it.
- The Best in slot anoint is: Shaman’s Dominion (Clear, Azure, Silver)
- A great budget anoint is: Divine Judgement (Sepia, Teal, Black)
A budget amulet alternative for League-Start is  Hyrri's Truth. Buy one with a good Dexterity roll. Do not enable the Level 30 Precision aura, as it will interfere with our aura setup!
Make sure to buy one with good rolls, use a  Blessed Orb on the implicit, apply 20x
  Intrinsic Catalyst, and anoint it.
*Later, if you want you can swap the  Astramentis for a Greatwolf Talisman with %increased Attributes, use a crafted Synthesised %Dexterity amulet, or even a Simplex Amulet. However, I do not encourage this, as these items can be very expensive. You are much better off transitioning to my other build: Shrapnel Ballista
Rings
For the rings, we use %Increased Dexterity Synthesised rings. Just get the base, and you’ll craft the rest yourself.

Medium Budget, use Synthesised rings with Added flat Dexterity instead. Just get the base, and you’ll craft the rest yourself.

Low Budget, use random rare rings that have T1 Dexterity on them, along with useful modifiers (like Life, Cold Damage to Attacks, Increased Elemental Damage, Elemental Resistances, etc.)
Belt
For the belt, we use an %Increased Dexterity Synthesised belt. From there, you’ll craft the rest yourself.

For Low and Medium Budget, use a  Stygian Vise belt instead. Just get the base, and you’ll craft the rest yourself.
If you’re using a  Stygian Vise belt, you’ll want to socket an Abyssal Jewel with Dexterity and Life. Another useful modifier to look for on the Abyssal Jewel is “% chance to Taunt Enemies on Hit with Attacks” (your totems will taunt enemies with this).
Jewels
For the jewels, it’s essential to place them exactly where the Skill Tree in Path of Building (PoB) indicates (Remember, you can find the PoB here).
The build uses the following Jewels: Fluid Motion (Strength from Passives in Radius is Transformed to Dexterity)
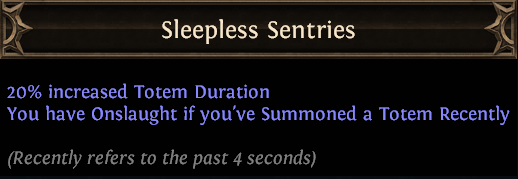
 Medium Cluster Jewel with the notable “Sleepless Sentries” (Gives us permanent Onslaught while mapping!)
 The Light of Meaning with 4% Chaos Resistance (for Budget, use one with +2 to Attributes). Later, you’ll want to switch to the one with 4% Chaos Resistance, as this alone will solve our Chaos Resistance issues!
 Brutal Restraint with a couple of 5% Dexterity Nodes (If you don’t know how to buy one, I’ve made a mini guide here. )
 Watcher's Eye with 7% or 8% “chance to Evade Attack Hits while affected by Grace”. Other modifiers that you can look for: “+#% to Chaos Resistance while affected by Purity of Elements”, “+#% to all maximum Elemental Resistances while affected by Purity of Elements”
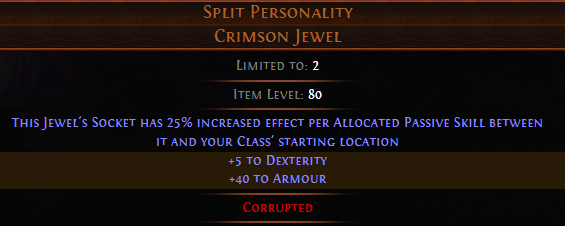
 Split Personality (with +5 to Dexterity). The ideal jewel would have “+5 to Dexterity” and “+40 to Armour”.
For league start scenario, you can use random rare jewels with % Increased Maximum Life and flat Dexterity.
Flasks
| Slot | Flask | Notes |
| 1 |  Divine Life Flask Divine Life Flask |
Get one with the “Grants Immunity to Corrupted Blood” modifier |
| 2 |  Granite Flask Granite Flask |
Boosts our Physical Damage Reduction |
| 3 |  Jade Flask Jade Flask |
Boosts our Chance to Evade Attacks |
| 4 |  Quicksilver Flask Quicksilver Flask |
Improves Movement Speed |
| 5 |  Amethyst Flask Amethyst Flask |
Increases Chaos Resistance / If you have the  The Light of Meaning(with %Chaos Resistance), then you can drop this flask and go instead for a The Light of Meaning(with %Chaos Resistance), then you can drop this flask and go instead for a  Diamond Flask Diamond Flask |
Suffixes and Prefixes on the flasks are very flexible. You can roll the flasks yourself using  Orb of Alterations.
For the Suffixes look for: “% Increased Armour During Effect, % Increased Critical Strike Chance During Effect, % Increased Evasion Rating During Effect, % Increased Movement Speed During Effect”
For the Prefixes look for: “% Increased Duration”, “% Increased Charge Recovery”, “% Increased Maximum Charges”.
[REMINDER] Apply quality to your flasks! All flasks should have 20% quality. You apply quality using  Glassblower's Bauble.
Automate your flasks! All the Magic Utility Flasks should have the Enchant: “Used When Charges Reach Full”.
You can get this enchant either by applying  Instilling Orb or by using your Crafting Bench.
Crafting
You have an easy-to-follow video crafting guide for the rings, belt, and body armour here.
In it, I show you how to buy your bases properly and also how to craft them efficiently with minimal investment. (When it comes to rare items, new players tend to overpay significantly.)


