Zombiemancer Baron Raise Zombie Necromancer Summoner Gear, Jewels, and Flasks
Summary – TL;DR
Like expected, nothing matters more than capping your Elemental Resistance before anything else. This means modifiers on gear are subordinate to Resistances as long as we’re not capped. Commander of Darkness does help you achieve this more easily which makes it so you can find relevant modifiers on gear more easily.
We’re providing you with an extensive analysis further down the page but chose to start off with an overview / recommendation. As you’ll notice, a lot of the emphasis is on Strength or %Strength rolls as we’re looking to get as much of that as possible.
Our recommendation:
| Item Slot | Item Name |
| Head |  The Baron – Look for High Rolls across the board The Baron – Look for High Rolls across the board |
| Amulet | Rare Warlord  Citrine Amulet with High Strength & %Increased Strength – Annointed with Death Attunement Citrine Amulet with High Strength & %Increased Strength – Annointed with Death Attunement |
| Chest | 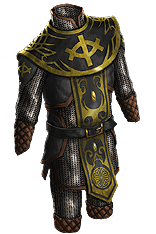 Geofri's Sanctuary Geofri's Sanctuary |
| Gloves | 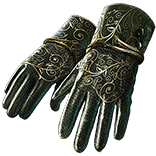 Shaper's Touch Shaper's Touch |
| Boots | 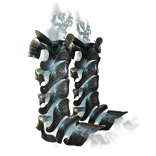 Alberon's Warpath Alberon's Warpath |
| Belt | Rare Elder  Heavy Belt with High Strength and %Increased Attributes Heavy Belt with High Strength and %Increased Attributes |
| Rings | 2x Rare  Two-Stone Ring (Cold / Lightning Resistances) with High Resistances & Strength Two-Stone Ring (Cold / Lightning Resistances) with High Resistances & Strength |
| Weapon | Any Well Rolled Multimodded 2-Hander with Minion Damage and +1 to level of Socketed Gems (Ideally a Synthesized base) |
For crafting Rare items, you can check out all the affixes that can roll on an item base, depending on its level, influence, and many other factors, using our affix tool.
Armour Pieces
Helmet
 The Baron is what you’re stuck with. Since its “nerf” it does have a high variance on rolls. Look out for a good one, with the most important mods being the ones below:
- Minions have #% increased Maximum Life (19+)
- #% of Damage dealt by your Zombies is Leeched to you as life (1.9%+)
Body Armour
 Geofri's Sanctuary is the BiS Body Armour. On top of that its generally reasonably cheap. Make sure to look for decent rolls across the board!
- +# to maximum Energy Shield (at least 36)
- +#% to all Elemental Resistances (at least 16)
- +# to maximum Life (at least 65)
- #% increased Armour and Energy Shield
Gloves
Another unique slot,  Shaper's Touch is used to scale and convert your Strength to Mana and Increased Energy Shield. Shaper’s Touch only rolls on “# increased Armour and Energy Shield” so it should be easy to pick up a very high roll.
Note: It’s possible to get corrupted Shaper’s Touches with “Curses enemies with level # Vulnerability on hit” which means you don’t have to run a Merveil’s Retainer and rely on a Spectre to apply Vulnerability. This is a very viable option!
Boots
The next item in our list is another set in stone Unique item.  Alberon's Warpath is irreplaceable because it can offer us up to 18% Increased Strength. Since it is a very common item, getting one with 18% Increased Strength shouldn’t be too hard, so we shouldn’t compromise here.
Belt
The first Rare item slot is found in your Belt. Before finding a really strong  Heavy Belt, you can always opt for a
  Cyclopean Coil temporarily. You want to use a
  Heavy Belt because of its implicit Strength. You want find one with the Elder influence mod #% Increased Attributes, really high Strength and potentially some Resistances and Life.
- #% Increased Attributes
- +# to Strength (at least 100)
- +# to maximum Life
- +% to Elemental Resistances

Accessories
Amulet
 Astramentis is a nice starter Amulet until you can afford a very well rolled Rare
  Citrine Amulet. You’re looking for a Warlord modifier “#% Increased Strength” as well as high Strength and some Life.
- #% Increased Strength
- +# to Strength (at least 60)
- +# to maximum life (at least 50)

Rings
We recommend  Two-Stone Ring (Cold / Lightning Resistances) because it makes capping Elemental Resistances easier. However, at very high levels of gear, when you can cap your Resistances without the extra Resistances on
  Two-Stone Ring (Cold / Lightning Resistances) you can opt for an
  Unset Ring and one (or two)
  Vermillion Ring(s). We want to finish off capping our Resistances here as well as get more Strength and Life.
- +# to Strength (at least 40)
- +# to Elemental Resistances (enough to cap)
- +# to maximum life (at least 50)
Note: Do note that using Catalysts on your Belt, Rings and Amulet can scale up your Strength even higher. By using  Intrinsic Catalysts on those items you’re going to get a lot more bang for your buck!
Weapon
Ideally, ever since the changes to 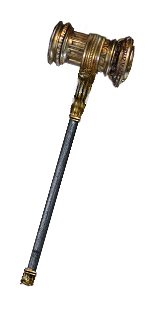 Imperial Mauls we’d want to use one of those, as they craft 10% Strength implicitly. The modifiers on our weapon are more important than its base, though, so the
  Imperial Maul is more of an ideal world type of thing. You’re looking for a weapon that has at least one open prefix & two open suffixes so you can craft “Can have up to 3 crafted modifiers”, as you really want to craft “+2 to Socketed Support gems” as it scales up your
  Empower Support and therefore your
  Raise Zombie. We mentioned that having more levels on your
  Raise Zombie is more important than anything else and thus getting a “+1 to Socketed Skill Gems” on our weapon would be really nice too.
If you’re looking for an even higher end weapon, you can try to craft it using Essences. Use  Deafening Essence of Fear and try landing on +1 to Socketed Skill Gems & the Minion Damage roll by themselves. Generally though, if you’re not familiar with this process, you’re better off saving up currency to just outright buy one.
- Crafted +2 to Socketed Support Gems
- +1 to Socketed Skill Gems
- Minions Deal #% Increased Damage
- Crafted Minions have #% increased Attack Speed

Optimally, late game, look for these stats on a Synthesized base that has implicit %Strength, such as in the PoB.
Animate Guardian Gear
For an  Animate Guardian to be effective it needs to use specific items. Mainly, you’re focusing on keeping your Animate Guardian alive and using
 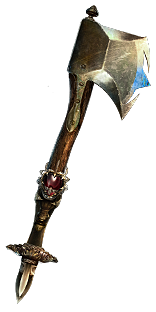 Kingmaker as the only buffs it provides.
For the Boot slot, you’re going to either use a pair of boots with a lot of various resistances and a “Regenerate 2% of Life per second if you were Hit Recently” enchantment. Otherwise, assuming you have appropriate gem levels and gear in other slots, 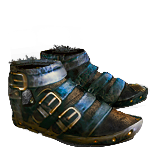 Victario's Flight can provide you with a decent chunk of movement speed, which is nice.
For its Helmet choice, ideally you want to use a  Mask of the Stitched Demon. We’re using it mainly for its “1% Life Regen per 500 Energy Shield” roll which I will get to later. Should this item be unavailable, you’re going for any Rare Helmet that has the “Nearby Enemies take 9% Increased Physical Damage” modifier.
Next up is its Body Armour. This is where you get Energy Shield for your  Animate Guardian. Ideally you want a Redeemer Body Armour with the “Nearby Enemies are Blinded” prefix. Afterwards, you want to craft 10% of Maximum Life as Extra Maximum Energy Shield. This way, since your
  Animate Guardian has 50,000 base life, it’ll get 5000 Energy Shield, which will then be removed yet converted into 10% Life Regeneration through
  Mask of the Stitched Demon. Should you be running a “-9 Physical Damage” Helmet, you want to keep the exact same Body Armour.
For Gloves, 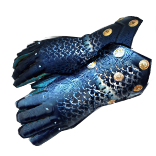 Southbound are essential as they provide your
  Animate Guardian with a decent chunk of Life and Resistances.
As mentioned before, we recommend a  Kingmaker as its weapon because it is incredibly strong. Giving your minions Fortify, Culling Strike, and Critical Strike Multiplier is just really really solid for one slot on your
  Animate Guardian. Should it be too expensive to acquire somehow, you can always use
 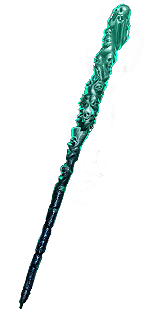 Dying Breath as a temporary solution.
Our Animate Guardian recommendation:
| Item Slot | Item Name |
| Head |  Mask of the Stitched Demon Mask of the Stitched Demon |
| Boots |  Victario's Flight Victario's Flight |
| Chest | Any Rare with “Nearby Enemies are Blinded” and crafted Maximum Life as Extra Maximum Energy Shield |
| Gloves |  Southbound Southbound |
| Weapon |  Kingmaker Kingmaker |
Flasks
I believe flasks are highly preference-based. One isn’t just outright better than another one for specific / certain builds. Obviously, sometimes, there’s a set in stone set of Flasks you should be using just because they synergise with your build so well. This build has a couple of those irreplaceable Flasks.
For starters, you can’t go without a  Rumi's Concoction. Make sure you’re buying one with as high rolls as you can afford. Block gets a lot better the more you have so having as much as possible is really important.
Secondly, I feel like a  Blood of the Karui is a really solid option for your Life Flask. Given you have such a tremendously high Life pool, instantly healing 600 HP through a Seething
  Divine Life Flask really doesn’t do much. A Blood of the Karui recovers almost half of your Life over a really short time and recovers all of your Life at the end of the flask effect.
For your utility flasks, my recommended setup will have a  Quartz Flask, a
  Jade Flask, and a
  Quicksilver Flask, but this choice is more up to you. Other contenders would be a
  Granite Flask, a
  Basalt Flask, a
  Amethyst Flask, or a
  Silver Flask.
Regardless of which utility Flasks you go for and whether you follow our recommendations or not, you’ll need to stick to the Suffixes we have picked for you (Staunching, Heat, Warding). The affixes on your non-unique Flasks can be changed around, but I recommend the following setup (based on the Flask duration, charges, and affix priorities):
Our recommendation:
| Slot | Flask |
| 1 |  Rumi's Concoction with 10% Spell Block Rumi's Concoction with 10% Spell Block |
| 2 |  Blood of the Karui Blood of the Karui |
| 3 | Chemist’s  Basalt Flask of Warding Basalt Flask of Warding |
| 4 | Experimenter’s  Quartz Flask of Heat Quartz Flask of Heat |
| 5 | Chemist’s  Quicksilver Flask of Staunching Quicksilver Flask of Staunching |
Be sure to check out our Flask Crafting Guide to learn everything you need to know about how to set up your non-Unique flasks.
Jewels
Efficient Training
Make sure to pick up an  Efficient Training as soon as possible so you can convert the starting Intelligence nodes into extra Strength nodes. With the right amount of “%Increased Strength” or Attributes, an
  Efficient Training can gives us over 150 Strength for a single Jewel socket. Very well worth it! While a +24 Strength roll might be expensive early in a league, this definitely is an item that you can look to upgrade later on. Perhaps you can even look for one that has the “Corrupted Blood cannot be inflicted on you” corruption to make the Sirius fight a lot easier.

Rare Jewels
You need one  Ghastly Eye Jewel because they can roll the “Minions Leech #% of Damage as Life” modifier which is vital to keeping your Zombies alive unless you already have the Mastery that makes them leech. Additionally, you’re looking for Strength / Life or Utility.
- Minions Leech #% of Damage as Life (mandatory to keep Zombies alive)
- # to maximum Life or # to maximum Energy Shield (at least 35)
- # to Strength
- Minions have % chance to blind on hit with attacks
- Minions have % chance to taunt on hit with attacks
- Minions have % increased attack speed if you or your minions killed recently

For your other jewels, I recommend a regular jewel as it can roll both Strength and Strength and Dexterity. If you already have more than 1500 Strength, you’re probably better off finding more Utility by running a second  Ghastly Eye Jewel. Try to find an #% increased maximum Life roll on them as well.


