The DPS Tank Fireball / Blazing Salvo Spellslinger Elementalist Gear, Jewels & Flasks
Summary – TL;DR
As per usual, nothing matters more than capping your Elemental Resistance before anything else. This means modifiers on gear are subordinate to Resistances as long as you’re not capped. Since you’ll be running a decent amount of Unique items, it’ll be important to look out for a lot of resistances on your Rare pieces!
We’re providing you with an extensive analysis further down the page but chose to start off with an overview / recommendation.
Our recommendation:
| Item Slot | Item Name |
| Head | Any Rare Helmet with 15% Reduced Mana Reservation for Spellslinger enchant, 30% More Elemental Damage and Life/Resistances |
| Amulet |  Citrine Amulet with Crit Chance & Multi, Life and Resistances Citrine Amulet with Crit Chance & Multi, Life and Resistances |
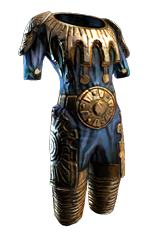
| Chest |  Vaal Regalia with Life, Spell Crit and Life as Extra Energy Shield Vaal Regalia with Life, Spell Crit and Life as Extra Energy Shield |
| Gloves | Incursion Gloves with Fire damage against Burning Enemies, Life and Resistances |
| Boots | Rare Movement Speed, Life, Resistances and Dexterity Boots |
| Belt |  Leather Belt with Life, CDR and Resistances Leather Belt with Life, CDR and Resistances |
| Rings |  Mark of the Shaper and Elder Ring with Life/Resists and -Mana cost Mark of the Shaper and Elder Ring with Life/Resists and -Mana cost |
| Weapon |  Imbued Wand with +1 to Fire Skills, Fire Damage, Spell Crit and Trigger Mod Imbued Wand with +1 to Fire Skills, Fire Damage, Spell Crit and Trigger Mod |
| Shield |  Harmonic Spirit Shield with +1 to Fire Skills, Life and 2 Damage Mods Harmonic Spirit Shield with +1 to Fire Skills, Life and 2 Damage Mods |
For crafting Rare items, you can check out all the affixes that can roll on an item base, depending on its level, influence, and many other factors, using our affix tool.
Armour Pieces
Helmet
The Helmet slot is historically the hardest one to fill in most builds. Honestly, even though it might look that way on first glance, that really isn’t the case for this build. You’re just looking to buy a white base, on pretty much whichever helmet. If you want to be greedy, a  Hubris Circlet would be best, with the “Skills Supported by Spellslinger have 15% reduced Mana Reservation”. Afterwards, you’re going to hit it with an
  Essence of Horror and that’s basically it. You’re done.
Once you have enough currency to be able to buy a second Helmet base, and a couple of Essence of Horrors at a time, you’re going to try and upgrade the Helmet by getting a really nice Life roll and perhaps some Resistances or an open suffix like on the one beneath which you can fill with some Resistances.
So, the affixes you want are:
- Skills Supported by Spellslinger have #% reduced Mana Reservation (15)
- Socketed Gems deal #% More Elemental Damage (30)
- +# to Maximum Life (at least 80)
- +# to Elemental Resistances (until cap)

*Note: If you’re in SSF and are unable to acquire this Helmet-enchant, please refer to our passive skill tree page for a SSF workaround involving Mana Reservation.
Body Armour
Now, here’s where you “just need to get lucky” or you’re going to be looking at an expensive piece. You really want a high Life roll, an open prefix to craft Life as extra Maximum Energy Shield, and a damage mod. The most optimal one is “#% to Spell Critical Strike Chance”, which is obtainable only on an Shaper-influenced item. Should you try to get this yourself, make sure to use a  Vaal Regalia as your base, as you’d like the extra Energy Shield on it.
- +#% to Spell Critical Strike Chance
- +# to Maximum Life
- Gain #% of Maximum Life as Extra Maximum Energy Shield

Gloves
This is a flexible item, but in an ideal world you’re looking for the incursion modifier here that grants you “# to # added Fire damage against Burning Enemies”. This modifier always comes with at least 40% Fire Resistance, so in theory, as long as you find one with either another high Resist or high Life you can fill out the item by crafting the other, as long as it has the open affix you require it to have.
- +# to maximum Life (at least 85)
- # to # added Fire Damage against Burning Enemies
- +# to Elemental Resistances (until cap)

Boots
The boot slot in this build is where you fix your need for Dexterity. Additionally, you’re going to want Movement Speed, Life and Resistances.
- +# to Dexterity
- #% increased Movement Speed
- +# to maximum Life (at least 85)
- +# to Elemental Resistances (until cap)

Belt
This is where you want to find the little bit of Cooldown Recovery Rate you can make use of to get the to the next proc threshold. 14% increased Cooldown Recovery Rate is enough to reach the next threshold. Anything over 18-19% is most likely bad, depending on how exactly the server tickrates are rounded. Generally, just getting 14 or 15% CDR is ideal. Additionally, you’re looking for Life and Resistances on a  Leather Belt for the most possible effective Life.
- +# to maximum Life (at least 125)
- #% increased Cooldown Recovery Rate (14)
- +#% to Elemental Resistances (until cap)

Accessories
Amulet
Your necklace again is a slot where you could go completely bonkers and splash a ton of currency on +2 Amulets, but honestly an Amulet that gives you some Resistances, Life and Critical Strike Chance / Multiplier will just do you completely fine!
- +#% to Global Critical Strike Multiplier
- +# to maximum Life (at least 70)
- +#% to all Elemental Resistances
- #% increased Global Critical Strike Chance

Anoint
While Heart of Flame is a little bit behind on Throatseeker or Searing Heat damage-wise, it offers the extra consistency on bosses through the Penetration and offers you some extra Energy Shield leech, which is always nice. I think I would prefer having this over the raw damage or the conditional damage from respectively Throatseeker or Searing Heat. Throatseeker is super cheap though, so while you’re farming / saving up for a  Golden Oil you can temporarily anoint that.
Rings
You’re using a combination of an Elder-base ring with high amount of Life, Resistances and a “Non-Channelling Skills have -9 to Total Mana Cost”. This needs to be an Elder base, because you want it to activate the effect of your second ring, the  Mark of the Shaper. A Mark of the Shaper, when Catalyzed with Caster modifiers, grants up to 90% Spell Damage as well as 25% Elemental Damage, some flat damage to spells, and a decent chunk of Life. This is definitely a piece that’s worth having! In case you’re playing Solo Self-Found, you’re looking for as much damage as you can find on both of your rings.
  Opal Rings are a good start with perhaps some crafted Fire Damage. The affix priority for your Elder-base ring is as follows:
- Non-Channelling Skills have -9 to Total Mana Cost
- Elemental Resistances (until capped)
- +# to maximum Life (at least 70)

Weapon
Spellslinger requires you to use a wand. You really want to find a 1.5 attack speed base (for example, an Imbued Wand). As Spellslinger scales off of Flat Damage on wands, one of your best offensive options on a wand is going to be Fire Damage. On top of that, you really want to get a +# to Level of all Spell Skill Gems. Lastly, you need a Trigger modifier on your wand to automatically proc all of your buffs. As optional modifiers you can look for Critical Strike Chance for Spells and/or Critical Strike Multiplier.
- Trigger a Socketed Spell when you Use a Skill
- +# to Level of all (Fire) Spell Skill Gems
- Adds # to # Fire Damage (110)
- #% increased Critical Strike Chance for Spells
- +#% to Global Critical Strike Multiplier

Shield
This is the last piece of equipment you should be getting. This is, mainly, because it’s a very versatile slot and will be able to fix every problem your gear has whenever you’re done getting your other pieces. Ideally, as you can see in the Path of Building, you want this slot to be a source of Life and damage modifiers only. Stuff like +# to Level of all Fire Spell Skill Gems, #% chance to deal Double Damage, #% of Fire Damage as extra Chaos Damage are incredibly strong and are great scalers to your build. However, if you can’t afford / find gear pieces that fix your Resistances on your other pieces of gear, obviously a shield is a very potent place to fix these problems.
- +# maximum Life (at least 90)
- +# to Level of all Fire Spell Skill Gems (1)
- Gain #% of Cold Damage as Extra Chaos Damage (at least 12)
- #% chance to deal Double Damage (5)

Flasks
I believe flasks are highly preference-based. One isn’t just outright better than another one for specific / certain builds. Obviously, sometimes, there’s a set in stone set of Flasks you should be using just because they synergize with your build so well. I wouldn’t say those really exist in this setup, but I’d strongly advise you to stick with the setup listed here.
The choice of Ascendancy offers us the option to go for a lot of Unique Flasks here as it gives you Elemental Ailment immunity. This means you’re no longer worried about having to find Shock and Freeze immunity on your Magic Flasks. The two Unique Flasks we’re suggesting are  Dying Sun and
  Cinderswallow Urn.
The  Dying Sun offers you additional projectiles, which scales both your Fireball clear speed, Blazing Salvo single target, and some coverage on
  Frenzy to more reliably apply Combustions. I would say this is mandatory for the optimal Clear and single target, but if you’re playing in a Solo Self-Found environment, you can get by without it.
Next up is the omnipresent  Cinderswallow Urn. Since you’re applying ignites with
  Fireball, it’ll automatically activate Cinderswallow’s secondary effect, which increases the damage monsters take by 10%. Obviously, besides that, having a Silver Flask base and the sustain it gives makes it incredible. Very big upgrade!
Otherwise, the none unique Flasks you want to run in this build are a  Diamond Flask which provides you with about 22% more Damage (and 25% Effective Critical Strike Chance). You just can’t go without one if you’re playing a Crit build. Next up, you’re supposed to run a
  Quicksilver Flask, because honestly mobility is just super important. Lastly, as you do sometimes get hit, a panic button in a
  Divine Life Flask is probably recommended.
Regardless of which utility Flasks you go for and whether you follow our recommendations or not, you’ll need to stick to the suffixes we have picked for you (Staunching, Warding). The affixes on your non-unique Flasks can be changed around, but I recommend the following setup (based on the Flask duration, charges, and affix priorities):
Our recommendation:
| Slot | Flask |
| 1 | Bubbling  Divine Life Flask of Staunching Divine Life Flask of Staunching |
| 2 | Chemist’s  Diamond Flask of Warding Diamond Flask of Warding |
| 3 |  Cinderswallow Urn Cinderswallow Urn |
| 4 |  Dying Sun Dying Sun |
| 5 | Chemist’s  Quicksilver Flask of Adrenaline Quicksilver Flask of Adrenaline |
Be sure to check out our Flask Crafting Guide to learn everything you need to know about how to set up your non-Unique flasks.
Jewels
Cluster Jewels
Cluster Jewels generally are not too amazing for your damage but because of the efficiency they have and the amount of Life they provide, they’re still pretty solid for this build.
If you are looking for the most optimal way to acquire your Cluster Jewels, or have any other questions whatsoever about them, such as how to craft or price them, we refer you to our complete guide on Cluster Jewels.
Since this build really likes skill points, and Fire builds generally aren’t that popular, I’d advise you find a  Large Cluster Jewel with 3 Notables. I’d argue that Cremator is your safest bet, as it offers you a decent chunk of damage and some safety against on death mechanics. Additionally, Lord of Drought and Doryani’s Lesson are most optimal to provide some Leech and some extra damage.

For your Medium Cluster Jewels, we opted for two different ones. The first one is a Curse Effect jewel, because it allows you to pick up Master of Fear and Evil Eye, which are both incredible damage multipliers. The second Medium Jewel can provide you with another Cremator, because 30% Fire Damage is pretty nice, Cooked Alive for some extra Fire Resistance Reduction but honestly they can be filled in by whatever notables you can get as long as they provide you with some damage.


Lastly, you’re not going to use rare jewels in your Cluster Jewels but we opted for Small Clusters to bump up our Regeneration and total Life by quite a significant amount! Look for Small Clusters with 2 Passives that offer the Surging Vitality notable.

Glorious Vanity
This is the only kind of small issue you will have in a Solo Self-Found environment, or the only somewhat expensive item you’re really looking to get as soon as you can in a Trade League. This jewel just does so much for your build that, while I wouldn’t call it mandatory, it should be one of the first things you work towards! It’s fairly target-farmable if you play a decent chunk of time, though. Make sure to kill as many Legion encounters as you can, perhaps by getting the Sextants or using some Scarabs if you find some. Whenever you have four emblems, make sure to kill as many Viper Napuatzi bosses in the domain as possible. They have a 25-30 second cooldown, so whenever you killed him, you want to make sure you’re resetting the encounter about 25-30 seconds later so you maximize the amount of times you can kill him in a single 4-Way Emblem fight. If you do this correctly, you will have a really solid chance of dropping a  Glorious Vanity from your first Emblem fight.
Whenever you drop / buy a  Glorious Vanity, you have to make sure it has the sacrificed souls in the name of “Doryani”. You can re-roll this by using
  Divine Orbs on it, so it is pretty much guaranteed once you obtain the item. It grants you the Corrupted Soul Keystone, which makes 50% of all damage (so not only Chaos) bypass your Energy Shield. In turn, it grants you 20% of Maximum Life as Extra Energy Shield, which equates to about 1800 Energy Shield on a solid build. Since you’re regenerating about 1000 Life per Second, and you’re leeching Energy Shield through Notables in the passive tree, you don’t mind spreading the incoming damage at the benefit of getting 20% more effective HP!

Regular Jewels
Because you want to stay relatively tanky, I really like grabbing #% increased Maximum Life on every single one of my Rare jewels, of which this build requires two. Your best modifiers are Critical Strike Multiplier followed by any source of Increased damage. I suggest you grab jewels that have a Life modifier, one critical strike multiplier roll, and one other benefiting modifier.
- #% increased maximum life
- +#% to Critical Strike Multiplier with Lightning Skills
- +#% to Critical Strike Multiplier with Elemental Skills
- +#% to Critical Strike Multiplier for Spells
- #% Increased Spell Damage
- #% Increased Spell Damage while holding a Shield
- #% increased Damage
- #% increased Fire Damage


