POEGuy's Shrapnel Ballista Hierophant Gear & flasks (Poe Mirage)
Summary – TL;DR
This build is very easy to set up because it uses many unique items. Relying on uniques allows you to put the build together faster and saves you a lot of hassle when it comes to character optimization.
Since this is an endgame build designed for difficult content, keep in mind that it’s not cheap. You should have a good amount of Divine Orbs (minimum 120) and a character above level 94 before starting this setup. I’m mentioning these two requirements to help players transition smoothly into the build without any issues.
If you need an in-depth explanation of the gear, click HERE
The setup should look something like this:
| Item Slot | Item Name | Rarity | Notes |
| Head |  Crown of Eyes Crown of Eyes |
Unique | |
| Amulet |  Astramentis Astramentis |
Unique | We have several much more powerful amulet options available for min-maxing. Scroll down for details. |
| Chest | 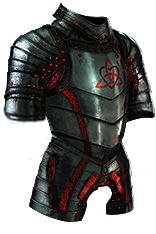 The Iron Fortress The Iron Fortress |
Unique | |
| Gloves |  Maligaro's Virtuosity Maligaro's Virtuosity |
Unique | |
| Boots | 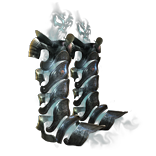 Replica Alberon's Warpath Replica Alberon's Warpath |
Unique | |
| Belt | %Increased Strength Synthesised belt | Rare | Check the Crafting Guide to learn how to make and avoid overpaying! |
| Rings | 2X %Increased Strength OR flat Strength Synthesised rings | Rare | Check the Crafting Guide to learn how to make and avoid overpaying! |
| Weapon | 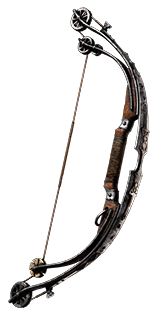 Replica Iron Commander Replica Iron Commander |
Unique | |
| Quiver | Crafted 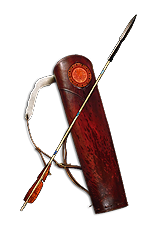 Penetrating Arrow Quiver Penetrating Arrow Quiver |
Rare | Check the Crafting Guide to learn how to make and avoid overpaying! |
We are a Strength stacker – don’t forget that. The more Strength you have, the more Damage you’ll deal and the tankier you’ll become. Most of our items revolve, in some way, around Strength.
Armour Pieces
Helmet
For the helmet, we use  Crown of Eyes. The most important modifier is: “Increases and Reductions to Spell Damage also apply to Attacks at 150% of their value.” This converts all of our Spell Damage gained from the IRON WILL Keystone and the
  Large Cluster Jewel into Attack Damage at an increased value. It also provides a much-needed Accuracy modifier, so try to get one with a decent roll.
Body Armour
For the body armour, we use  The Iron Fortress. This armour grants up to 120 flat Strength, a chance to block Attack Damage based on our Strength, and a solid Armour rating.
  The Iron Fortress also has synergy with our
  Crown of Eyes helmet, thanks to its final modifier:“Strength’s Damage Bonus instead grants 3% increased Melee Physical Damage per 10 Strength.” This modifier enhances the % Melee Physical Damage bonus we get from Strength. All of this bonus damage is then converted into Spell Damage by the IRON WILL keystone, which is further converted back into Attack Damage by
  Crown of Eyes through the modifier:“Increases and Reductions to Spell Damage also apply to Attacks at 150% of their value.” If you need a visual explanation of this interaction, click HERE
Gloves
For the gloves, we use  Maligaro's Virtuosity. These gloves set your Critical Strike Multiplier to 300%, which provides a significant damage boost. Because of this modifier, we won’t invest in Critical Strike Multiplier on our items, skill tree, or gems (it would be wasted entirely). Once you equip these gloves, any additional Crit Multi becomes useless. They also provide some Dexterity, Attack Speed, and Critical Strike Chance.
Boots
For the boots, we use  Replica Alberon's Warpath. These boots grant a significant amount of chaos damage based on our Strength and up to 18% Increased Strength. It might sound strange, but a large portion of our Damage comes from these boots! The more Strength you have, the more flat added Chaos Damage to Attacks you gain. They also provide 25% increased movement speed and some Chaos Resistance. It’s important to note that while wearing these boots, you can only deal Chaos Damage.
Weapon
For the bow, we use  Replica Iron Commander. This is a vital piece for the build, mainly because of this line: “Shrapnel Ballista has +1 to Maximum Number of Summoned Totems per 200 Strength “. Simply put, the more Strength you have, the more Ballista totems you can summon. Be sure to keep an eye on your Strength at all times and aim for key totem breakpoints (1800 str, 2000 str, 2200 str). As you might have guessed, getting extra totems is a big deal!
Remember to use  Blessed Orb on the implicit.
Quiver
For the quiver, we use a crafted  Penetrating Arrow Quiver. We need this base to get an extra +1 Pierce effect. The quiver also needs to have the “Bow Attacks fire an additional Arrow” modifier, high maximum Life, Strength, and some damage-related modifiers (such as Crit, Attack Speed, or added Chaos Damage), along with some Elemental Resistances. Just get the base, and you’ll craft the rest yourself (it’s very easy to craft!).
In order to craft this quiver, you will want to buy a  Penetrating Arrow Quiver with the “Bow Attacks fire an additional Arrow” modifier fractured. Then you will spam
  Deafening Essence of Rage on it until you are happy with the other modifiers. Alternatively, if the fractured base is expensive, you can fracture it yourself using a
  Fracturing Orb.
Jewellery
Amulet
For the amulet, we use  Astramentis. This will solve all your attribute problems (no need to worry about Dexterity and Intelligence) and will also give you a big Strength boost. Make sure to buy one with good rolls, use a
  Blessed Orb on the implicit, apply 20x
  Intrinsic Catalyst, and anoint it.
For the anoint it is mandatory to use: Watchtowers (Indigo, Silver, Silver)
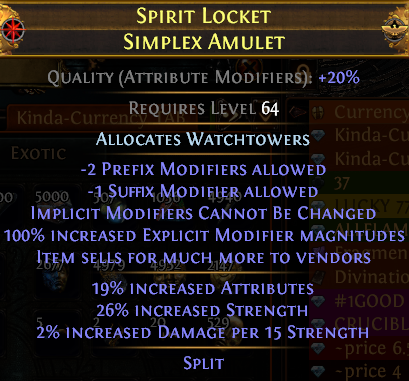
*Know that for min-maxing, you have multiple alternatives here. You can use:  Eyes of the Greatwolf, a % Increased Strength Synthesised rare amulet, or a simplex amulet. However, these are typically much more expensive and harder to find than an
  Astramentis
Rings
For the rings, we use %Increased Strength Synthesised rare rings or flat Strength Synthesised rare rings. Just get the base, and you’ll craft the rest yourself (it’s very easy to craft!). You have an easy-to-follow crafting guide for the rings at the bottom of this page (scroll down to Section 9).
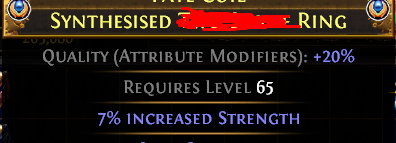
*If you have a very expensive ring, consider using a  Kalandra's Touch to mirror it to your other ring slot.
Belt
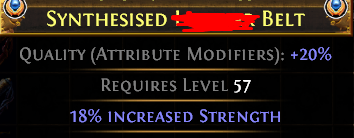
For the belt, we use a %Increased Strength Synthesised rare belt. Just get the base, and you’ll craft the rest yourself (it’s very easy to craft!). You have an easy-to-follow crafting guide for the belt at the bottom of this page (scroll down to Section 9).
Jewels
To avoid mistakes, try to place the jewels exactly where the Skill Tree in Path of Building (PoB) indicates (Remember, you can find the PoB here).
POB Page Shrapnel Ballista Hierophant The build uses the following Jewels: Rain of Splinters (Grants us +2 Extra Projectiles)
 The Light of Meaning with 4% Chaos Resistance ( this will solve our Chaos Resistance problems )
 Watcher's Eye with 7% or 8% “chance to Evade Attack Hits while affected by Grace”. Other modifiers that you can look for: “+#% to Chaos Resistance while affected by Purity of Elements”, “+#% to all maximum Elemental Resistances while affected by Purity of Elements”
 Emperor's Mastery (If it’s too expensive, you can temporarily use a rare jewel with % increased Life, flat Strength, and some Resistances; you can also use temporarily an
  Emperor's Might jewel)
 Lethal Pride with a couple of 5% Strength Nodes / 20 to Strength nodes (If you don’t know how to buy one, I’ve made a mini guide HERE )
- 2x
 Split Personality with +5 to Strength and +40 to Accuracy. (The Accuracy modifier on these jewels is very important, as it helps us cap our hit chance!)
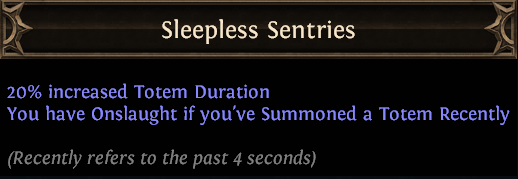
  Medium Cluster Jewel with the notable “Sleepless Sentries” (Gives us permanent Onslaught while mapping!) / Ideal jewel would have for the second passive: “Ancestral Reach” (lets us place the totems farther away from us) and be 4 passives
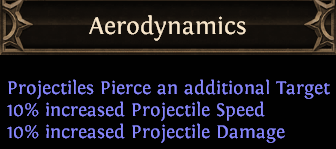
 Medium Cluster Jewel with the notable “Aerodynamics” (Gives us +1 Pierce!) / Ideal jewel would have for the second passive: “Shrieking Bolts” and be 4 passives
 Large Cluster Jewel with 12 Passive nodes. The
  Large Cluster Jewel base needs to say “Added Small Passive Skills grant: 10% increased Spell Damage”

The jewel needs to have a high Strength roll paired with the % increased Effect modifier. In addition to these two mandatory mods, you can look for: All Attributes, Life, % increased Damage, % Elemental Resistances, % Chaos Resistance, etc.- [Optional] You can add an
 Inertia jewel once you hit level 100 (place it near the Elemental Equilibrium Keystone jewel socket). Know that you have this jewel listed in the
  Mageblood version of the PoB.
Flasks
For the Non- Mageblood version
| Slot | Flask | Notes | |
| 1 |  Divine Life Flask Divine Life Flask |
*You need to get one with the “Grants Immunity to Corrupted Blood..” modifier and Instant Recovery | |
| 2 |  Diamond Flask Diamond Flask |
Boosts our Critical Strike chance | |
| 3 |  Quartz Flask Quartz Flask |
Grants us Phasing and increases our Spell Suppression chance | |
| 4 |  Quicksilver Flask Quicksilver Flask |
Helps with Movement Speed | |
| 5 |  Sulphur Flask Sulphur Flask |
Boosts our damage | (You can replace this with  Bottled Faith, or, if you want even more defenses, you can use a Bottled Faith, or, if you want even more defenses, you can use a  Progenesis) Progenesis) |
Suffixes and Prefixes on the flasks are very flexible. You can roll the flasks yourself using  Orb of Alterations.
For the Suffixes look for: “”% Increased Armour During Effect, % Increased Critical Strike Chance During Effect, % Increased Evasion Rating During Effect, % Increased Movement Speed During Effect”
For the Prefixes look for: “%increased Duration”, “%Increased Charge Recovery”, “%Increased Maximum Charges”.
[REMINDER] Apply quality to your flasks! All flasks should have 20% quality. You apply quality using  Glassblower's Bauble
Automate your flasks! All the Magic Utility Flasks should have the Enchant: “Used When Charges Reach Full”
You can get this enchant either by applying  Instilling Orb or by using your Crafting Bench.
For the  Mageblood version
| Slot | Flask | Notes |
| 1 |  Divine Life Flask Divine Life Flask |
*You need to get one with the “Grants Immunity to Corrupted Blood..” modifier and Instant Recovery |
| 2 |  Topaz Flask Topaz Flask |
Roll for 70% increased effect enchant (use  Enkindling Orb) Enkindling Orb) |
| 3 |  Sapphire Flask Sapphire Flask |
Roll for 70% increased effect enchant (use  Enkindling Orb) Enkindling Orb) |
| 4 |  Quicksilver Flask Quicksilver Flask |
Roll for 70% increased effect enchant (use  Enkindling Orb) Enkindling Orb) |
| 5 |  Quartz Flask Quartz Flask |
Roll for 70% increased effect enchant (use  Enkindling Orb) Enkindling Orb) |
Suffixes and Prefixes on the flasks are fixed this time! You will buy them with these specific modifiers:
For the Suffixes, look for: “”% Increased Armour During Effect, % Increased Critical Strike Chance During Effect, % Increased Evasion Rating During Effect, % Additional Elemental Resistances During Effect”. It doesn’t matter which flask has each of these effects: what matters is that you have all four of these modifiers (and with good rolls also)
For the Prefixes, look for: “25% Increased Effect”
More Maxing
Here are some additional upgrades you can make to push the build even further. These upgrades aren’t mandatory in any way; I’m just mentioning them for those who enjoy the build and want to push it even further!
In Patch 3.26, they added the Bound by Destiny jewel. This item can provide an additional 15% Strength if you have two Warlord-influenced items equipped.
The most convenient item slots to obtain this influence are the gloves, the quiver, and the amulet.
- For the gloves, all you need to do is buy any random uncorrupted
 Deerskin Gloves with Warlord influence (if they don’t have influence, you’ll need to slam a
  Warlord's Exalted Orb on them). Once the gloves have the influence, go to the Crafting Bench and select “Reroll the Rarity of a non-unique item,” then use it repeatedly until they transform into
  Maligaro's Virtuosity (the influence will be retained).
 - For the quiver, you’ll need to buy any random
 Penetrating Arrow Quiver and an item level above 70. Then, spam
  Deafening Essence of Rage on the quiver until you hit the ‘Bow attacks fire an additional arrow’ modifier. At the end, if you are an experienced player you can do some meta-crafting, or, if you are newer to the game, simply craft something useful with the bench. You will finish this craft with a
  Warlord's Exalted Orb, which will guarantee Warlord influence on the item.
 - For the amulet, note that the standard simplex amulet used for strength stacking already comes with Warlord influence applied.
Note that these uniques can have corruptions; here are the ones I recommend:
- For the gloves: Attack Speed, Critical Strike Chance for Attacks, or % increased Maximum Life
- For the helmet: +2 to AoE Gems, +2 to Aura Gems, or % increased Maximum Life
- For the boots: % Movement Speed, % Spell Suppression, or % increased Maximum Life
- For the body armour: 1 to Level of Socketed Gems or +2 to Socketed Projectile Gems (remember that
 Shrapnel Ballista at level 22 grants an additional totem)
Lastly, if you decide to buy a simplex amulet, make sure it has the right modifiers! Check the image below.
Crafting
You have an easy-to-follow video crafting guide for the rings, belt, and body armour HERE
In it, I not only show you how to buy your bases properly, but also how to craft them efficiently with minimal investment. (When it comes to rare items, new players tend to overpay significantly.)


