Spellslinger VD (Volatile Dead) & Detonate Dead Necromancer Passive Skill Tree & Gem Links
Life-Based Version or Low-Life Version
As mentioned in the main page of our guide, we decided to cover two variants of this build. There’s a standard Life-Based variant which is the easiest to gear for and League start with and a Low-Life version with a bit more late game scaling, should you think that is required. If you are not an advanced player or are starting in a fresh environment where you have no access to currency, you should really stick to the Life-Based variant rather than trying to get the Low-Life version going without having any currency to back it up.
Passive Skill Tree
Life-Based League-Starter-viable Variant
Again, as mentioned before, this is the version you should pick if you’re either new to the game or don’t have high amounts of currency to back your build up. It hardly requires anything to get going and doesn’t require many  Orb of Regrets in the late game to get you set up. It is an alright build to get through the leveling with and will start shining post Cruel Labyrinth.
You can find an optimized Path of Building here. Every build I release will use the community fork of Path of Building, which is maintained and updated in a much more regular fashion than the original one. You can find PoB’s Fork, by LocalIdentity, here.
If you are not comfortable with Path of Building, we also have a PoePlanner for you. Do note that PoE Planner does not support Cluster Jewels and some specific unique jewels and it is highly recommended you install Path of Building to follow builds most optimally. If you are seeking more information or a more thorough item breakdown, please refer to the Gear page.
Progression Advice
Since it’s vital you improve your build throughout the level-ups and keep dealing an appropriate amount of damage, we’re also going to provide you a lower level option. That way you can feel confident about the way you’re building your character at every step of the way. Obviously, the choices you made until Level 60 were set in stone, as explained in our leveling section.
Next up, we’re going to leave you with a level 80 Path of Building and a Passive Skill Tree give you an indication of how your Passive Skill Tree should look at that point. Obviously, we’ve retained our endgame gear, so don’t worry if yours looks like it has a little bit less damage or Health. I’m sure you will do fine!
Low-Life Variant
The Low-Life variation of this build runs about 30.000.000 damage, making it deal about 4x as much as the Life-Based variation. While it is able to compete with it for effective HP Pool (running around 9000 Energy Shield), it is forced to use a  Prism Guardian. This means you’re not making use of an “Energy Shield gained when you Block” shield, and since we’re Energy Shield-based, our
  Bone Offering‘s “Life gained when you Block” goes to waste entirely. On the upside, however, we do get to run an Aspect of The Spider modifier on one of our Rare pieces. Aspect of the Spider probably is the most underrated Aura in the game, as it provides up to 30% Reduced Movement Speed for Enemies which is an insanely strong defensive mechanic as well as granting basically 15% More Damage. I’d argue that both builds run pretty close when it comes to defenses.
Other than not offering you much extra tankiness, the gear for a Low-Life Variant is incredibly expensive. You’re gonna be dishing out infinite amounts of damage yet are going to have to invest appropriately. Here’s an example Path of Building and PoePlanner for a Low-Life variant of this  Spellslinger Support build.
Its main advantages are that you’ll get to run a  Herald of Ash as well as
  Zealotry and
  Anger, which allows you to go for a Crit route rather than speccing Elemental Overload. Obviously, we’re now looking for High Energy Shield, High Resistance (as there are a lot of Uniques in the build), sources of Critical Strike Multiplier and Generic damage mods on gear. Compared to the fact that we really could be running around with some high Life Rares before, this is a lot harder to gear for.
Gem Links
We will be covering both Low-Life & regular Life-based setups in our Gem Links section. Obviously, as we transition into one or the other, some gems will change.
Pre-Trigger Wand Environment
If you’re League-starting as a  Volatile Dead,
  Detonate Dead Spellslinger, you will probably have to play without a Wand that has the Trigger a Socketed Spell when you Use a Skill modifier.
This greatly alters your playstyle and makes it so you will have to either press some buttons or rely on  Cast when Damage Taken Support setups to mimic the wand. The skills we would generally automate through this wand are
  Bone Offering,
  Wave of Conviction,
  Flammability.
You might have already seen builds put their  Wave of Conviction in a
  Cast when Damage Taken Support link which, honestly, is fine. It won’t cost you too much DPS if you’re using a Level 1
  Wave of Conviction with a Level 1
  Cast when Damage Taken Support. Flammability, however, does really like level ups and thus is less fit to be linked to a low
  Cast when Damage Taken Support. You could run multiple setups to keep guaranteeing the uptime of skills, but I’d generally advise to just run a low level
  Flammability for the time being.
 Bone Offering is the odd one out here. Our entire character is based on having
  Bone Offering up at all times and it’s really not all that impressive at Level 1. I suggest you manually cast it as long as you don’t have a “Trigger Wand”.
 Cast when Damage Taken Support (Level 1)
 Flammability (Level 1)
 Wave of Conviction (Level 1)
Aside from that, use  Bone Offering elsewhere.
Life-Based Variant
Automated Setup in a Wand
After we’ve acquired the aforementioned craft on your wand, you’re going to want the following gems to be socketed in your wand so you can automatically keep all of their buffs up.
Frenzy – Main Skill
 Frenzy will be used to start our chain of Fireballs and Explosions. It can be socketed in any 4-Linked item, as there’s no benefit to putting it in a specific piece of gear. As for your support gems of choice, you want
  Combustion Support,
  Inspiration Support, and
  Barrage Support. The
  Combustion Support support makes it so that when you attack an enemy with
  Frenzy there’s a high chance you’ll Ignite the target. Targets that have been ignited by
  Combustion Support have -19% Fire Resistance, which is a huge buff to our damage.
Next up, there’s the usage of  Barrage Support. The reason why this gem is prevalent is because of the interactions between your skills.
  Barrage Support changes the dynamic of your
  Frenzy, which makes the game check
  Spellslinger Support procs multiple times per single attack. If you were not to run a
  Barrage Support, you would have to attack one time to cast
  Desecrate and then another time to cast
  Volatile Dead and so on. Obviously, casting all of our sequence in a single attack is a lot more convenient as well as just being a more efficient usage of our
  Desecrate Corpses.
Desecrate Spellslinger in a Shield
This setup is used to automatically proc  Desecrate linked to
  Spell Cascade Support to spawn 15 Corpses per cast. These Corpses are used to then consume for things like
  Bone Offering,
  Vaal Detonate Dead, or
  Volatile Dead. I recommend you to socket this in your Shield, as it will always remain a 3-Linked Setup.
Vaal Detonate Dead & Volatile Dead Spellslinger in your Body Armour
This is where the magic happens! Your main 6L and the source of your damage spells. Your body armour will be the home of 2 “Active Skills” and 4 Support Gems. As explained earlier, we’d rather Spellsling some more  Detonate Deads then getting an extra support for
  Volatile Dead. As for the supports that are chosen, we obviously need a
  Spellslinger Support. Next up, a
  Spell Cascade Support is also mandatory as it triples your effective damage (because it spawns more VDs per Spellsling). The last two supports are a little more up in the air. Combining
  Inspiration Support and
  Hypothermia Support is the most consistent way, in our opinion. These are potentially to be swapped out for
  Elemental Focus Support or
  Concentrated Effect Support, but in general we feel like the recommended setup is the most versatile.
 Vaal Detonate Dead
 Volatile Dead
 Spellslinger Support
 Spell Cascade Support
 Inspiration Support
 Hypothermia Support
Note: If you don’t have access to the Charisma anoint or a Helmet with the Spellslinger Reduced Mana Reservation Enchant, you drop Hypothermia and play on 5-Link for now.
Utility Gems
As per usual, you can socket these wherever you feel like. We recommend you run  Cast when Damage Taken Support (Level 17) with
  Steelskin (Level 19) and a
  Vaal Grace (+- Level 10 or as high as you can level it). Next up, you’re going to want to 3-Link a
  Flame Dash somewhere, linked to
  Arcane Surge Support for that nice bonus Spell Damage and
  Second Wind Support because it makes your
  Flame Dash so much more reliable.
Note: Since you’ll be reserving most of your Mana if you’re going for the Charisma option, you’re not going to have enough Mana to cast level 20  Flame Dash. Therefore, you need to keep it at level 1 if you’re opting into this way of dealing with the nerfs. In case you’re going for the Helmet-enchant route, you don’t have to worry about this, and you’re free to level up the gem.
 Flame Dash (level 1 / 20 Quality)
 Second Wind Support
 Arcane Surge Support (level 1)
This should leave you with 2 free sockets in which you can setup your Primal Crushclaw Spectres!
Low-Life Variant
As per usual in Low-Life  Shavronne's Wrappings builds, you’ll be able to run a couple extra Auras. In this particular setup, you’ll be running
  Anger,
  Discipline,
  Zealotry,
  Herald of Ash, Aspect of The Spider and of, course, your three
  Spellslinger Supports. Let’s go over how you should be socketing those for maximum optimization!
Automated Setup in Wand
Nothing changed here. We still want the same three gems as we did in the Life-Based version to be automatically cast whenever we use  Frenzy (
 Bone Offering,
  Wave of Conviction,
  Flammability).
Frenzy Setup in Gloves or Boots
Again, no major changes here. We’re running the exact same setup as we did in the Life-Based Variant for exactly the same reasons. No reason to deviate here.
Desecrate Spellslinger in Helmet
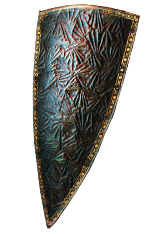
We’re using the same links for  Desecrate, but we can’t optimize it socket-wise by putting them in our Shield, as we’re running the unique
  Prism Guardian and we need to put our Auras in there.
The 4th socket in this link can be used for a  Raise Spectre gem to summon some Primal Crushclaws to optimize the Corpse Explosion damage from both Detonate Dead and Volatile Dead.
Vaal Detonate Dead & Volatile Dead Spellslinger in your Body Armour
I would generally recommend not to change too much here but there’s something to be said about the  Energy Leech Support gem. It has a very tiny amount more damage than
  Inspiration Support and we have plenty of Unreserved Mana since we had to take a lot of Reduced Mana Nodes and items to be able to fix our Auras that are run on our Life Pool.
  Energy Leech Support also obviously has the benefit that it offers you some extra Energy Shield Leech so its definitely something to consider.
 Vaal Detonate Dead
 Volatile Dead
 Spellslinger Support
 Spell Cascade Support
 Hypothermia Support
 Inspiration Support or
 Energy Leech Support
Note: If you don’t have access to the Charisma anoint or a Helmet with the Spellslinger Reduced Mana Reservation Enchant, you drop Hypothermia and play on 5-Link for now.
Auras in Prism Guardian
Since  Prism Guardian allows you to reserve Auras on your Life for cheap, you’ll socket your three main Auras in here.
  Anger,
  Discipline, and
  Zealotry will become a lot cheaper to run this way.
Herald & Utility Skills in Gloves
Disclaimer: the pieces you are socketing your gems in highly depend on where you got your Aspect of the Spider craft. You can’t have Aspect of the Spider on the same item as where you’re socketing your  Herald of Ash because we’ll be linking the Herald to a ###item:Blood-Magic-Support###. If we do so in the item that has the Aspect of the Spider craft, the Aspect will reserve Life instead of Mana and we don’t want that. You could just exchange these links for the
  Frenzy setup or the
  Desecrate setup should you happen to get the Aspect on your Gloves.
You’re going to want your Gloves to be a double 2-Link, as we’re also going to link  Flame Dash and
  Arcane Surge Support. If we however make the
  Herald of Ash linked to the
  Arcane Surge Support it’ll reserve extra Mana and we can’t have that.
 Herald of Ash
- ###item:Blood-Magic-Support###


 Elemental Army Support