TbXie's Poison Tornado Shot Pathfinder Gear, Jewels & Flasks (PoE Necropolis)
Summary – TL;DR
As per usual, nothing matters more than capping your Elemental Resistance before anything else. This means modifiers on gear are subordinate to Resistances as long as you’re not capped. Since you’ll be running a decent amount of Unique items, it’ll be important to look out for a lot of resistances on your Rare pieces! In this particular case however, you should be fine relying on a Flask Affix to get your Resistances sorted just because you’re Pathfinder and finding resistances is so god damn hard in this build.
We’re providing you with an extensive analysis further down the page but chose to start off with an overview / recommendation.
Our recommendation:
| Item Slot | Item Name |
| Head | Rare Helmet with Attributes, Life, Chaos Resistance |
| Amulet |  Zerphi's Heart Zerphi's Heart |
| Chest |  Daresso's Defiance Daresso's Defiance |
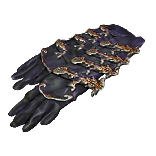
| Gloves |  Asenath's Gentle Touch Asenath's Gentle Touch |
| Boots | Rare boots with Resistances, Movement Speed & Life |
| Belt |  Bisco's Leash Bisco's Leash |
| Rings |  Ming's Heart & Rare Ring to top off attributes/resistances Ming's Heart & Rare Ring to top off attributes/resistances |
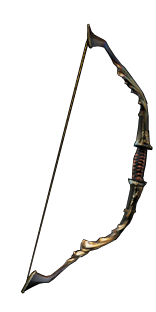
| Weapon |  Darkscorn Darkscorn |
| Quiver | Rare Quiver with Proj Speed, Phys Damage & Damage over Time |
For crafting Rare items, you can check out all the affixes that can roll on an item base, depending on its level, influence, and many other factors, using our affix tool.
Attributes & Resistances
Because of  Zerphi's Heart, the build is super hungry for attributes. I want to point out that it’s important that you can find those anywhere. You can pick up some points on the tree for 30 strength & intelligence, you can shuffle around attributes on your Rare pieces, Cluster Jewels, regular Jewels. Don’t let attributes be your bottleneck. Find them where you can, upgrade to better pieces later.
About resistances, I wanted to point out that the character that I played (and showcase in the video) never had capped Resistances and relied on a Flask to play the game. This was fine. The gear in the PoB is just to showcase one specific way you could cap resistances without Flasks. This is a very endgame thing and you should try focusing on your fixed gearpieces & then get your attributes in and rely on a Flask until you can afford really good pieces to fix this.
Armour Pieces
Helmet
Since I opt for attributes on a helmet, you’ll need an Armour / ES hybrid base because these can roll Intelligence & Strength. Ideally, you find one with the “Tornado Shot fires additional projectiles” enchant & a fractured intelligence or strength roll. You can then use Chaos Resistance Essences (Essence of Envy) to spam until you hit the other attribute and a Life roll. If you decide to not get a fractured base, spam essences until you hit both attributes & craft life on it using the crafting bench. Finish off your item by using Eldritch Currency to get the necessary implicits.

Body Armour
This slot gets filled by the unique  Daresso's Defiance. This gives you a source of Onslaught, but you’re running a Silver Flask anyhow. You’re mostly using this because it’s a solid chestpiece in itsself, and gives you 100% increased Effect of Onslaught and a source of Physical Damage Reduction through Endurance Charges.
Gloves
 Asenath's Gentle Touch is the choice here. They’re irreplaceble because of their ability to make it so you no longer have to aim. You can just shoot somewhere and the entire pack will explode. Make sure to grab a piece which has the +1 to Socketed Gem corruption to boost your auras and more importantly your
  Enlighten Support.

Boots
Another rare slot, which is fairly versatile. Ideally, you want high movementspeed, to further enable the guides speed, combined with high resistances (or perhaps an attribute, opening up affixes elsewhere to get those resistances). Lastly, grab a high Life roll here because we don’t have many of those. Finish off your item by using Eldritch Currency to get the necessary implicits.
Belt
Ideally, you run a  Bisco's Leash but when you’re starting out, and you’re having issues capping attributes, you could grab a
  Heavy Belt and hit it with Intelligence Essences to fix some of your attributes that way. I do not recommend this however.
Accessories
Amulet
 Zerphi's Heart is the item we have build the guide around and should thus be used at all times.
Anoint
You need to anoint Whispers of Doom as it gets you your second curse, meaning you can curse both Despair and the Temporal Chains from your Gloves. If you can’t afford this, at the start, you can still play without the Despair.
Rings
Your first ring is a  Ming's Heart. Grab a high roll one, because they’re cheap anyhow, and catalyse it with Phys & Chaos catalysts to amplify its Physical Damage gained as Chaos.
Weapon
Another unique slot.  Darkscorn is just insane for the build. If you want to invest 200 Divines into the build, there are ways to beat it, but I decided I didn’t deem it worth to cover those in this guide. Try to get a really well rolled Darkscorn as you’ll never be replacing it.
Flasks
I believe flasks are highly preference-based. One isn’t just outright better than another one for specific / certain builds. Obviously, sometimes, there’s a set in stone set of Flasks you should be using just because they synergize with your build so well. I wouldn’t say those really exist in this setup, but I’d strongly advise you to stick with the setup listed here.
In this particular case, most of the Flasks were tailored to amplify the strengths of the build. This means they make u fast, while also getting u some edges left and right versus incoming damage. All of your Flasks should have a prefix which increased their effect. This is because the downside, reduction of their duration, doesn’t matter on a Pathfinder, as you’re getting infinite charges anyhow. The two flasks which grant you your mobility are a  Quicksilver Flask and a
  Silver Flask. Next up, I feel like a
  Sulphur Flask and a
  Jade Flask are the Flasks that suit you the best. Lastly, a
  Dying Sun is mandatory as it gives you not two, but three extra projectiles due to being a Pathfinder.
Optionally, you can replace either the Jade or the Sulphur for a  Divination Distillate if you’re good at keeping it up. This is what I did. If you chose the Distillate route, you should use Master Surgeon as your fourth Ascendancy. If you are going for more standardized Flasks, you use Nature’s Boon to amplify them.
Regardless of which utility Flasks you go for and whether you follow our recommendations or not, you’ll need to stick to the suffixes we have picked for you (Attack Speed, Curse Reduction etc). The affixes on your non-unique Flasks can be changed around, but I recommend the following setup (based on the Flask duration, charges, and affix priorities):
Our recommendation:
| Slot | Flask |
| 1 | Dabbler’s  Silver Flask of the Cheetah Silver Flask of the Cheetah |
| 2 | Dabbler’s  Quicksilver Flask of the Dove Quicksilver Flask of the Dove |
| 3 | Dabbler’s  Jade Flask of the Owl Jade Flask of the Owl |
| 4 |  Dying Sun Dying Sun |
| 5a | Dabbler’s  Sulphur Flask of the Rainbow Sulphur Flask of the Rainbow |
| 5b |  Divination Distillate Divination Distillate |
Be sure to check out our Flask Crafting Guide to learn everything you need to know about how to set up your non-Unique flasks.
Jewels
Cluster Jewels
Cluster Jewels are incredibly potent scalers both for Damage over Time Multiplier, Attack Speed, and much more!
If you are looking for the most optimal way to acquire your Cluster Jewels, or have any other questions whatsoever about them, such as how to craft or price them, we refer you to our complete guide on Cluster Jewels.
Now, because you want to be able to run two Medium Cluster Jewels, you will need a Large Cluster Jewels.
Because they are a source of attributes or resistances, we urge you to try and look out for a 3-stat with an additional benefactor to it. Make sure to stick to the notables mentioned on the jewel, though.

For your Medium Cluster Jewels, we’re running two different ones. The first one is a Flask Cluster Jewel because we want the Alchemist Genius effect from Spiked Concoction. The second one is just a combination of damage modifiers. Again, if possible, grab some with extra attributes / resistances to ease your gearing proces.

Regular Jewels
I would opt to get a life modifier on all of them. Other than that, because of Soul Eater stacks, poison Duration becomes incredible. It beats any other single modifier for damage, but loses to a combination of any two relevant modifiers. So, ideally, you find jewels with Life, Poison Duration & another good damage mod. If you can’t, however, any 3 stat jewels are okay.
Note: You can find Attributes and/or Resistances on these too and you wont need the damage really. So use the slots as you see fit.


