The Burning Man - Righteous Fire Juggernaut Gear, Jewels & Flasks
Summary – TL;DR
As per usual, nothing matters more than capping your Elemental Resistance before anything else. This means modifiers on gear are subordinate to Resistances as long as you’re not capped. Since you’ll be running a decent amount of Unique items, it’ll be important to look out for a lot of resistances on your Rare pieces!
We’re providing you with an extensive analysis further down the page but chose to start off with an overview / recommendation.
Our recommendation:
| Item Slot | Item Name |
| Head | Rare 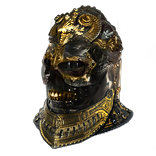 Eternal Burgonet with Supported by L20 Burning Damage & Concentrated Effect, Life Eternal Burgonet with Supported by L20 Burning Damage & Concentrated Effect, Life |
| Amulet |  Replica Atziri's Foible or a well-rolled #item:Marble-Amulet### Replica Atziri's Foible or a well-rolled #item:Marble-Amulet### |
| Chest | 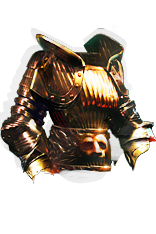 Kaom's Heart Kaom's Heart |
| Gloves | 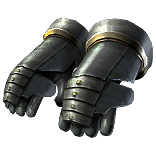 Titan Gauntlets with Fire DoT Multiplier, Life and Resistances Titan Gauntlets with Fire DoT Multiplier, Life and Resistances |
| Boots |  Legacy of Fury Legacy of Fury |
| Belt |  Leather Belt with increased Life Recovery Rate, Life and Resistances Leather Belt with increased Life Recovery Rate, Life and Resistances |
| Rings | 2x  Vermillion Ring with Life, Strength, increased Damage, Resistances Vermillion Ring with Life, Strength, increased Damage, Resistances |
| Weapon | Rare Sceptre with Fire DoT Multiplier, +1 to Level of All Fire Skills, Increased Fire Damage |
For crafting Rare items, you can check out all the affixes that can roll on an item base, depending on its level, influence, and many other factors, using our affix tool.
Armour Pieces
Helmet
This is probably your most important piece of gear, as it is where you socket your  Righteous Fire into. Since RF doesn’t really have many sources of damage amplification, its potential supports are very limited. Hence, most commonly people opt into a
  Kaom's Heart Body Armour, as two of the only supports that affect Righteous Fire are to be found on a Helmet. Most optimally, but hardly ever achievable for most people, you can even create a 7-Link on a Helmet, which is your chase-item and only obtainable through using
  Essence of Horrors. For starters, though, you should focus on getting an Elder Helmet with two Elder modifiers and a really high Life roll.
- Socketed Gems are Supported by Level # Concentrated Effect (ideally 20)
- Socketed Gems are Supported by Level # Burning Damage (ideally 20)
- +# to maximum Life (at least 65)
- Socketed Gems deal #% more Elemental Damage
- +# to Elemental Resistances (until cap)

Body Armour
As I just explained in the Helmet section, there’s only about 5 supports that benefit Righteous Fire whatsoever, and since the best modifiers are on a Helmet, you might as well get a “Fake 6-Link” there. Since the chase modifier in “more Elemental Damage” only appears on Helmets, there’s really no point in trying to get a good Rare chest piece, especially since  Kaom's Heart exists. Kaom’s Heart accounts for about 12% of your total damage, while giving you 1600 Life. Pretty insane I’d say for a chest piece.
Gloves
Since a lot of your items require a specific influenced modifier, and I’m writing this guide from a Trade League perspective (in case you’re in Solo Self-Found, you’re going to have to craft most of it yourself anyway), I’m trying to keep most of the affix requirements pretty light.
This is because, generally, acquiring this influenced modifier with just some Life on top of it is usually fairly cheap. If you start requesting the items to have a lot of Resistances, Attributes or other things, the price skyrockets by quite a bit. You’re going to notice that I usually use a crafted Resistance on most of the showcased gear here, so my suggestion is to try and find items with high Life rolls and the affixes that the item in question needs. If you find one of them with an open suffix, you can freely change around the resistances to your needs.
- +# to Maximum Life (at least 85)
- +#% to Fire Damage over Time Multiplier
- +#% to Resistances (until cap)

Boots
Before anything, if you can afford them, buy  Legacy of Fury.
As per usual, for boots, you ideally want a pair of high Movement Speed and Life boots. Getting some Chaos Resistance won’t hurt you either, as this is a slot that doesn’t require any source of influence.
- #% Increased Movement Speed (25+ but ideally 30)
- +# to maximum life (at least 75)
- +# to Elemental Resistances (enough to cap)

Belt
This an item with some specific needs too! You’re looking for an Elder  Leather Belt to roll increased Life Recovery Rate. This accounts for a decent chunk of your Regeneration, and is a very important piece of the puzzle. Luckily, it is very easy to roll, and thus not too expensive. Otherwise, look for a T1 Life Roll, with potentially some resistances.
As this is a build with a very high emphasis on Life Rolls, obviously you should be catalyzing your Belt & Rings with Fertile (Life and Mana) Catalysts to get most optimal results. Doing this will get you damage, Life and Life Regen and is definitely what you want to be using those Catalysts on!

Accessories
Amulet
Whereas before 3.12 Heist League everyone was using  Marble Amulets with all kinds of different modifiers (Malevolence has reduced Mana Reservation, Fire Damage over Time Multiplier, +1 To Fire Skills and so on) I feel like the introduction of
  Replica Atziri's Foible has completely thrown that out of the window. Imagine getting 400 Total Life and a thousand Life per second from an Amulet slot. I mean, obviously, you can’t not wear this when you have access to it!
At very endgame levels of gear, the little amount of Flat life & Percentage Recovery really gets outshone by a good Marble Amulet. You should compare the numbers for yourself and if the Marble amulet starts getting close in Regen & Life levels, you should get one which has other stats (such as Dexterity, Intelligence, Fire Multi, …) as it makes optimizing your other stats on all other items a lot easier.

Anoint
Whispers of Doom is the anointment of choice. Due to freeing up skill sockets compared to past iterations, we’ve freed up the means to apply two curses on our enemies through  Storm Brand which is where Whispers of Doom becomes the best notable in the game.
Rings
If you’ve read more of my guides, I assume I’m starting to sound like a broken record here but in this case  Vermillion Rings really are what you’re looking for. Again, scaling Life is the best way of scaling our damage, and it gets us Life in the process. It seems like a hard thing to pass up on in my book. If you specifically picked up pieces with open suffixes before, you shouldn’t be needing too much Resistances here, which makes these Rings very obtainable and Self Craftable!
You’re looking for top tier Life and Strength as a baseline, and if you want to completely self-craft them, you can multimod #% increased Damage and whatever Resistances you need afterwards. Obviously, you can also just look for rings with Life, Strength and Resistances and add on a #% increased Damage mod after buying them! Likewise here, you really want to Catalyze your rings as you’re getting a lot of bang for your buck from them!
Affix priorities before catalyzing:
- +# to maximum Life (at least 75)
- +# to Strength (at least 50)
- +#% Elemental Resistances (until cap)
- #% increased Damage

Weapon
You’re using a Sceptre in this slot which has a couple of interesting possibilities to it.
As far as damage on your Sceptre, you want it to have both #% to Fire Damage over Time Multiplier and +1 to Level of all (Fire) Spell Skill Gems. Additionally, you can multicraft it for #% increased Fire Damage and #% increased Damage over Time. Do note that increased Spell Damage does not work for Righteous Fire.
- #% Fire Damage over Time Multiplier
- +# to level of all (Fire) Spell Skill Gems
- #% increased Fire Damage
- Trigger a Socketed Spell when you use a Skill
- #% increased Damage over Time
- #% increased Elemental Damage

Shield
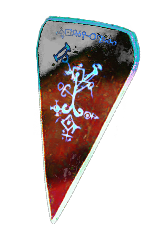 Saffell's Frame is your shield of preference. However, this is not target-farmable in Solo Self-Found, so in that case you will have to resort to the good old
 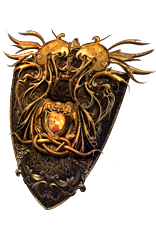 Rise of the Phoenix. Rise of the Phoenix used to be the go-to for Righteous Fire builds, but as Regeneration got more widely available, the necessity for higher Fire Resistance faded and made place for the Saffell’s option which gives you a little bit less maximum Fire Resistances but a great deal of Elemental Damage mitigation.
Atlas Influence Modifiers
With the release of the Siege of the Altas expansion, several easily acquirable implicits were added to the game. I will be listing preferred affixes here for all rare items regardless of whether the guide recommends you to use a rare item in this slot. This, to enable you to make your own choices and gives you a bit more opportunity to play around with rare items, should you so chose.
Gloves
- Fire Damage over Time Multiplier (Exarch) – Uncontestable
- Inflict Exposure on Hit (Eater) – Nice before you have your cluster jewel
- Increased Damage per Strength (Eater)
Helmet
- Increased Flammability or Elemental Weakness Curse Effect (Exarch)
- Physical Damage from Hits taken as Fire Damage (Eater)
- Increased Mana Reservation Efficiency of Skills (Handy in certain circumstances)
Boots
- Maximum Fire Resistance (This is most likely the best, regardless)
- Drops Sapped Ground while Moving
- Increased Damage per Endurance Charge
Body Armour
- Increased Effect of your Curses (Exarch)
- % of Damage taken recouped as Life (Exarch)
- +# to all maximum resistances (Exarch) – Note : Especially good when you transition to Melding of the Flesh
- Malevolence Aura Effect (Eater)
- Less Damage taken per Strength (Eater)
Flasks
I believe flasks are highly preference-based. One isn’t just outright better than another one for specific / certain builds. Obviously, sometimes, there’s a set in stone set of Flasks you should be using just because they synergize with your build so well. I wouldn’t say those really exist in this setup, but I’d strongly advise you to stick with the setup listed here.
In this particular case, none of the Flasks are incredibly mandatory but the first Flask I’ll suggest is a  Ruby Flask. A Ruby Flask basically functions like a Health Potion in this build as Less Damage Taken means more Life Regenerated per second. This approximately gives you about 300 Extra Life per Second while active.
Next up, you’re going to want a  Sulphur Flask because it creates Consecrated Ground which grants 6% Life Regeneration per second while you are on it! Obviously, in a build like this, that can’t be missing.
Besides those two Flasks, which are focused on Regeneration, you’re also going to be running my holy duet of Defensive flasks, a  Basalt Flask and a
  Quartz Flask. I think both of those are incredibly solid as they both do something most builds lack. While Basalts grants you 15% Physical Damage Reduction (which is different from most other sources of Physical Mitigation, and hard to come by) a Quartz gets you effectively 10% more Health in most circumstances. Getting 860 Health effectively sounds pretty appealing to me, at the cost of a single Flask slot!
Additionally, since you’re playing somewhat of a melee build, getting Phasing from the Quartz Flask also allows you to pass through mobs so you can make it to the middle of the pack rather than having your AoE not being able to hit all of the monsters! If you don’t mind that, a Basalt is your most defensive option.
The last flask slot goes to a  Quicksilver Flask. Ideally, this one is set up to push out the most movement speed possible as you wont be the fastest of characters without it! Getting an Alchemist’s roll or at least an Adrenaline roll here is pretty mandatory for the build not to feel too slow.
Regardless of which utility Flasks you go for and whether you follow our recommendations or not, you’ll need to stick to the suffixes we have picked for you (Staunching, Heat, Grounding, Warding). The affixes on your non-unique Flasks can be changed around, but I recommend the following setup (based on the Flask duration, charges, and affix priorities):
Our recommendation:
| Slot | Flask |
| 1 | Experimenter’s  Ruby Flask of the Iguana Ruby Flask of the Iguana |
| 2 | Experimenter’s  Sulphur Flask of the Walrus Sulphur Flask of the Walrus |
| 3 | Chemist’s  Basalt Flask of the Owl Basalt Flask of the Owl |
| 4 | Alchemist’s  Quicksilver Flask of the Cheetah Quicksilver Flask of the Cheetah |
| 5 | Experimenter’s  Basalt Flask of the Moray Basalt Flask of the Moray |
Be sure to check out our Flask Crafting Guide to learn everything you need to know about how to set up your non-Unique flasks.
Jewels
Cluster Jewels
Cluster Jewels are incredibly potent scalers as they provide additional sources of notables / ways to scale the otherwise hard to scale Righteous Fire. Since the Cluster Jewels for Righteous Fire shouldn’t usually be in popular demand, we opted to include pretty optimal ones in the build.
If you are looking for the most optimal way to acquire your Cluster Jewels, or have any other questions whatsoever about them, such as how to craft or price them, we refer you to our complete guide on Cluster Jewels.
Now, because you want to be able to run two Medium Cluster Jewels, you will need a single Large Cluster Jewel. As mentioned, the ones we suggest are pretty optimal and if they are too expensive or unobtainable, you’re free to drop a notable to make them a lot cheaper. The notables you are looking for are Prismatic Heart, Burning Bright and whatever 3rd Notable you can get. There are only 3 options possible and they all are similar in terms of Damage / Utility.

For your Medium Cluster Jewels, you’re looking to grab another Burning Bright, which is just incredibly strong of a Notable for this build, accompanied by Brush with Death which also provides tremendous amounts of damage while also giving you some extra source of Recovery for even more tankiness! One of these Cluster Notables needs to be “Master of Fire” as it’s your only source of Exposure. Great Notables across the board here! Again, since they are usually not the most popular, finding these shouldn’t be a problem.


Watcher’s Eye
The variety of Watcher’s Eyes this build could be running is quite big, but personally I think that you’re better of getting more defenses than killing the boss just a tad faster. If you have a huge chunk of money lying around, you can grab a Watcher’s Eye that has both the “Damage over Time Multiplier while affected by Malevolence” and “Increased Life Recovery Rate while affected by Vitality” modifiers, but otherwise I’d just stick with the Vitality one. You’re never going to kill a boss in 3 seconds anyway and whether you spend 20 seconds or 24 seconds hardly matters at all, in my opinion.
Regular Jewels
Because you want to stay relatively tanky and it provides you with additional damage anyway, I really like grabbing #% increased Maximum Life on every single one of my Rare jewels. Otherwise, there’s only three modifiers that scale Righteous Fire:
- #% Increased Fire Damage
- #% Increased Burning Damage
- +#% to Fire Damage over Time Multiplier
All three of those modifiers equate to approximately the same DPS so I suggest you find Jewels with life and as many of them as possible. Ideally at least two of them should be something that is relatively affordable.

Endgame Optimisation
You could (and should) swap over to a combination of  Rise of the Phoenix &
  Melding of the Flesh to obtain 88% all resistance. Here’s a showcase PoB on how to obtain that : Melding Pob()


