 Druid
Druid Oracle
 Shaman
 Huntress
 Amazon
 Ritualist
 Spirit Walker
 Mercenary
 Gemling Legionnaire
 Tactician
 Witchhunter
 Monk
Monk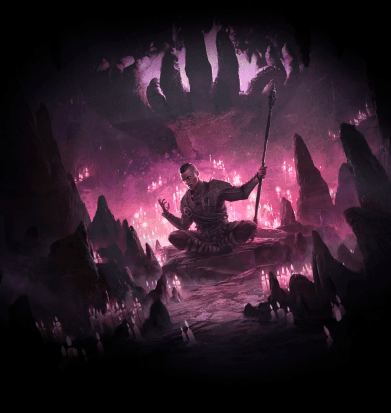 Acolyte of Chayula
 Invoker
 Martial Artist
 Ranger
 Deadeye
 Pathfinder
 Sorceress
 Chronomancer
 Stormweaver
 Disciple of Varashta
 Warrior
 Smith of Kitava
 Titan
Titan Warbringer
 Witch
Witch Blood Mage
 Infernalist
 Lich
Lich Abyssal Lich


Build Introduction
The Acolyte of Chayula Minion Leveling Build tries to smooth out Monk’s notoriously weak Act 1, and then transitions into several powerful minion builds. It clears the early Acts with Physical Wind skills, dashing around, stunning enemies, and uses the Hollow Palm keystone to remove a lot of gearing pressure, making the transition to minions cheap and easy.
This guide was written by GhazzyTV and Lollash. If you have any questions or feedback, you can click on their names to be taken to their Twitch channels, or you can head to the ARPG Vault Discord server for additional help!
Strengths and Weaknesses
- Stuns everything it touches, keeping you safe even in melee
- Rapid clear.
- Very durable late game.
- Has short periods of weakness in campaign.
- Melee is a riskier playstyle.
Ascendancy
Select your first Ascendancy after completing the Trial of the Sekhemas in Act 2. The trial is not difficult, so complete it within the level 20-30 range. During the early access of Path of Exile 2, the Monk can ascend as an Invoker, Martial Artist, or Acolyte of Chayula. You will be choosing Acolyte of Chayula and allocating the following Ascendancy Passives.
- Into the Breach will start spawning flame remnants around you, which will provide a source of Life and Mana sustain, and increased Chaos Damage as you collect them
- Lucid Dreaming – Choice of Power will cause all Flame Remnants you spawn to be purple, allowing you to sustain the maximum 10 stacks for a huge damage boost, which you will share with your minions through
 Selfless Remnants Support.
 - Chayula’s Gift increases your Maximum Chaos Resistance and doubles any Chaos Resistance you have.
General Leveling Advice
Path of Exile II’s campaign can be quite difficult starting out, but with this build it will be a breeze. The most important thing by far in the early campaign is to CHECK VENDORS FOR GOOD EARLY GEAR.
Look for the following gear from vendors:
- Quarterstaffs with higher DPS than you currently have/with sockets for runes (until you take the Hollow Palm Keystone).
- + Added flat damage on Gloves and Rings
- + Level of All Melee Skills on Amulet and Gloves
- Boots with #% increased movement speed
- Any gear with Maximum Life, Resistances, or good Armor or Evasion.
Regal Orbs or Orbs of Augmentation can be used on these items that you find as magic. If you can’t find pieces from bullets 1 or 2 and find yourself struggling, consider buying them off the trade site using Exalted Orbs or gambling for them from the vendors.
Vendor bad Magic or Rare items you don’t need for gold to make sure you can afford the occasional shop purchase or gamble, and the eventual Passive Tree respec later on. White items with sockets or quality can be broken down at the Salvage Bench to get you extra Artificer’s Orbs and Blacksmith’s Whetstones/Armorer’s Scraps. It is always worth identifying Rare items, even if you have to buy a Scroll of Wisdom during Act 1, as Rare items will always gain more value from being identified than a Scroll of Wisdom costs.
Leveling Passive Tree
The Passive Tree below can be followed all the way through the campaign and into the endgame. Remember: You will need to choose which attributes to assign to each travel node based on the requirements of your gear and skill gems.
NOTE: There may be changes to this tree based on new information revealed in the data mine or after playtesting. Make sure you check back to ensure you are getting the latest information.
Skill Gems
Listed below are all Skill Gems that should be used during the leveling process. There may be a slight variation depending on which Act you’re currently progressing. Notes for each Act will be listed below the Skill Gem tool.
Once you reach Utzaal in Act 3 and have completed your second Ascendancy Trial, you will be swapping into your Minion focused gameplay. This will require a significant change in your gem setup, so make sure you save extra Uncut Support and Uncut Skill Gems to facilitate the swap.
Campaign Advice
Act I Notes
Act 1 is a notoriously difficult experience on the Monk. You will get around this by going a little slower than normal, making sure you clear some optional content and being a little adaptive.
After killing The Miller, cut an  Entangle Skill Gem. You will use this as your primary spell when moving through the first few zones to safely damage monsters and slow them down. In Clearfell you will find another guaranteed Level 1 Uncut Gem and you will turn it into
  Killing Palm. If you find a Magic Wand or Staff, you can place it in your second weapon set and assign Entangle to only be usable on Weapon Set 2.
Entangle functions as an excellent tool for setting up enemies into cull threshold range for your Killing Palm, which will dash between monsters to finish them off and generate Power Charges. You can then use  Falling Thunder to deal large amounts of burst damage to enemy Rare or Boss monsters.
If you are lucky enough to find a good Quarterstaff, Gloves, or Rings with some flat damage and are confident, you can just use your  Quarterstaff Strike to deal damage to Bosses much faster, or possibly even one-shot white monsters with Killing Palm… but it is very drop reliant, so this strategy will level that experience out.
After clearing The Red Vale and getting access to your first Level 3 Uncut Skill Gem you will get  Staggering Palm, and will follow up with
  Tempest Bell and
  Wind Blast. With
  Brink I Support your Wind Blast will prime groups of enemies for stun, allowing you to flicker through them with Staggering Palm to stack its buff quickly and finish them off!
 War Banner, earned after completing Freythorn, gives you a powerful attack speed and damage steroid for bossing that can be used whenever it’s charged. After you assign the Hollow Palm Technique Keystone Passive, you will unequip your weapon and never need to equip one again.
That was a lot, so to recap all of that information, here are the rotations through Act 1:
Before The Red Vale
- Cast Entangle to set enemies to low life, then cull them with Killing Palm
- Cast Falling Thunder against tanky Rare monsters, Bosses, or very large packs
- IF you are comfortable, you can close to melee range against Bosses and use Quarterstaff Strike, or you can play it safe and continue to deal damage with entangle from range
After The Red Vale
- Cast Wind Blast to deal some damage, and make enemies Dazed to increase your stun damage against them, priming them for stun.
- Cast Staggering Palm to teleport around and delete packs with
 Impact Shockwave to keep your Staggering Palm Projectile buff active.
 - When fighting tanky enemies:
- Hit them once with Wind Blast to Daze the enemy.
- Build combo by using Quarterstaff Strike (replaced by
 Tempest Flurry at the end of Act)
 - Use War Banner to provide significant boosts to Attack Speed and Damage.
- When you can, cast Tempest Bell on the boss, and then try to strike both the boss and bell with Quarterstaff Strike/Tempest Flurry.
- Hit them once with
Act 2 Notes
Now that you’ve made it to Act 2, everything smooths out. You won’t need to change your play pattern much, and only add one new Skill,  Freezing Mark, which is used alongside the
  Mark for Death Support Gem to allow all physical damage you deal to Bosses to shred armor. This is a significant damage increase, and you should keep Freezing Mark active when killing Bosses.
During the later stages of the Act, you can start keeping an eye out for Minion-related gear, specifically a +Level of Minion Skills Helmet and Scepter, and a defensive option for your offhand. This could be a Focus or Buckler with good defensive affixes. This is to prepare for the swap to the Minion-focused gameplay in the middle of Act 3.
In Act 2, you will gain access to the Trial of the Sekhemas after traveling through the Traitors’ Passage. This build has no problem clearing the Trial early, so you can do it as early as you want to gain access to your first 2 Ascendancy Passive Points. Your first Ascendancy passives will grant you Life and Mana recovery, and an increase in damage with  Into the Breach. When you can, add
  Remnant Potency I to Into the Breach to increase the value of the Remnants you collect.
It is, of course, important that you continue to check the Skill Gems section of the guide to make sure your Support Gems are up to date.
Here is your updated Skill Usage for Act 2:
- Cast Wind Blast to deal some damage, and make enemies Dazed to increase your stun damage against them, priming them for Stun.
- Cast Staggering Palm to teleport around and delete packs with Impact Shockwave to keep your Staggering Palm Projectile buff active.
- When fighting tanky enemies:
- Apply Freezing Mark to gain access to the armor shred from Mark for Death
- Hit them once with Wind Blast to Daze the enemy.
- Build combo by using Tempest Flurry.
- Use War Banner to provide significant boosts to Attack Speed and Damage.
- When you can, cast Tempest Bell on the boss, and then try to strike both the boss and bell with Tempest Flurry.
- Apply
Act 3 Notes
The first part of Act 3 is essentially the same. You will continue to level, upgrade your gear and Skill gems, and add in new supports as they become available. You should save the Lesser Jeweler’s Orb you find in the first zone to be used on your Bind Spectre Gem, and should focus on only leveling Staggering Palm as you save some Skill and Support gems for the swap.
REMEMBER: Keep an eye out for good Minion gear, specifically Helmets and Scepters, and an offhand Buckler or Focus for when you swap to Minions later this act!
In Act 3, you will gain access to the Trial of Chaos. This trial has a lot of randomness in its difficulty, and often it is better to wait until you get to Utzaal and acquire your Spectre gem before attempting this. If you’d like, you can choose to swap into the Minion skill tree and gems before attempting it (but after getting your Spectre) as the Minion playstyle is more forgiving in this particular Trial.
Upon reaching Utzaal, you will be looking to use a  Bind Spectre to capture a Vaal Guard to use as your primary damage minion for the rest of the campaign. When binding your spectre, it is important that you look for a Vaal guard that costs exactly 50 Spirit. These are the monsters that throw grenades, and the Spectre you are looking for.
After ascending and capturing your Vaal Guard Spectre, you will be swapping to a Minion-focused approach. This will require swapping to a Scepter, Minion Helmet, and Shield that you should have been keeping an eye out for and saving during the past two Acts, along with some changes to your support gems. Make sure you check the relevant sections of this guide.
Once you have swapped, you have to decide how to spend your Spirit. Add minions based on this setup:
- As many Vaal Guard Spectres as you can fit
- 2x Skeletal Warrior (if you have a Rattling Sceptre)
- Add 1 each of the following Skeletal Minions to use Spirit that cant be put towards another Vaal Guard
- Skeletal Cleric
- Skeletal Storm Mage
- Skeletal Sniper
- Skeletal Reaver
Your primary Minion damage scaling comes from Into the Breach with Selfless Remnants, so make sure you have this socketed after you swap!
Act 4 and the Interludes
Act 4 is an open-ended experience, allowing you to choose which islands to explore in whatever order you choose. This build doesn’t benefit from completing any of the quests in a particular order, so feel free to complete the islands in whatever order you like!
Other than changing or adding a few new Support Gems, Act 4 is very straightforward. Once you reach the Interludes, you should complete the Third Interlude first, as Lythara, the Broken Spear rewards you with +40 Maximum Spirit, allowing you to increase the size of your minion army
Rotation
Before you swap to a full minion-focused approach, your rotation should look like this:
- Use Staggering Palm as your primary clearing skill.
- Use Tempest Bell and Quarterstaff Strike on anything tanky as your main DPS skills.
- Use Wind Blast to Daze enemies, making them easier to Stun, or when you dont feel safe being in melee.
- Use Freezing Mark with Mark for Death to make physical damage shred armor on Bosses.
- Use War Banner whenever it is charged during boss fights for a large damage steroid.
After the swap to Minions you will instead focus on maintaining these buffs, and positioning safely:
- Use
 Pain Offering to sacrifice a
  Skeletal Warrior or
  Skeletal Cleric to boost the damage of your
  Spectre: Vaal Guard.
 - Use
 Despair to lower the Chaos Resistance of tanky Rare or Boss monsters.
 - Use Freezing Mark with Mark for Death to help with shredding Armor on Bosses.
Gearing Progression
This build equips item upgrades during the campaign according to a stat priority list. You will want to regularly upgrade your Quarterstaff, identifying every one that drops looking for affixes from the list below. Then use your crafting currencies to try to improve any that already have good affixes. Remember, you can always equip a new weapon and check the tooltip DPS value in your skill gem screen to see if its a better
For defenses, focus mostly on improving your resistances and maximum life values, but pay attention to pieces with particularly high evasion and energy shield.
Offensive Gear
Prioritize the following stats to improve your offensive power. Remember that added damage to attacks can also be found on your rings and gloves for even more damage!
- Attack Speed
- Adds # to # Damage (all types are useful, physical being the most valuable especially when combined with…
- % increased Physical Damage
- % increased Elemental Damage with Attacks
Starting in Act 2 you will also need to keep an eye out for good minion gear, specifically checking for +Level of Minion Skills on Amulets and Helmets, and for a good Scepter with these stats:
- +Level of Minion Skills
- % increased Minion Damage
- % increased Spirit
Defensive Gear
Prioritize the following stats on armor and jewelry pieces to improve your defensive power.
- Maximum Life
- Resistances
- Evasion/Energy Shield
Augments
Socket Runes into your gear to help bring your missing resistances to the base cap of 75%, or to help with meeting attribute requirements. For your Quarterstaff, runes that add flat damage are best in the early campaign, and later on runes that grant % increased physical damage are better. Exactly when this happens is highly dependent on your weapon.
You can Salvage gear you would otherwise vendor that has sockets at the Salvage Bench to obtain Artificer’s Orbs to put extra sockets on your gear. This will allow you to frequently use these orbs to add sockets to your best gear pieces, and socket more resistances to make the campaign even easier!
Leveling Uniques
This build is entirely League-Start / no-budget viable. But if you do have extra currency, pick up these uniques for a twink leveling character.
Weapons and Offhands
 Pillar of the Caged God – Very powerful when combined with other Attribute granting uniques, such as the unique belt
  Meginord’s Girdle, but only useful until you take Hollow Palm Technique.
Boots
 Wanderlust – Excellent boots with Move speed and immunity to slows, usable from Level 11.
Helm
 Goldrim – Tons of resistances, usable from Level 10.
Chest
 Foxshade – Grants Movement speed and Evasion, usable from Level 4.
Amulet
 Surefooted Sigil – Increases dodge roll distance, and Evasion after dodge rolling. Usable from Level 8.
Return of the Ancients Mechanics
With the Return of the Ancients update, and its accompanying Runes of Aldur League, there are a ton of new tools being introduced that will dramatically change up itemization. One of the additions is the introduction of powerful runes available at low levels that grant powerful stats for specific builds.
If you are struggling with your character or are running low on currency, you should consider engaging with this mechanic often to earn targeted rewards to help boost your power.
Campaign Buffs
Throughout the campaign, you will encounter several opportunities to gain permanent buffs for your character by completing side-quests. You should choose the following buffs for the Invoker:
- Valley of the Titans Altar (Act 2)
- 30% increased charm charges gained.
- Venom Draught (Act 3)
- 25% increased Mana Regeneration Rate.
- Eye of Hinekora (Act 4)
- Resistances from all three Tattoos.
- Tribal Medicine (Act 4)
- Rakiata’s Lesson (Evasion as Deflection Rating)
- Solitary Confinement (Act 4)
- % increased recovery from Life Flasks.
- Qimah Pillars
- These can be changed at will, so you can choose Resistances to help early and later swap to global defenses, movement speed, etc.
For more details, check the guide on Campaign Difficulties and Permanent Stat Bonuses.
Flasks and Charms
While leveling, you will find several flasks and Charms. Upgrade your flasks as you go along and if you fail to find flask upgrades, check vendors to buy them with gold.
Modifiers to look for on your flasks and charms:
- Health and Mana Flasks
- Prefix: Increased Amount Recovered
- Suffix: # Charges gained per second
- Charm: Stone Charm, Thawing Charm, Staunching Charm
Changelog
- May 29th, 2026: Updated to compensate for Staggering Palm fix
- May 26th, 2025: Guide created for Path of Exile II, Early Access