Ky's Arc Elementalist Build Guide Gear, Jewels & Flasks (PoE Mirage)
Early Game
Foreword to Itemization in PoE
Why is the guide using so many rares and can I use these Uniques?
While a general consensus in ARPGs is that the higher the rarity of an item, the better it becomes, Path of Exile is not necessarily constructed like that. Unique Items can generally be divided into two segments; those who enable a build because they offer a specific effect on them which are then combined with Rare Gear items which compliment the build-enabling item, and those who are placeholders that fix certain things until you can actually upgrade it with better rolls on Rare Gear pieces. Outsides of specific Mechanics, replacing items with random Uniques is not great. However, whenever you feel like they fill your gaps correctly, feel free to use them as placeholders.
Resistances and Attributes
One can never emphasize enough how important Elemental Resistances are on gear. The game is constructed around playing with at least 75% Elemental Resistances and ideally a bit of Chaos Resistances too. Therefore, you should always be looking to cap your Resistances. They should be capped starting from Act V until the end of your progression and you should try to upgrade with Chaos Resistance where you can as you progress through maps. Additionally, people generally have issues finding enough Attributes on builds. Do note that almost every class paths through a passage where they can pick a +30 to Intelligence, Strength or Dexterity and there is no shame in doing so whilst you are still preparing your better gear.
Flasks
Something heavily overlooked by newer and veteran players alike is the strength that lies in your Flasks. As soon as you hit maps, you should have a bunch of  Orb of Alterations and you should try to get some lower tiers of the affixes you want on your Flasks according to the guide you’re following. You should aim to have at least some form of useable Flasks when you’re starting maps and aim to have the right Magic Flasks right around when you enter Yellow maps. Obviously, expensive Unique Flasks can be added in later.
Understanding Gear & Character Progression
Where as all guides generally suggest some kind of specific modifiers on Gear, it’s important that these things are “ideal cases”. Generally, when you start your journey through maps, you wanna aim for mostly Life & Resistances on all of your gear (outside of weapons) just to make sure you’re capped Resistances and have a decent health pool. This will, generally, do you just fine for a while. At this point, you’re still mostly carried by your Skill Gems & Passive Skill Tree. Therefore, make sure that you have all suggested gems when you start doing maps and have fixed your links & sockets when you’re able to. Lastly, do not forget to quality your gear using  Armourer's Scrap‘s. This is a multiplicative bonus to all the defenses found on your item.
Gear Overview
Please note this gear overview is for end game (higher investment level!) you can find step-by-step gear stat suggestions below and in the PoB. Do not skip steps unless you have all the pieces!
| Item Slot | Item Name | Rarity |
| Head | Ancient Mask or Torturer’s Mask | Rare |
| Amulet |  Replica Dragonfang's Flight Replica Dragonfang's Flight |
Unique |
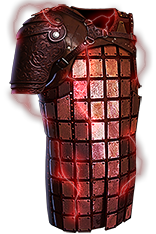
| Chest |  Inpulsa's Broken Heart Inpulsa's Broken Heart |
Unique |
| Gloves | Phantom Mitts | Rare |
| Boots | Ralakesh’s Impatience | Unique |
| Belt |  Crystal Belt Crystal Belt |
Rare |
| Rings |  Cogwork Ring Cogwork Ring |
Rare |
| Weapon |  Void Battery Void Battery |
Unique |
| Shield |  Malachai's Loop Malachai's Loop |
Unique |
Armor Pieces
Below you can find stat suggestions for each item listed in order of importance.
Head
Priority Mods:
- Highest Evasion Rating/Energy Shield Total Possible
- Chance to Suppress Spell Damage
- Maximum Life
Also be sure to look for Resistances!
Amulet
Unique  Replica Dragonfang's Flight with +3 to the level of all Arc gems
Chest
Unique  Inpulsa's Broken Heart preferably with +1 to the level of socketed gems in the endgame.
Gloves
Priority Mods:
- Highest Evasion Rating/Energy Shield Total Possible
- Chance to Suppress Spell Damage
- Maximum Life
Also Look for:
- Dexterity
- Resistances
Boots
Unique  Ralakesh's Impatience with “Count as having your maximum number of Power Charges”
Belt
Priority Mods:
- Maximum Life
- Maximum Energy Shield
- Strength
Also Look for:
- % increased maximum energy shield
- Resistances
Rings
Start off with a crusader  Two-Stone Ring (Cold / Lightning Resistances) or a
  Amethyst Ring with the damage per Power Charge modifier and transition to crafting a
  Cogwork Ring as your budget allows.
Priority Mods:
- adds # to # lightning damage per power charge
- Maximum Life
- Resistances
Also Look for:
- Cast Speed
- Critical Strike Multiplier
Weapon
 Void Battery with a good crit chance and cast speed roll. As a min-max you can look for the corruption implicit “ Damage penetrates #% elemental resistances “
Offhand
 Malachai's Loop – Do not equip this shield until you have a pair of
  Ralakesh's Impatience!!
Flasks
| Slot | Flask | Description |
| 1 |  Divine Life Flask Divine Life Flask |
|
| 2 |  Jade Flask Jade Flask |
x |
| 3 |  Bottled Faith Bottled Faith |
x |
| 4 |  Diamond Flask Diamond Flask |
x |
| 5 |  Quicksilver Flask Quicksilver Flask |
x |
Flask Modifiers
For your utility flasks I will always recommend the prefix modifier x% increased duration. As for your suffix modifiers you want all of the following combination across any of your remaining suffixes:
- % Increased evasion rating during effect
- % increased critical strike chance during effect
- % Increased Movement Speed during effect
For your Life Flasks I recommend either #% increased Amount Recovered, #% increased Charges per use as your prefix and the following as your suffix. The Suffix is much more important than the prefix.
- Grants Immunity to Bleeding for # seconds if used while Bleeding, Grants Immunity to Corrupted Blood for # seconds if used while affected by Corrupted Blood.
Jewels
Look for the following modifiers on your jewels listed in order of priority:
- % increased maximum Life.
- % increased maximum Energy Shield.
- % increased Critical Strike Multiplier for Spell Damage.
- % increased Critical Strike Multiplier with Elemental Skills.
- % increased Critical Strike Multiplier with Lightning Skills.
- % increased global Critical Strike Multiplier.
- % increased Critical Strike Chance mods.

