Bladestorm Berserker Build (PoE Sentinel 3.18)
Introduction
Due to the latest balancing changes, we do not recommend playing this build anymore, as it does not meet the high standards we apply to our guides in terms of fun and performance. We are leaving it up as a reference and it might be revived in a later patch.
 Bladestorm is a relatively recent addition to Path of Exile, first introduced back in Legion League alongside the melee skill and Ascendancy rework. While on the surface it might not appear all that different from
  Cyclone, there are a few key distinctions that make this skill its own.
For starters, the interaction with  Blood and Sand allows you to modify the way the skill works at a fundamental level. Similar to other skills, such as
  Lacerate, the Sand stance is more geared towards clear, while the Blood stance can offer far more impact on lone and formidable targets.
Berserker also got a lot of attention from GGG, and received quite the facelift. No longer a feckless choice of Ascendancy, the new Berserker is a brutal beast that tears apart bosses and maps with savage glee. Boasting a unique Rage mechanic and built-in scaling mechanics, our  Bladestorm Berserker has the potential to be both a league-starter and a late-game leviathan.
Build Assessment
Pros
+ Excellent single-target and bossing capability
+ Phenomenal league starter — functional on low levels of gear and links
+ Decent clear speed relative to average builds — not quite on par with top-tier skills such as  Tornado Shot or
  Essence Drain
+ Viable choice for both Solo Self-Found leagues and Hardcore
+ Unique feel
+ Solid defenses
Cons
– Certain map mods are not possible or difficult to deal with (Physical Reflect, No Leech)
– Slight ramp up time before maximum damage is achieved
– Button heavy and requires constant “stance-dancing” to maximize damage (also a potential positive if you like active builds!)
Path of Building
Path of Building for this build is available here.
Included is the recommended set of mid-game gear, a full skill tree, and all the gem links needed to get the build to tick.
We use the Path of Building Community Fork for all of our builds, which is highly recommended. If you are encountering errors importing the build, please ensure you are using the Community Fork.
Playstyle and Build Mechanics
 Bladestorm is skill with a 360 degree area of attack. Unlike a similar skill that comes to mind (
 Cyclone),
  Bladestorm is not a movement skill, and therefore you cannot move while casting it. It is also not considered a Channelling skill, and is unaffected by gems such as
  Infused Channelling Support. One of the upsides of this skill, however, is that it has two separate incarnations based on whether or not you are in Sand or Blood stance.
Alternating between Sand and Blood Stance:
The playstyle of this build is fairly easy to get a handle of in theory, but it does have a fair amount of button engagement that will keep your fingers and your brain busy. For example, you should use  Blood and Sand to stance dance between sand and blood as needed.
 Bladestorm is a two part attack, but you only really need to concern yourself with the main component, which is when your player spins in place. This is the bulk of your damage. Using
  Bladestorm also creates a secondary effect, known as Bladestorms, underneath your character while it spins. You can have a maximum of three of these storms active at a time, and they deal additional damage and grant your character bonuses based on your current stance. This means there is some ramp up time before you hit peak damage on a boss, but only for a second or two at most.
Sand stance causes your bladestorms to travel forward, and standing in your bladestorms causes you to gain increased movement speed. We usually rely on Sand stance while clearing, as it offers the best speed as we move through an area. Blood stance is used when you have to deal with bosses or particularly dangerous Rares, such as Legion mobs, as it grants additional Attack Speed. Blood bladestorms are stationary, though this does not usually have any significant difference in feel.
To clear, simply  Leap Slam into packs and
  Bladestorm. If your gear is appropriate to the content you are attempting, most packs should die more or less instantly, and you can immediately leap into the next set of enemies. If you encounter tougher targets, like the Syndicate or Legion Rares, you will want to switch to Blood stance in order to gain the additional Attack Speed while you are bladestorming.
Keep  Blood Rage active at all times while you are clearing for additional damage and leech, as well as keeping your Frenzy Charges capped. There is no need to ever place your
  Dread Banner — we simply use it as a means of procuring additional chance to Impale as well as reducing the accuracy of enemies. Cycle your chose Vaal aura as needed. We recommend using
  Vaal Molten Shell, as this can also fit neatly into a CWDT linkage. If you are familiar with the map layout, be sure to have your Vaal skills ready for the boss in advance.
 Vaal Ancestral Warchief is our damaging Vaal skill for significantly boosting boss burst damage. You can even bring out the normal
  Ancestral Warchief for even more damage on bosses that really need the smack down. You can use the
  Vaal Ancestral Warchief while clearing too, although things often die too often for it to be properly effective. It is a fantastic ally against aforementioned tough targets, however, and really brings the pain against Syndicate encounters and the like.
Passive Skill Tree
Click here to see our recommended Level 97 Passive Skill Tree.
For more details on the Passive Tree, skill acquisition order, and more, be sure to check out the Passive Skill Tree page for in-depth information.
Gems
We go over all of the gem links this build uses in the end-game on our Gem Link page.
Ascendancy, Bandits, and Pantheon Powers
Our Ascendancy, Bandit, and Pantheon Powers page goes into detail about all the choices you need to make in these regards.
Gear Summary / TL;DR
These items strike a balance between power and cost-effectiveness. If you want to explore more options for Gear (both budget and high-end), Flasks, or get more information on alternatives and specialty items, please ensure you read the Gear, Jewels, and Flasks page thoroughly.
Our recommendation:
| Item Slot | Item Name |
| Head | Rare  Concentrated Effect Support Helmet Concentrated Effect Support Helmet |
| Amulet | +1 Physical Skill Gems Amulet |
| Chest | Nearby Enemies Explode  Astral Plate Astral Plate |
| Gloves | 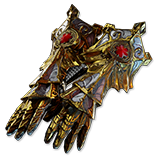 Hands of the High Templar or Rare Hands of the High Templar or Rare  Spiked Gloves Spiked Gloves |
| Boots | Tailwind  Two-Toned Boots (Cold and Lightning Resistances)_ Two-Toned Boots (Cold and Lightning Resistances)_ |
| Belt | Rare  Stygian Vise Stygian Vise |
| Rings | Rare  Steel Rings Steel Rings |
| Weapon | Rare 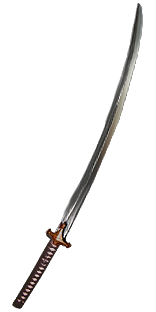 Exquisite Blade Exquisite Blade |
For in-depth recommendations for gear, flasks, jewels, and crafting advice be sure to read our Gear, Jewels, and Flasks page.
Leveling
As a reminder, we have several guides to help you level up a character.
- Our step-by-step leveling walkthrough, which allows even more experienced players to save time and speed through the leveling process.
- Our guide to Unique Items for leveling, which helps you gear up your characters for the leveling process.
- Our beginner leveling guide, which answers many of the questions new players might have and will set you on the right path.
Start out with  Ground Slam, which you should use until Level 12, when
  Sunder can be acquired. Sunder is a fairly potent leveling skill due to its high base damage and ease of use. Your Sunder links, in order of priority, are:
 Sunder
 Melee Physical Damage Support
- ###item:onslaught-support###
 Multistrike Support
 Maim Support
 Ruthless Support
Just use what you can get until the gems become available —  Maim Support and
  Ruthless Support are available very early, along with ###item:onslaught-support###, but you will have to wait until Act II for
  Melee Physical Damage Support.
  Added Fire Damage Support is an option in the meantime, if you are using a
  Tabula Rasa.
 Blood and Sand is available right at Level 4, and should be picked up immediately. Acquire
  Herald of Ash and
  Herald of Purity in Act II to help you level up. You can get
  Pride in Act III after doing Lost in Love and drop
  Herald of Purity.
You can acquire  Bladestorm in Act III after defeating General Gravicius in the Sever the Right Hand quest.
  Bladestorm is viable as a leveling skill — feel free to swap it in immediately, although you may want to utilize some nodes or gems (such as
  Pulverise Support) in order to maximize area of effect, and thus leveling speed.
FAQ
What Annointment Should I Use on My Amulet?
- Fatal Blade is our preferred choice due to its high damage for a single point and versatile offense.
- Panopticon provides the highest possible damage in a vacuum scenario, but can’t be fully utilized while mapping, or against bosses that like to move a lot.
I’m Struggling to Maintain Mana, What Do I Do?
Get % of Physical Attack Damage Leeched as Mana on gear such as Gloves or Rings, or spec into some more Mana Leech on the tree.
What About Vitality Void?
Vitality Void is a great notable but not mandatory by any means. If you feel you need a little more Leech to bolster your build, this can be a great choice to open up a little more defensive potential. It is more of a matter of preference than of objective worth, or lack of.
How About  Kaom's Heart and a 2-Hander?
Entirely possible, but this build is not written for this configuration. Feel free to ask in the comments and we can give you advice on how to facilitate this if you desire!
Check out the rest of the guide for any additional information:


