Moon's Caustic Arrow Occultist Gear & Flasks (PoE Necropolis)
Gearing
Since this build functions without relying on any unique items, the itemisation is straightforward. Up to the end of act 10 you should try your best to accrue some decent bits of gear with Life and Resistances.
While going through the acts, look at rare item drops and ask yourself:
1. Does this base fit my build? (Socket colours and base stats.)
2. If yes, is my item in this slot in need of an upgrade?
3. If yes, pick up and identify.
4. Is it good? Can you use the Crafting Bench in your hideout to make it good?
5. If yes, craft it and wear it.
If the answer is “no” at any point, sell it to an NPC vendor or drop it back on the ground when you run out of inventory space.
Before starting maps it’s likely you’ll have to upgrade a few pieces of your gear that your drops haven’t covered – this is where player trade comes in. Use the official trade tool at https://www.pathofexile.com/trade to search for other players’ items you can trade your orbs for.
Focus primarily on capping your Elemental Resistances and on meeting the attribute requirements of your gems. Despite no unique being needed for the build to function, some strong options are suggested, such as  Mark of Submission for easily weakening enemies with a second curse and
 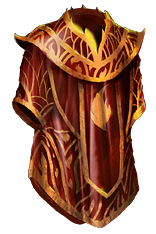 Cloak of Flame which synergises very strongly with
  Determination and serves as your main source of Physical Damage Reduction.
Use this table as a quick reference for gear:
| Item Slot | Item Name | Rarity |
| Helmet | A rare item with Life, Resistances and chance to suppress spell damage. When possible, switch to a  The Devouring Diadem. The Devouring Diadem. |
Rare |
| Amulet | A rare item with Damage over Time Multiplier or +1 to level of All Chaos Skill Gems, but eventually both. Also look for Resistances and Attributes you need. | Rare |
| Chest |  Cloak of Flame is very powerful to start. We upgrade to a rare with chance to suppress spell damage and other defensive stats when possible. Cloak of Flame is very powerful to start. We upgrade to a rare with chance to suppress spell damage and other defensive stats when possible. |
Rare |
| Gloves | A rare item with Life, Resistances and chance to suppress spell damage. | Rare |
| Boots | A rare item with Life, increased Movement Speed Resistances and chance to suppress spell damage. | Rare |
| Belt | A rare  Heavy Belt with Strength, to help us meet all our gems and items’ attribute requirements. Also look for Life and Resistances. Heavy Belt with Strength, to help us meet all our gems and items’ attribute requirements. Also look for Life and Resistances. |
Rare |
| Rings | A  Mark of Submission to enable us to easily apply a second curse to our enemies and a rare ring with Life, Resistances and Attributes. Mark of Submission to enable us to easily apply a second curse to our enemies and a rare ring with Life, Resistances and Attributes. |
Rare |
| Weapon | A 6-linked bow with +2 to Level of Socketed Bow Gems and later with +1 to Level of Socketed Gems also. The dexterity requirement should be kept low. | Rare |
| Quiver | A rare quiver with Damage over Time Multiplier with Attack Skills and increased Damage with Bow Skills. Also look for Life and other DoT stats. | Rare |
Remember you can use horticrafting to change resistance elements on rare items. Make use of the Crafting Bench options for colouring items with unlikely socket outcomes.
If at any point you feel intimidated by the item system in Path of Exile or are unsure about how to proceed or learn more, consult our Beginners Guide to Crafting and Upgrading, which explains the usage of Orbs and socketing mechanics.
The Bow
Your bow is the only item with very strict requirements for its modifiers. Since  Caustic Arrow scales very strongly with gem levels, you’ll want the “+2 to Level of Socketed Bow Gems” modifier at a minimum and to combine it with “+1 to Level of Socketed Gems” as soon as possible.
This can be achieved through the use of a Deafening or  Shrieking Essence of Dread which guarantees the “+2 to Level of Socketed Bow Gems” modifier, by using them on a bow until you hit “+1 to Level of Socketed Gems” – and since the modifier spawned by the essence ignores item level, you can use 6-Linked bows of relatively low item level, such as the Short Bows from
 ![]() The Porcupine Divination Card set. The lowest item level we can use to make this starter bow with Essences is 50.
The Porcupine Divination Card set. The lowest item level we can use to make this starter bow with Essences is 50.
If you have no access to Essences, “+2 to Level of Socketed Bow Gems” requires an item level 64 bow. Use  Orb of Alteration and
  Orb of Augmentation on your bow until you roll “+2 to Level of Socketed Bow Gems”, then use a
  Regal Orb on it and craft any damage over time modifiers you can from your bench, with damage over time multiplier being preferred. Use this bow to farm the relevant Essences and currency to trade for Essences until you get a “+3” bow. This bow will enable you to use
  Empower Support over
  Slower Projectiles Support. Remember to complete Betrayal encounters you face early on to unlock damage over time multiplier crafting from unveiling items with Jun – you can find a guide to this core mechanic here: Immortal Syndicate Guide.
Remember to get a base with a low Dexterity requirement, so that less attribute rolls are needed on your gear. Level 21 Caustic Arrow requires 159 Dexterity – a bow that requires an amount close to that is optimal. I personally like to opt for a 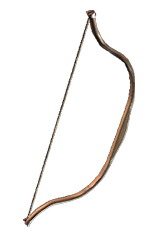 Short Bow or
  Grove Bow for their fastest-in-class 1.50 base attacks per second, though
  Highborn Bow,
 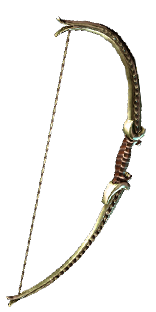 Royal Bow or a movement speed-enhancing
  Reflex Bow are fine alternatives.
You should prioritise getting a Body Armour with extra levels to gems before swapping off of the rare bow and into  Widowhail. If you don’t, your damage will be severely lower. Check the ADVANCED notes in the Body Armour section below for suggested options.
• ADVANCED: Later,  Caustic Arrow is socketed in our Body Armour, and we switch to the unique bow
  Widowhail, which enhances the properties of the quiver we combine it with –
 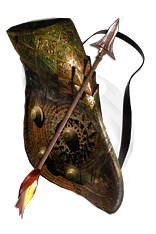 Rearguard. It has a single modifier which can roll from 150% to 250% – when switching to this setup, you should look for one with at least a roll of 213%, as this is the lowest roll that will allow you to cap your block chance at 75% if your Rearguard has rolled its maximum attack block roll of 24%. For a quiver with a block roll of 22% you will need a Widowhail with a roll of 241% to cap your block chance. This is something you must balance with the cost of each item. The highest useful roll of Widowhail for this build is 247%, which is the last breakpoint for a Rearguard with maximum Spell Block chance.
The Quiver
Your quiver should be a rare item and have damage over time modifiers. To start, identify or trade for an item with “increased Damage with Bow Skills” and other useful stats or force the modifier to spawn with a  Shrieking Essence of Woe or similar tier, rolling the item until it has two or three useful modifiers, and then crafting another useful stat on it. Later, look for items that combine this with fractured “Damage over Time Multiplier with Attack Skills”, Life and eventually the Hunter-influenced modifier “+x% to Chaos Damage over Time Multiplier with Attack Skills” modifier.
While the base item of your quiver isn’t crucial, crafting attempts should be made on a 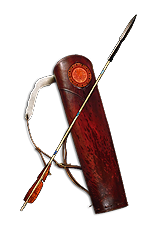 Penetrating Arrow Quiver. Despite the build not investing into accuracy and thus having its arrow usually miss and whizz by enemies, effectively acting as free pierce, it will still hit some of the time, making a small source of piercing valuable as a means of having our arrows consistently arrive where we clicked.
• ADVANCED: In an advanced progression stage, after solidifying the rest of the gear set, we switch to the unique quiver  Rearguard, which is a highly defensive quiver with “chance to block” modifiers. These are multiplied more than threefold by the unique bow we combine it with –
  Widowhail. Its “Chance to Block Attack Damage” modifier should be at a minimum 22% so that a high roll of Widowhail can reach your block chance cap of 75%. Ideally, it would be 23 or 24% to make it easier to cap with a cheaper bow, since high rolled bows are much pricier. The “Chance to Block Spell Damage” modifier is the second most important roll on it, and you’re looking for the highest roll you can afford after you make sure that the attack block roll in combination with your Widowhail will cap your block chance.
Every other modifier is nice to have a high roll of, but relatively low priority to block. “+x% chance to Suppress Spell Damage” as well as “Bow Attacks fire an Additional Arrow” corrupted implicits on Rearguard are also amplified by the bow, making attacks shoot 2 extra arrows or lowering stat pressure on your gear. The latter allows dropping  Greater Multiple Projectiles Support from your
  Frenzy gem links, and is used from the Advanced setup onwards.
Armour Pieces
Body Armour
While not an essential unique item, a  Cloak of Flame is the most cost-effective and easily accessible Body Armour during early progression. Because damage reduction from armour is more effective the less damage we take, converting 40% of incoming physical damage to fire means that we use
  Determination and a
  Granite Flask much more effectively to tank the remaining 60%, while the converted portion is mitigated by our Fire Resistance. If a Cloak isn’t available to you, use a rare item with base Armour and Evasion and high defence rolls.
When moving into the Midrange setup, a rare body armour with base Armour and Evasion Rating will outperform any affordable unique option. An item with a tier 2 or higher roll of fractured “Chance to Suppress Spell Damage” should be acquired – select a high-level base: a 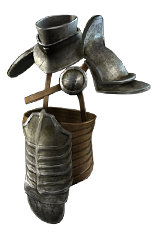 Triumphant Lamellar,
 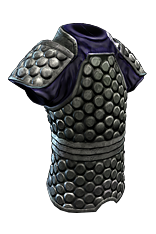 Desert Brigandine,
 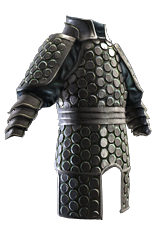 General's Brigandine or, preferably, a
  Full Dragonscale. Should these prove too expensive, any base equal to or better than a
 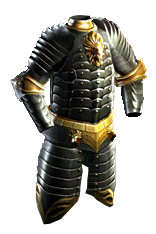 Full Wyrmscale with an item level of 72 or higher will be sufficient but should not be used as a base for crafting the body armour described in the advanced section below.
To craft this item cheaply, make it a rare with a  Regal Orb and use a
  Dense Fossil in a
  Primitive Chaotic Resonator until you get a good combination of Defence modifiers and Elemental Resistances, then craft the modifier “x% of Physical Damage from Hits taken as Fire/Lightning Damage”. This crafted modifier is unlocked by unveiling items dropped by Gravicius in Betrayal encounters. When you’re done, roll Eldritch implicit modifiers with
  Lesser Eldritch Ember and
  Lesser Eldritch Ichor or higher the highest tier of eldritch currency you can afford. Look to combine the Searing Exarch’s “increased Effect of non-Curse Auras from your Skills” and the Eater of Worlds’ “Determination has x% increased Aura Effect”.
• ADVANCED: In this setup, we switch our bow and quiver to  Widowhail and
  Rearguard, as explained above. Since the bow we use no longer grants gem level modifiers, we need to craft a new Body Armour that does. A good crafting base and fossils from the previous step may be reused – combine a
  Dense Fossil with
  Faceted Fossil in a
  Potent Chaotic Resonator to produce a Body Armour with “+1 to Level of Socketed Dexterity Gems” (to boost
  Caustic Arrow) or “+1 to Level of Socketed Strength Gems” (to boost
  Empower Support), two Defence prefixes, some useful suffixes, and an open slot for crafting “x% of Physical Damage from Hits taken as Fire/Lightning Damage”. Depending on your current spell block, you may want to reroll your Eater of Worlds implicit to “Chance to Block Spell Damage” at this point. Another option at this budget level is to trade for a body armour with spell suppression that has been corrupted with any combination of “+1 to Level of Socketed Gems”, “+2 to Level of Socketed Projectile/Duration/AoE Gems” and linking its sockets with a few
  Tainted Orb of Fusing.
• VERY ADVANCED: We switch our Body Armour for a  Skin of the Lords with the Mind Over Matter keystone. Naturally, this is an item of very limited availability, and its sockets cannot be modified, limiting supply further. The socket colours to look for are G-G-G-G-R-B and the preferable G-G-G-G-G-R. The first combination allows socketing
  Efficacy Support which can be swapped for
  Concentrated Effect Support for bossing; the second combination allows for
  Awakened Vicious Projectiles Support to be socketed instead.
  Awakened Arrow Nova Support is swapped for
  Awakened Swift Affliction Support for bossing in both colour combinations.
• ULTRA ADVANCED: If available, a  Dialla's Malefaction with a gem level corruption is used. This is a very rare and expensive item, beating the DPS of a Skin of the Lords setup by a moderate amount when it has a single corruption and by a large amount with two favourable corrupted implicit modifiers. A colour combination of RRRRGG is preferred, and gems can be swapped freely due to the unique item’s modifier. However, it comes with the downside of losing the survivability granted by Mind Over Matter. This version is intended only for very experienced players.
Helmet
The helmet used should be a rare item with Life, Resistances, and Chance to Suppress Spell damage, with base Evasion and Energy Shield.
This is due to only items with base Evasion Rating being able to spawn “Chance to Suppress Spell Damage” modifiers, which will be needed during early gearing to get our suppression chance as close to the 100% cap as possible. Remember to allocate the suppression mastery “Chance to suppress spell damage is lucky.” if you are not at 100%.
Secondly, base Energy Shield is important so that we can pay for the cost of our skills with Eldritch Battery, having special regard for the cost of Malevolence linked to Divine Blessing, which should be kept at the lowest level that your ES pool can sustain. If you’re having trouble with skill costs, allocate the life mastery “Skills Cost Life instead of 30% of Mana Cost”. A crafting base with fractured spell suppression may be useful to craft on and is usually readily available.
The Eldritch implicit modifiers to look for in the helmet slot are the Searing Exarch’s “increased Despair Curse Effect” and the Eater of Worlds’ “x% of Physical Damage from Hits taken as Fire/Lightning/Cold Damage”.
From the Midrange setup on,  The Devouring Diadem is the helmet of choice, allowing more auras and providing extremely high Life and Energy Shield recovery every 5 seconds, as long as there are corpses nearby. The main aura skill group will be socketed in your helmet from this point onwards. One of the modifiers on the Diadem is unveiled, meaning it is variable; look for versions with resistances or attributes as needed.
• ULTRA-ADVANCED: In the Ultra-Advanced setup, a “Socketed Skill Gems get a 90% Cost & Reservation Multiplier” corruption is used to make Defiance Banner fit into the mana pool in lieu of a  Culling Strike Support gem on
  Frenzy. This is an extreme optimization and intended only for very experienced players.
Gloves
For the same reasons explained above in the helmet section, the gloves used should be a rare item with Life, Resistances, and Chance to Suppress Spell damage, with base Evasion and Energy Shield. Additionally, the modifier “increased Damage during any Flask Effect” may be crafted onto gloves. A crafting base with fractured spell suppression may be useful to craft on and is usually readily available.
The Eldritch implicit modifiers to look for in the glove slot are the Searing Exarch’s “+x% to Chaos Damage over Time Multiplier” and the Eater of Worlds’ “+x% chance to Suppress Spell Damage”.
Boots
Logically, the boots used should also be a rare item with Movement Speed, Life, Resistances, and Chance to Suppress Spell damage, with base Evasion and Energy Shield. Additionally, once unveiled the modifier “x% increased Movement Speed/chance to gain Onslaught for 4 seconds on Kill” may be crafted onto boots without a Movement Speed prefix. A crafting base with fractured spell suppression may be useful to craft on and is usually readily available.
The Eldritch implicit modifiers to look for in the boots slot are the Searing Exarch’s “x% increased Action Speed” and the Eater of Worlds’ “x% increased Warcry Speed”.
• ADVANCED: In the later setups, they may be crafted with  Deafening Essence of Torment, which when combined with the Searing Exarch’s “chance to Avoid being Shocked” implicit can reach a total of 100% chance to Avoid being Shocked; this can be applied to other all elemental ailments through the use of a
  Stormshroud unique jewel, which enables the usage of the Solaris pantheon powers. Boots are also one of the most likely items to be beast crafted with the suffix “Grants level 20 Aspect of the Spider Skill”, a strong but optional effect that weakens enemies around your character but reserves mana, consequently requiring a level 4
  Enlighten Support gem,
  Awakened Blasphemy Support, and a 25% increased effect mana reservation efficiency Small Cluster Jewel that adds 3 passives.
Jewellery
Amulet
The amulet used should be a rare item, initially with “+x% to Damage over Time Multiplier” or “+1 to level of All Chaos Skill Gems”, but eventually both. Also look for Resistances and Attributes you need. A Citrine Amulet base is preferred, since it combines the two attributes we’re most likely to be low on, but an Amber Amulet is just as solid of a base.
The amulet should be anointed with the notable passive “Corruption”.
(Crimson Oil + Black Oil + Black Oil)
• ADVANCED: In the late game, a “+2” Amulet with the additional modifier of “+1 to Level of All Skill Gems” should be acquired, but not without damage over time multiplier. This item can be traded for or crafted deterministically for a moderate amount of currency.
To craft it:
1. Acquire a  Citrine Amulet or
  Amber Amulet with a high roll of fractured “+x% to Damage over Time Multiplier”.
2. Use  Orb of Alteration on it until you roll “+1 to Level of All Skill Gems”. This will take an average of 2000 orbs of alteration.
3. Use a  Regal Orb on the item to make it rare.
4. A) If the Regal Orb added a suffix, craft “Prefixes Cannot Be Changed” from the Crafting Bench.
B) If the Regal Orb added a prefix, craft “Can have up to 3 Crafted Modifiers” from the Crafting Bench, then “Prefixes Cannot Be Changed” also.
5. Use the Horticrafting Station crafting option “Add a new Chaos modifier and remove another random modifier from a non-Influenced item”.
6. Optionally, you may now craft “Prefixes Cannot Be Changed” from the Crafting Bench and use Horticrafting options to Reforge the item’s suffixes. “Reforge a Rare item with random modifiers, including a Chaos modifier” will always result in a chaos resistance roll.
When running Mind Over Matter (usually through  Skin of the Lords), “Disciple of the Slaughter” should be anointed instead, and the usage of
  Blood Rage discontinued, so that it does not interfere with our ability to pay for skill costs in situations where our recovery sources are reduced or there are no corpses for
  The Devouring Diadem to consume, such as boss arenas.
Rings
Early on, while not mandatory, we opt to use a  Mark of Submission to apply a secondary curse. On the other hand, modifiers on rare rings will be a major source of Resistances and Attributes and their base type should grant some form of resistance also.
From the Midrange setup onwards, we use no unique rings, opting for two rare items instead, one of which should be an  Unset Ring. When
  Iolite Ring bases become available with good, fractured suffixes, one should be acquired and crafted with an
  Essence of Delirium for an extra source of scaling.
• ADVANCED: To craft starting from a ring with a fractured suffix modifier:
1. Use an  Essence of Delirium to guarantee “+x% to Damage over Time Multiplier” and roll the item until you find a final useful suffix modifier, such as a resistance or attribute.
2. Craft “Suffixes Cannot Be Changed” from the Crafting Bench.
3. Use a Veiled Chaos Orb on the item.
4. Craft “+x to maximum mana” from the Crafting Bench.
5. Unveil “+x to maximum Life/Regenerate x Mana per second”.
6. Craft “x% increased Damage” from the Crafting Bench if possible.
When you use a  Veiled Chaos Orb there is a very small chance that the item is reforged with 3 prefixes. This means that you’ll be unable to block certain undesirable unveil modifiers by crafting mana, but it’s still possible to unveil life. If this fails, you may want to try your luck with an
  Orb of Annulment to open a prefix and start from step 2. If this fails, start from step 1.
Belt
The belt is the most straightforward item slot. You need a  Heavy Belt with a Strength roll. Any additional Resistance modifiers are welcome, and a strong belt can be easily crafted with the use of Essences, especially when starting from a base with a fractured modifier. At the very start of the gearing process, you can compensate for the lack of Strength with +30 Strength notables on the passive skill tree, but this situation should be avoided, as levels are very valuable for this build.
Getting a strong belt early on simplifies gearing for all stages to come, since the only truly paradigm-changing upgrade is the extremely expensive and sought-after  Mageblood in the Ultra-Advanced version of the build, where budget does not present a barrier.
Flask
While levelling, flasks are of utmost importance to the damage of  Poisonous Concoction. The same is true after the switch to
  Caustic Arrow, but for different reasons: flasks become the largest defensive layer for many builds in maps. They provide base defences to be further scaled, and temporary immunity to lethal effects such as Corrupted Blood, Bleeding and Freeze.
As such, an example flask set and their suffixes in order of preference is presented in the table below. Repeat suffixes do not stack, so look for a different one on every flask.
| Flask Base | Desired Suffix |
 Granite Flask Granite Flask |
1. “x% increased Armour during Effect”, 2. “x% increased Evasion Rating during Effect”, 3. “Immunity to Freeze and Chill during Effect”. |
 Jade Flask Jade Flask |
1. “x% increased Evasion Rating during Effect”, 2. “x% increased Armour during Effect”, 3. “Immunity to Freeze and Chill during Effect”. |
 Silver Flask or Silver Flask or  Quicksilver Flask Quicksilver Flask |
1. “x% increased Movement Speed” 2. “x% increased Attack Speed”. |
 Quartz Flask, Quartz Flask,  Basalt Flask, Basalt Flask,  Sulphur Flask Sulphur Flask |
1.“Immunity to Freeze and Chill during Effect” 2. “x% increased Attack Speed”. |
 Divine Life Flask, Divine Life Flask,  Eternal Life Flask Eternal Life Flask |
1.“Immunity to Bleeding and Corrupted Blood during Effect”. |
No specific prefix is important to get but avoid any that reduce the effect or duration of the flask if you can.
Remember to automate your flask usage through the use of  Instilling Orb enchantments or their respective crafting recipes in the Crafting Bench, unlocked after Act 10 in the Epilogue. “Used when Charges reach full” is a strong and popular option.
A  Quartz Flask should only be used if your chance to suppress spell damage is low. In the late-game, strong unique options are available for the slot occupied by the Quartz/Basalt/Sulphur Flask:
 The Overflowing Chalice
 Taste of Hate
 Dying Sun
• ADVANCED:  Progenesis
Jewels
Regular Jewels
To start, look for Jewels with a combination of the following modifiers, in order of preference:
1. +x% to Chaos Damage over Time Multiplier
2. +x% to Damage over Time Multiplier
3. %x increased maximum Life
To craft these yourself, look for a  Viridian Jewel with a fractured roll of “+x% to Damage over Time Multiplier” and craft them with a combination of an
  Aberrant Fossil and a
  Pristine Fossil. Alternatively, craft them only with Aberrant Fossils and use an
  Exalted Orb for a 1/16 chance of “x% increased maximum Life”.
Don’t shy away from using resistance and attribute rolls on jewels early on, instead of two damage modifiers, but look to replace them as you progress through the endgame.
Cluster Jewels
Large Cluster Jewels
The Large Cluster Jewels you choose to use should have “Added Small Passive Skills grant: 12% increased Chaos Damage” and add as few passives as possible, meaning that 8 added passive skills is optimal, saving you the most passive skill points. Ideally, these should have 3 Notable nodes relevant to Chaos Damage or Damage over Time.
To craft them, repeatedly use an  Aberrant Fossil in a
  Primitive Chaotic Resonator. Jewels with an item level of 67 or below are the easiest to craft through this process, having a 1/6 chance of success per attempt.
Medium Cluster Jewels
There are two strong options when crafting medium clusters. When looking for bases, avoid any that add more 4 or 5 passive skill points (5 is functionally identical to 4 because you can always take the short path to the jewel socket).
The affordable and quick option is to craft on a base with “Added Small Passive Skills grant: 12% increased Chaos Damage over Time”. These should have 2 Notable nodes relevant to Chaos Damage or Damage over Time and can be crafted with the same Aberrant Fossils used for the Large Cluster Jewels.
Your second option is to craft on a base with “Added Small Passive Skills grant: 10% increaed Damage over Time”. Because the “Flow of Life” notable is particularly desirable and has better of spawning on these jewels, they’re the preferred option for a balance of damage and survivability. These can be rolled with a  Pristine Fossil until you get “Flow of Life” and another relevant damage notable skill.
Small Cluster Jewels
• ADVANCED: Small Cluster Jewels find their place only in the Advanced setups, to enable using Aspect of the Spider in the Advanced and Very Advanced setups, and  Defiance Banner in Ultra Advanced. They should add the maximum number of 3 small passives and have no notable nodes. They require an “Added Small Passive Skills have 25% increased effect”, which is bumped to 35% in Ultra Advanced and only rolls on item level 84 and above jewels.
Unique Jewels
No unique jewels are required for this build. However, strong options exist and are recommended if available:
1.  Stormshroud – once endgame boots have been acquired.
2.  Impossible Escape for the “Precise Technique” Keystone – Allows the allocation of Farsight, Entrench, Thick Skin and the small but useful node “Evasion and Phasing”.
3.  Watcher's Eye – with the “x% to chance to Suppress Spell Damage while affected by Grace” modifier at a minimum. Combining other useful modifiers represents a worthwhile but high increase in the jewel’s price.
4.  The Adorned – despite requiring special care when setting up all other regular jewels, it is the single most powerful way to scale them in the end-game.
These are considered feasible within the Advanced variants provided in the included Path of Building.


