TbXie's Penance Brand of Dissipation Elementalist Gear, Jewels & Flasks (Poe Necropolis 3.24)
Summary – TL;DR
As per usual, nothing matters more than capping your Elemental Resistance before anything else. This means modifiers on gear are subordinate to Resistances as long as you’re not capped. Since you’ll be running a decent amount of Unique items, it’ll be important to look out for a lot of resistances on your Rare pieces!
We’re providing you with an extensive analysis further down the page but chose to start with an overview/recommendation.
Our recommendation:
| Item Slot | Item Name |
| Head | Rare Suppression Helmet with Double Reservation Efficiency |
| Amulet |  Replica Dragonfang's Flight Replica Dragonfang's Flight |
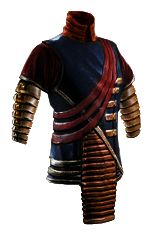
| Chest | Rare Suppression ES/EV Sadist Garb |
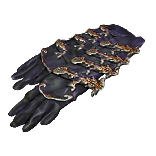
| Gloves |  Asenath's Gentle Touch w/ Elemental Weakness on Hit Asenath's Gentle Touch w/ Elemental Weakness on Hit |
| Boots | Rare Suppression Boots with Resistances, Life & Movement Speed |
| Belt |  Headhunter or Headhunter or  Bisco's Leash Bisco's Leash |
| Rings |  Polaric Devastation & Polaric Devastation &  Pyre or Rare Ring Pyre or Rare Ring |
| Weapon | Rare Wand w/ Levels to Gems, Fire Damage, DoT Multi, Cast Speed |
| Shield | Rare ES/EV Suppression Shield with Resistances & Life |
For crafting Rare items, you can check out all the affixes that can roll on an item base, depending on its level, influence, and many other factors, using our affix tool.
Armour Pieces
Helmet
Like most items in this guide, you’re going to start from a Fractured base and use Essence to either finish the item or move on to the next step. In this particular case, you’ll stop at essences. You’re on the hunt for a Helmet with a fractured Spell Suppression Chance. Afterwards, you’re going to be hitting it with  Screaming Essence of Loathing or
  Deafening Essence of Loathing until you hit at least 1 high resistance, either high Life (65+) or a Good Flat or Percent Evasion Roll. Whichever of those two is lacking, can be crafted on the bench. Finish off the item by using Eldritch Ichors. You’ll need to use Grands for the Reservation Implicit, as otherwise, you won’t be getting 8% and you won’t be able to reserve all your Auras.

Minmaxing
Combining Deafening Essences & high Ichors to grab 20% Reservation Efficiency here with an Enlighten level 4 on your Main Auras will allow you to squeeze in a Defiance Banner. This should only be done at high optimizations as it will be a lot more expensive to craft & obtain those things for a small benefactor.
Body Armour
Again, you’re going to start from a Fractured base with Spell Suppression Chance. Ideally, you’re grabbing a  Sadist Garb base but a
  Lacquered Garb is potentially acceptable if Suppression base Sadist Garbs are too hard to obtain. Again, you’ll be hitting it with
  Screaming Essence of Loathing or
  Deafening Essence of Loathing until you hit at least 1 high resistance, an open prefix and a combination of ES/EV modifiers which get you at least 150 Energy shield and 650 Evasion. Finish off your chest piece by crafting the “Damage taken as” craft on the crafting bench. Lastly, use Eldritch Ichors to finish it off with Aura Effect & Grace Aura Effect.

Gloves
You’ll be using  Asenath's Gentle Touches to enable your chain explosions. Grab a pair with Elemental Weakness on hit corruption to facilitate an automated curse.
Boots
As per usual, you start from a fractured Suppression Base. Afterwards, hit it with  Deafening Essence of Envy or
  Screaming Essence of Envy until you hit a desired 3rd prefix (high resistance). When that’s done, craft suffixes cannot be changed on the bench, use a
  Veiled Chaos Orb and craft Mana. Then go unveil your veiled modifier, you should be guaranteed a source of movement speed. Finish of the craft by crafting Life on the crafting bench and use ichors to get both Golem Buff Effect & Physical as Extra.
!https://i.imgur.com/7JLsKXL.png
Belt
 Headhunter is definitely the chase item here. Until you can afford one,
  Bisco's Leash gives you some useful stats & rampage, which will speed up your clearspeed.
Accessories
Amulet & Rings
Your amulet slot is going to be locked in by  Replica Dragonfang's Flight. Depending on which essences you used for your reservation, this will either need to be 7-10% reservation efficiency. Make sure you get one with +3 to level of Penance Brand gems, as it will otherwise not do anything for your gems.
Anoint
Anointing Charisma is mandatory to run all auras.
Weapon
The Weapon is the hardest item to obtain in this gear set as it is very common for people to just vendor items we need which are “cheap”. No one is going to be keeping an item that has +1 Lightning Spell skills and Ignite Modifiers because Lightning Skills generally don’t ignite. Ideally, you’re looking for a +2 Wand, which you can find numerous crafting guides for. Getting those, starting from a Fractured Suffix (For Example Fire DoT Multi) would land you a pretty good wand at a medium budget as you’ll be able to craft Cast Speed to finish it off.
Earlier on, try to find a Wand with either +1 to Physical or Lightning Skills and a combination of Fire Damage, Fire Damage over Time multiplier & Cast speed.
Shield
Again, start from a Fractured Spell Suppression base. It needs to be Energy Shield / Evasion based as you’re on the hunt for extra Energy Shield here to enable to your Eldritch Battery. You’re hitting this with  Shrieking Essence of Greed which are usually dirt cheap. You can therefore be a bit more greedy. Ideally, you want an open suffix, one really good resistance and a nice ES/EV Hybrid Roll. You can then craft Fire as Extra Chaos on the bench & finish it off by slamming an
  Exalted Orb hoping to hit another resistance.
Flasks
I believe flasks are highly preference-based. One isn’t just outright better than another one for specific/certain builds. Sometimes, there’s a set-in-stone set of Flasks you should be using just because they synergize with your build so well. I wouldn’t say those exist in this setup, but I’d strongly advise you to stick with the setup listed here.
I went for a  Granite Flask & a
  Jade Flask to boost my Determination & Grace a bit. Don’t sleep on Flask modifiers (suffixes) as they are super strong in builds which can keep Flasks up indefinitely, such as fast mappers like this one. Next up, I went with a
  Quartz Flask to cap my suppression chance. Lastly, I went for two unique Flasks in
  Taste of Hate &
  Sin's Rebirth! Those round out your entire Flask-belt in the way I recommend setting it up. For maximum speed, you can replace the Granite & Jade with a Quicksilver & Silver Flask but you’ll be losing a lot of defenses.
Regardless of which utility Flasks you go for and whether you follow our recommendations or not, you’ll need to stick to the suffixes we have picked for you (Staunching, Warding). The affixes on your non-unique Flasks can be changed around, but I recommend the following setup (based on the Flask duration, charges, and affix priorities):
Our recommendation:
| Slot | Flask |
| 1 | Flagellant’s  Granite Flask of the LIzard Granite Flask of the LIzard |
| 2 | Flagellant’s  Jade Flask of the Horsefly Jade Flask of the Horsefly |
| 3 | Flagellant’s  Quartz Flask of the Impala Quartz Flask of the Impala |
| 4 |  Taste of Hate Taste of Hate |
| 5 |  Sin's Rebirth Sin's Rebirth |
Be sure to check out our Flask Crafting Guide to learn everything you need to know about how to set up your non-Unique flasks.
Remarks: This setup does not run a Life Flask, nor a Bleed Immunity. If you feel the need to run a Life Flask, which is a bit awkward due to Petrified Blood, you can skip the Sulphur Flask.
Jewels
Jewels are basically what make this build. Without them, the end-game version of this build wouldn’t exist. I’ll start by mentioning the standard jewels.
Forbidden Flesh & Flames
While it doesn’t matter which Ascendancy you take for FF jewels, I recommend Shaper of Flames because it allows you some flexibility later on and they’re generally the cheapest. If you can’t afford those, you’ll need to allocate Shaper of Flames manually in favour of Bastion of Elements.
Elegant Hubris
A complicated piece of the puzzle. First of all, you’ll need an Elegant Hubris which commemorates Caspiro. This will give you the Supreme Ostentation keystone, which allows you to completely ignore Attributes. This is important because most of your Suffixes will be filled with Suppression & Resistance. Only after acquiring a Headhunter, you could potentially run a rare ring with High Dex/Str which could potentially replace this. However, the only benefit you’d be getting from this is some extra Life from Strength, which honestly doesn’t seem worth it to me.
Watcher’s Eye
Another piece of the Suppression Puzzle. Grab one which has Suppression Chance while Affected by Grace, ideally in combination with another nice modifier. The absolute BiS would be DoT Multiplier while affected by Malevolence.
Cluster Jewels
Again, I have to emphasize that picking up additional benefits to your Cluster Jewels is very important to achieve Resistance & Attribute requirements. You’ll be running 2  Large Cluster Jewels, 4
  Medium Cluster Jewels and 2
  Small Cluster Jewel.
Large Cluster Jewels
Your Large Cluster Jewels need a variety of things. Notables you need to find once no matter on which one are : Doryani’s Lesson (can use more), Master of Fire, Cremator (if not using Pyre, this is mandatory, otherwise it’s an option). When you acquire those notables, you can freely add Burning Bright, Widespread Destruction, and Prismatic Hearts to them as you please. Of course, Prismatic Heart puts less pressure on resistances but loses you AoE you would be getting from the other two. It’s always a puzzle.
Medium Cluster Jewels
We’ll be splitting these up into 2 AoE enablers & 2 Damage/Utility Mediums.
The First set of Clusters will be focused on Burning Damage Cluster Jewels. On those you require one Fan the Flames. On top of those, Burning Bright & Cooked Alive can be added or combined on those mediums. The other 2 Medium Clusters will be on Area Damage bases and will both have an Assert Dominance & Towering Threat modifier. Combining all these modifiers will result in the most optimal bang for your buck from your Medium Cluster Jewels.
Small Cluster Jewels
You’ll be using 2 Small Cluster jewels. One to cap your Suppression Chance through the notable Untouchable & one to generate Endurance Charges through Enduring Composure. As these are just 1 modifier items, you can try to find as many additional modifiers as you can such as Life, Regen, Chaos Resistances and whatnot. This is what makes Cluster Setups insane, trying to optimize them as much as possible.


