TbXie's Poison Scourge Arrow Pathfinder Gear, Jewels, and Flasks (PoE Necropolis)
Gear Summary
Like always in a build in Path of Exile, it is really important to max your Elemental Resistances. This build, however, depending on how it is played, also wants relatively high Chaos Resistance as it converts incoming Physical Damage to Chaos Damage through 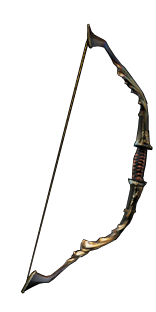 Darkscorn. Make sure to prioritize capping Elemental Resistances before anything else.
We will go over every single piece of gear individually on this page and try to get you the best understanding possible, but we have a summary for you too. Note that some specific modifiers on items could be expensive and that most of the “fancy” modifiers are just upgrades that can be delayed.
Our recommendation:
| Item Slot | Item Name |
| Head |  The Devouring Diadem with Ailment Duration while Focused The Devouring Diadem with Ailment Duration while Focused |
| Amulet | A Rare  Agate Amulet with high Life, Resistances and bench-craft minimum endurance charge Agate Amulet with high Life, Resistances and bench-craft minimum endurance charge |
| Chest |  Dendrobate Dendrobate |
| Gloves | A rare pair of gloves with Life, Resistances & Spell Suppression |
| Boots | A Rare pair of (ideally) 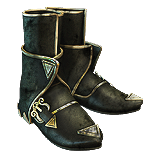 Slink Boots orMovement Speed, Life, Spell Suppression & Resistances Slink Boots orMovement Speed, Life, Spell Suppression & Resistances |
| Belt | A Rare  Leather Belt with high Resistances & Life Leather Belt with high Resistances & Life |
| Rings | One  Circle of Nostalgia and a Rare Two-Stone Ring with Intelligence, Resistances, Despair on Hit and high Life bench-craft minimum endurance charge Circle of Nostalgia and a Rare Two-Stone Ring with Intelligence, Resistances, Despair on Hit and high Life bench-craft minimum endurance charge |
| Weapon |  Darkscorn Darkscorn |
| Quiver | A Rare Quiver with “Chaos Damage over Time Multiplier” (Hunter), “Bow Attacks fire an additional Arrow” (Shaper), “High Life and a 5% Frenzy Charge on Critical Strike” Bench-craft |
For crafting Rare items, you can check out all the affixes that can roll on an item base, depending on its level, influence, and many other factors, using our affix tool.
Armour Pieces
Helmet
Because dealing with mana has honestly become a problem in recent PoE, we opted to pick up a  The Devouring Diadem for the build. It’s easily self-farmable and many Diadem-strategies have been posted around and about so getting one shouldn’t be too problematic. Before Diadem, you’ll need an Enduring Mana Flask to play the build.
Body Armour
 Dendrobate is a solid chest piece for builds like this one. You will have to make sure you have at least 300 Dexterity & 150 Intelligence though to make use of both of its conditionals. Other than that, together with Diadem, it gets you enough Flat Energy Shield to never care about mana anymore while still offering a couple of defensive stats. Great pickup!
Gloves
Your first source of Spell Suppression slot. Make sure you get Life, necessary resistances and the suppression. Later on, you can fiddle with Eldritch implicits to get you a ton of extra Damage.

Boots
None of the Unique options in this slot are particularly good. This means you’re looking for a Rare pair of boots. Whilst  Slink Boots can offer the most Evasion, they’re not a necessity. Obviously, you’d really like them to have 30% Increased Movement Speed but if that makes them too expensive, don’t feel to bad about dropping that down a notch. Lastly, this is your other slot of Spell Suppression. Don’t forget to finish it off with some nice implicits!
- % increased Movement Speed (at least 20%)
- +# to Maximum Life (at least 80)
- +#% chance to Suppress Spell Damage
- +# to Elemental Resistances (until capped)

Belt
You want a Rare belt over any of the Unique alternatives. The easiest one to acquire is definitely a  Leather Belt, but a
  Stygian Vise can be useful as an Abyss Jewel could provide with some utility like “Onslaught on kill”, some damage through the “Attack Speed if you’ve killed Recently” modifier. For convenience we recommend a Leather Belt. This is one of your main sources of Elemental Resistances. The affixes you’re looking for are:
- +#% total Elemental Resistances (until capped)
- +# to maximum life (at least 120)
- % increased Chaos Damage (
 Aberrant Fossil or Hunter Influence)

Accessories
Amulet
While there are a couple of Unique items that could be in contention (for example a  Impresence (Chaos)), our general guideline is to go for a Rare
  Agate Amulet as it provides some necessary stats and a lot of room to find Life and Resistances. Optionally, yet very unnecessary, you can go for a Hunter-Influenced Amulet with an extra “Increased Chaos Damage” roll. Anointing Whispers of Doom here is very important as it enables dual-curse which is obtained through the Ring & Mark on Hit in your skills.
- +#% total Elemental Resistances (until capped)
- +# to maximum life (at least 80)
- +# to Minimum Endurance Charges

Rings
You’re looking to run a single  Circle of Nostalgia to further boost your Damage and your Herald of Agony buff effect. The “Increased Chaos Damage while affected by Herald of Agony” as well as the “Herald of Agony has 50% increased Buff Effect” are the mods we’re looking for. The latter will increment the More multiplier for Poisons and the chance to Poison from
  Herald of Agony, while the Increased Chaos Damage just provides a nice damage boost.
Next up, for your second Ring slot, you want a Rare ring on preferably a  Vermillion Ring or a Two-Stone Ring base in case you still need more Resistances. You really want to find Intelligence here as you’re lacking quite a significant amount of that. Try to grab one with Despair on Hit!
- Curse Enemies with Despair on Hit
- +# to Intelligence (at least 30)
- +# to maximum life (at least 70)
- +#% to Elemental Resistances (until capped)
- +# to Minimum Endurance Charge

Weapon & Quiver
 Darkscorn is your bread and butter choice here. It’s important to note that it has the “25% of Physical Damage from Hits taken as Chaos Damage” which, since we have high Chaos Resistance, is a really solid defensive layer. The Physical Damage rolls are the ones you’re looking out for. Try to pick one up with reasonably high rolls.
Quiver
A Rare Quiver is competitive in damage even on low quality Quivers. Their biggest upside is the possibility to craft “#% chance to gain a Frenzy Charge on Critical Strike”. Even though we don’t focus on Critical Strikes whatsoever, we randomly end up with a solid amount of Critical Strike Chance. Because your  Scourge Arrow hits its enemies so often, this craft is a very solid way of getting Frenzy Charges, even on single target fights. Other than the craft, which is available on your crafting bench, you’re looking for Life and some damage modifiers. The affix priority list is as follows:
- #% chance to gain a Frenzy Charge on Critical Strike (Craft on the bench)
- +# to maximum life (at least 80)
- +#% to Chaos Damage over Time Multiplier (Hunter Modifier – at least 20%)
- #% Increased Attack Speed (at least 10%)
- Adds # to # Physical Damage to Attacks

Flasks
As you’re playing a Pathfinder (called Flaskfinder by many) your flasks are of utmost importance to your build. We have selected a fairly defensive, yet very potent set of Flasks for you.
First up,  Atziri's Promise provides a lot of Chaos Resistance to help us reach cap to deal with the Physical Damage taken as Chaos Damage from
  Darkscorn and it provides us with a reasonable amount of Life Leeched and a little bit of damage.
The three non-Unique flasks you are running are a  Granite Flask,
  Sulphur Flask and a Life Flask. The Quartz flask is relied on to cap out Spell Suppression. A Sulphur Flask could be replaced with a Jade Flask or something else defensively but it’s a pretty solid and reliable way of getting some damage.
Lastly, a  Taste of Hate provides you with excellent Physical Damage Mitigation which is where you could use a little bit of extra help.
The Suffixes we need on these two flasks are some form of Bleed Immunity & Reduction to Curses. Both of these affixes are important for comfortable mapping and bossing and shouldn’t be swapped out.
My recommendation:
| Slot | Flask |
| 1 |  Taste of Hate Taste of Hate |
| 2 | Alchemist’s  Jade Flask of the Impala Jade Flask of the Impala |
| 3 | Alchemist’s  Sulphur Flask of the Kakapo Sulphur Flask of the Kakapo |
| 4 | Alchemist’s  Granite Flask of the Armadillo Granite Flask of the Armadillo |
| 5 | Bubbling  Eternal Life Flask of Assuaging Eternal Life Flask of Assuaging |
Be sure to check out our Flask Crafting Guide to learn everything you need to know about how to set up your non-Unique flasks.
Rare Jewels
Our recommended setup uses no Unique jewels. You could run a  Watcher's Eye with a Damaging Ailments you inflict deal Damage 15% faster while affected by Malevolence as a sort of Quality of Life but in general we believe sticking to Rare jewels is highly recommended. You really want to look for “increased maximum Life” on your jewels as your Life pool is a big source of the reason why we remain so tanky. One of your rare jewels need a 3 Increased Mana Reservation Efficiency roll in order to enable all your auras.
The affix priority is as follows:
- #% increased Maximum Life
- #% increased Damage with Poison
- #% increased Damage with Ailments
- #% increased Attack Speed
- #% increased Chaos Damage
- #% increased Damage over Time
- #% increased Damage


