Purifying Flame Inquisitor Gear, Jewels, and Flasks
Gear Summary / TL;DR
These items strike a balance between power and cost-effectiveness.
Our recommendation:
| Item Slot | Item Name |
| Head |  The Devouring Diadem The Devouring Diadem |
| Amulet | Rare Amulet |
| Chest |  Carcass Jack Carcass Jack |
| Gloves | 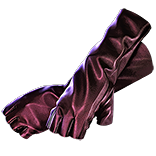 Fingerless Silk Gloves Fingerless Silk Gloves |
| Boots | Rare Boots |
| Belt |  Leather Belt or Leather Belt or  Stygian Vise Stygian Vise |
| Ring 1 |  Gifts from Above Gifts from Above |
| Ring 2 | Rare or  Mark of Submission (see Rings) Mark of Submission (see Rings) |
| Weapon | Rare 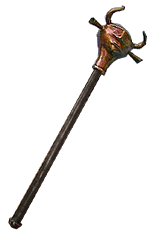 Sambar Sceptre Sambar Sceptre |
| Shield* |  Magna Eclipsis Magna Eclipsis |
*See Weapons section for more information on Dual-Wielding versus using a Shield.
For crafting Rare items, you can check out all the affixes that can roll on an item base, depending on its level, influence, and many other factors, using our affix tool.
Armor
Chest
 Carcass Jack is our default pick for our chest piece. Not only is it a reasonably cheap acquisition, even on League Start, but it offers a huge increase to Area of Effect and damage, which feeds into
  Purifying Flame perfectly. Not only does the added Area of Effect speed up our clear, it also boosts the size of the Consecrated Ground left behind on impact. Finally, the nice combination of Life, Evasion and Energy Shield, and Elemental Resistances add a nice defensive trinity that makes this chest hard to argue with for its price.
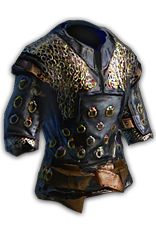 Loreweave is a great option for the end-game, but is only worth using over
  Carcass Jack if you can afford a high-tier roll. This chest is particularly good for bossing, such as Uber Elder and Shaper, where the added Area bonus of the Carcass Jack is not much of a boon. The additional maximum Resistances also help minimize the chance of a one-shot death to big Elemental “rogue-wave” style attacks.
Helmet
 The Devouring Diadem is the best overall choice, as it allows us to run all of our auras in our helmet for a greatly reduced cost, as well as providing Eldritch Battery innately and voiding the need for an additional 2 Passive Point investment. Energy Shield recharge chance on skill use is also a great bonus, and helps ensure we are not running dry on Energy Shield from Mind Over Matter. It can vary wildly in price, depending on the league and the availability, and enchants are not always as easy to spot, which is one unfortunate downside.
A Rare helmet will also be a perfectly acceptable alternative, although you will not be able to run all three auras at once. You can opt to run  Vitality instead of
  Discipline in the meantime — depending on your Energy Shield rating, it might be difficult to sustain Mind Over Matter. If this is the case, you can drop Eldritch Battery and Mind Over Matter for the time being, run Vitality, and rely on the large pool of Life Regeneration as your primary defense. If you are using Spiritual Aid on the tree and are not running Discipline or Mind Over Matter, you should use a
  Bone Helmet for the damage. Prioritize the stats as follows:
- [Uncapped] Resistances
- +# to Maximum Life
- Nearby Enemies have -9% to Fire Resistance (Delve)
- Dexterity/Strength/Intelligence
Recommended Enchantments:
- Purifying Flame deals 40% increased Damage
- If you are using the Spiritual Aid node on the tree without Mind Over Matter, you should use the
 Bone Helmet implicit instead
Gloves
A pair of  Fingerless Silk Gloves is the best option, due to their damage implicit. Prioritize stats as follows:
- [Uncapped] Elemental Resistances
- +# to Maximum Life
- Gems Supported by Level # Faster Casting / % Increased Cast Speed (Shaped)
- % Increased Energy Shield
- +# to Maximum Energy Shield
Boots
A pair of Rare boots is a great choice, and can be used throughout the entire end-game. If you need more of a buffer for Mind Over Matter, look for an Energy Shield base. An ideal choice is an Armor/Energy Shield hybrid, such as one of  Two-Stone Ring (Fire / Lightning Resistances) bases.
- % Increased Movement Speed (25+)
- [Uncapped] Resistances
- +# to Maximum Life
- Socketed Gems are Supported by Level # Increased Duration / % Increased Skill Effect Duration (Elder)
Recommended Enchantments:
- Damage Penetrates 10% of Enemy Elemental Resistances if you Haven’t Killed Recently
If you are using 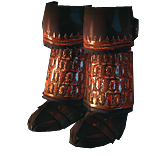 Kaom's Roots for Uber Elder you could also opt to have the 16% increased Attack and Cast Speed if you’ve Killed Recently on your mapping/clearing boots.
Weapons and Shield
Rare  Sambar Sceptres
The  Sambar Sceptre is the best base for our build. Good influenced weapons will be the end-game best possible option due to the variety of game changing affixes that can be found together.
Here is an example pair of Sceptres crafted several leagues ago for a relatively cheap price.

Due to the changes in multi-mod crafting, however, it is usually easier to simply buy your weapons than craft them yourself, and it requires far less know how.
Affix priority:
- Gain % of Physical Damage as Extra Fire Damage (Shaper prefix or Crusader suffix)
- % Increased Spell Damage
- % Increased Critical Strike Chance for Spells
- % Increased Global Critical Strike Multiplier
- Adds # to # Fire Damage to Spells / Damage Penetrates % Fire Resistance (Warlord Prefix)
- % Increased Cast Speed
- % Increased Fire Damage
- Adds # Fire Damage to Spells
League Starting and Unique Options
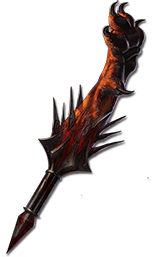 Cerberus Limb is a great blend of damage, defense, and economy — even relatively early in the league, this can be obtained extremely cheaply. Playing with the Spell Vampirism feels very smooth, and adds even more incoming Life per second on top of our already excellent Regeneration. This is a great first pickup if you do not have much currency to spare.
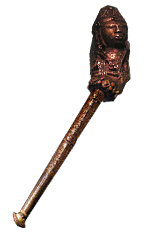 Doryani's Catalyst is relatively inexpensive and can be acquired early. Like
  Cerberus Limb, it provides good damage and leech.
Shield
Shields are best used when you are still in relatively inexpensive gear, to bolster your defenses.
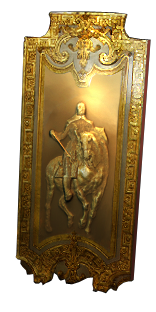 Lioneye's Remorse has a huge Maximum Life roll, solid all-round defenses, and 30% block, which allows you to activate the leech on
  Cerberus Limb.
 Magna Eclipsis is a cheap and potent option for defending against Elemental damage, and is an especially good option for Hardcore.
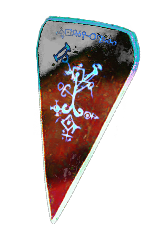 Saffell's Frame is the best option if you are planning on running
  Righteous Fire at all times.
Accessories
Amulet
A Rare amulet is the best choice here, as it offers the most flexibility and damage.  Xoph's Blood is completely unnecessary for these build due to the proximity of Avatar of Fire, and is actually quite a noticeable damage loss compared with even a moderately well rolled Rare. Try to find Resistances on other items as much as possible in order to budget for damage on this piece. Prioritize affixes as follows:
- +# to Maximum Life
- Gain % of Physical Damage as Extra Fire Damage (Elder)
- % Increased Global Critical Strike Multiplier
- % Increased Global Critical Strike Chance
- % Chance to Gain a Power, Endurance, or Frenzy Charge on Kill (Shaped)
- % Increased Fire Damage
- % Increased Spell Damage
- % of Fire Damage Leeched as Life (only if you have no source of Life Leech already)
- Resistances
- Attributes (Strength or Dexterity)
Rings
 Gifts from Above is a no-brainer for this build, do to our virtually permanent Consecrated Ground. It is very cheap and should be one of your first acquisitions on this character.
 Mark of Submission is usually a relatively budget pickup, and can be an option early in the league in order to apply your curse of choice without relying on any other mechanics.
A Rare ring should replace  Mark of Submission as soon as you are able to afford a decently rolled one. Prioritize as follows:
- [Uncapped] Resistances
- +# to Maximum Life
- Curse Enemies with
 Warlord's Mark on Hit (Elder — only if you want to use Warlord’s Mark as your curse)
 - % Increased Global Critical Strike Multiplier (Elder)
- % Increased Global Critical Strike Chance (Shaped)
- % Increased Fire Damage
- Adds # Fire Damage Against Ignited Enemies (Elder)
- % Increased Damage (Crafted)
- Attributes (Strength or Dexterity)
Belt
A  Leather Belt is the best base, but only if you can get an Elder version with the correct affix. This is due to the % Increased Life Regeneration Rate affix, which acts a multiplier for your Life Regeneration. If you cannot afford the Elder belt — which can be very expensive due to its prolific use in Life Regeneration and
  Righteous Fire builds — you should instead use a Rare
  Stygian Vise.
- % Increased Life Regeneration Rate (Elder)
- [Uncapped] Resistances
- +# to Maximum Life
- % Increased Fire Damage (Delve)
- % Increased Damage
- Dexterity
Jewels
 Watcher's Eye Options
As with most builds that use classic Auras, a  Watcher's Eye is going to be your best bet in the late-game. This is not necessary at all for the build and was excluded from any of the damage stats and calculations, simply because it will not be a realistic acquisition for many players.
Prioritize  Watcher's Eye mods as follows:
- % increased Critical Strike Chance against Enemies on Consecrated Ground while affected by Zealotry
- Consecrated Ground you create while affected by Zealotry causes enemies to take % increased Damage
- % increased Cast Speed while affected by Zealotry
Abyss Jewels
In most cases, the use of Abyss Jewels is preferred over standard Jewels.
- +# to Maximum Health
- Adds Fire Damage to Spells while Dual-Wielding OR while Holding a Shield (depending on what your weapons are)
- Adds Fire Damage to Spells
- Adds Physical Damage to Spells while Dual-Wielding OR while Holding a Shield (depending on what your weapons are)
- % to Global Critical Strike Multiplier
- % to Global Critical Strike Chance
Flasks
Flasks can be swapped out as your preference suits. Fortunately, we have Elemental Ailment immunity from Pious Path, which means we have some extra wiggle room with how we budget our Flask suffixes. Our recommended Flasks:
- Chemist’s Basalt Flask of Staunching/Warding
 The Wise Oak (Fire must be your highest Resistance, or they must be evenly balanced)
 Cinderswallow Urn
- Experimenter’s Diamond Flask of the Order/Warding
- Alchemist’s Quicksilver Flask of Adrenaline
Use Seething Divine Life Flask of Staunching when you are starting early mapping. Once you feel comfortably with your defenses, and your Life Regeneration is sufficient, you may decide to swap it out.
You can only have three out of four of these suffixes with this setup:
- Staunching
- Order
- Warding
- Adrenaline
You will have to decide for yourself which suffixes you can live without; for example, some players find playing without a curse flask to be acceptable and they avoid maps with  Temporal Chains. Our preference is to always play with a Curse Immunity flask, as curses result in a significant number of unexpected player deaths. For maximum survivability, drop the of Order suffix in favor of of Warding. For the best general damage setup, drop the of Staunching suffix and rely on your Life Regeneration to sustain through bleeds.
Uber Elder
 Bottled Faith
 The Wise Oak (Fire must be your highest Resistance, or they must be evenly balanced)
 Cinderswallow Urn
- Experimenter’s Diamond Flask of the Order
- Alchemist’s Quicksilver Flask of Adrenaline
Check out the main page of the guide or use the menu on the right side of this page to navigate to the other sections of the guide.


