TbXie's Cold Dot Vortex Occultist Gear, Jewels & Flasks (PoE Affliction)
Summary – TL;DR
As per usual, nothing matters more than capping your Elemental Resistance before anything else. This means modifiers on gear are subordinate to Resistances as long as you’re not capped. Since you’ll be running a decent amount of Unique items, it’ll be important to look out for a lot of resistances on your Rare pieces!
We’re providing you with an extensive analysis further down the page but chose to start off with an overview / recommendation.
Our recommendation:
| Item Slot | Item Name |
| Head |  Rime Gaze Rime Gaze |
| Amulet | Rare Amulet with +1 to Level of Cold Skills, Attributes, Life & (Cold) DoT Multi |
| Chest | Rare ES/EV Chest with Life, Suppression & Maximum Life |
| Gloves | Rare Gloves with Suppression, Dexterity, Life & Resistances |
| Boots | Rare Boots with Movement Speed, Life, Resistances & Suppression |
| Belt | Rare Belt with Life, Armour & Resistances |
| Rings |  Mark of Submission and a Rare Amethyst with necessary Attributes, Life & Resistances Mark of Submission and a Rare Amethyst with necessary Attributes, Life & Resistances |
| Weapon | +1 Spell/Cold Skills Wand with Cold DoT Multi & Spell Damage |
| Shield | A rare Life Recovery on Block Shield with as much Life/Armour & perhaps Suppression you can find. |
For crafting Rare items, you can check out all the affixes that can roll on an item base, depending on its level, influence, and many other factors, using our affix tool.
Energy Shield for Eldritch Battery and Armour & Evasion
First and foremost, it is of importance that you need to find Energy Shield up to a certain level. I personally felt super comfortable with about 1000 Energy Shield, after modifiers. This equates to about 250-280 Energy Shield on your gear pieces. Our Energy Shield protects our Mana Pool which means you’re going to be using Energy Shield to cast spells. Energy Shield keeps on recharging whenever it hasn’t taken damage. Since the Energy Shield is protecting our Mana Pool (instead of Life), it means it can never take damage, so it will constantly be recharging. The higher Energy Shield you have, the higher recharge rate per second you will have, and thus effectively the more “Resource Regeneration”, call it Mana Regeneration if you want, you’d have to cast.
It doesn’t matter where you find this Energy Shield. Usually people get it on Body Armours but you could honestly run an Armour Evasion chest piece (obviously do mind that a non-ES base will be harder to colour) and just run a single piece of Pure Energy Shield with nice ES modifiers to get to your 270 Pool. You do not want to get way more than 1000 Energy Shield, as that will be plentiful to have enough recharge rate in order to spam your skills. Every piece of gear that is otherwise used to obtain more than said number of Energy Shield, would take away opportunities to use Armour or Evasion bases, therefore lowering your characters total amount of Evasion or Armour. Hence, whenever you have a good amount of Energy Shield, one you personally feel comfortable with, again, I suggest around 1000 total, you should look to get Armour & Evasion base pieces of gear to get as much of those as possible in turn.
Armour Pieces
Helmet
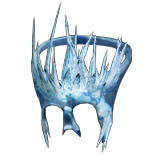
The  Rime Gaze unique offers a reliable and cheap way of getting a lot of things you really like. It provides you with a potential 5-Link for your
  Cold Snap, which is basically preference. I suggest you test out Cold Snap inside and outside of the Helmet to see if you’d rather have the increased single target damage from Rime Gaze’s L20 Concentrated Effect Support, or if you’d rather have more coverage by not having your Cold Snap in the helmet at all. Personally, I think it’s a nice boost of damage on bosses and therefore very convenient.
Additionally, offers you two of your best damage modifiers in the extra link and more importantly the whopping 50+% to Cold DoT Multiplier!
Body Armour
A rare Evasion / Energy Shield Armour is what you’re looking out for. Ideally you’re looking for one which has high Suppression, Resistances & A lot of Evasion & Energy Shield. You don’t require it to have Life, as a non-life Body Armour can be complemented by the Life Mastery which gives you 15% More Life if you have no Life Modifiers on your body Armour.
Optionally, when you can afford it, an open prefix for the Gravicus mod with Physical Damage conversion & perhaps some Chaos Resistances are ideal.

Gloves
Most of the pieces of gear in this build will be following the same reasoning. You’ll need attributes on gear and you will want to cap suppression. So most of your rares will neither both or at least one of them to get you there. Obviously, you want as much life as you can get. Finally, follow the Eldritch Battery rules and get good bases if you can which suit your needs. Finish of your item with the correct Eldritch Implicits through Eldritch Currencies and you’ll be golden.

Boots
Same idea as for your boots. Suppression, Dexterity or Strength (Ideally Dexterity, as that can’t be found on a Belt, and Strength can) and as much Life as you can find. As beforementioned, make sure to get the correct implicits when you can afford to get them to get that extra powerspike.

Belt
As for your Belt, I think this is a priority buy. Check if you can find one with really high strength as that will most likely solve all of your Strength issues instantly, and will make it so you can focus on Suppression & Dexterity elsewhere. Other than that, resistances, a lot of them and life are key. A topping on the cake would be either a  Stygian Vise base or a really nice armor roll.

Accessories
Amulet
Lategame, you will want a +2 Amulet with Cold Damage over Time Multiplier and Life. For starters, aim for a single Level of Skills, Life and Cold Damage over Time Multiplier.
Anoint
You need to anoint Ash, Frost & Storm as it gives you the most Bang for your Buck!
Rings
Your first ring should be a  Mark of Submission. Just because manually applying two curses is not something we look to be doing, this will stay here, almost forever. Your second ring, ideally is an
  Amethyst Ring base so you can get your Chaos Resistance up, whilst getting all affixes you still need. Life, Resistances, Attributes, they can all be found on rings quite conveniently!

Weapon
The number one modifier you want on your wand is a +1 to Level of all (Cold) Spell Skill Gems – Ideally two of those. As extras, you can either get the other +1 modifier, Spell Damage, or Cold Damage over Time.
For your starter weapon, I recommend buying a Fractured +1 Cold & Spamming Essences of Woe on it for High Spell Damage. Try to hit any useful suffix & craft on Cold Damage over Time Multiplier on the Bench.
A midgame weapon would look something like this:

Flasks
I believe flasks are highly preference-based. One isn’t just outright better than another one for specific / certain builds. Obviously, sometimes, there’s a set in stone set of Flasks you should be using just because they synergize with your build so well. I wouldn’t say those really exist in this setup, but I’d strongly advise you to stick with the setup listed here.
Regardless of which utility Flasks you go for and whether you follow our recommendations or not, you’ll need to stick to the suffixes we have picked for you. It’s okay to use lower tier rolls initially but please upgrade your flasks as you can because they’re so often undervalued and forgotten:
Our recommendation:
| Slot | Flask |
| 1 | Chemist’s  Granite Flask of the Impala Granite Flask of the Impala |
| 2 | Chemist’s  Quartz Flask of the Armadillo Quartz Flask of the Armadillo |
| 3 | Chemist’s  Quicksilver Flask of the Owl Quicksilver Flask of the Owl |
| 4 | Chemist’s  Jade Flask of the Heron Jade Flask of the Heron |
| 5 | Bubbling  Divine Life Flask of the Assuaging Divine Life Flask of the Assuaging |
Be sure to check out our Flask Crafting Guide to learn everything you need to know about how to set up your non-Unique flasks.
Jewels
Cluster Jewels
Cluster Jewels are incredibly potent scalers both for Damage over Time Multiplier, Cold Damage, and much more!
If you are looking for the most optimal way to acquire your Cluster Jewels, or have any other questions whatsoever about them, such as how to craft or price them, we refer you to our complete guide on Cluster Jewels.
We’re looking to run a single  Large Cluster Jewel, ideally a Cold Damage base, although that doesn’t matter that much, with 3 modifiers being Deep Chill, Disorienting Display & Prismatic Heart. They should actually be super cheap because some of these affixes are very not-sought after and they appear often in a correct order.

Next up you’ll be running 2 Small Cluster Jewels. One with Enduring Composure, to give you Endurance Charges and another one with Untouchable, to cap your Spell Suppression and save you a ton of skill points.


_Tip: These Cluster jewels can give additional benefits to their small nodes. You’re picking up 1 Small Node per Cluster Jewel which could be giving you Resistances, Dexterity, Strength, … . Do not miss out on these benefits as they usually only cost you a few measerly Chaos orbs extra!
Regular Jewels
Early on, you’ll be looking to pick up a 2% Reservation Efficiency jewel, ideally with 1% Spell Block (you’ll need 2 of those 1% Spell Blocks), which you’ll need to cap (don’t forget that becomes 2% due to Glancing Blows).
On your second Jewel, as mentioned, you’ll be looking for the Spell Block again, with some Damage Mod(s). The 2% RME supersedes anything else as it will allow you to run all your auras and is hugely important to the build!


Tip: When currency allows, upgrade them to have 7% Increased Maximum Life as well!
###page-button:vortex-occultist-build-guide#Main Page / TL;DR###


