Earthquake Juggernaut Gear, Jewels, and Flasks
Path of Building
Find all our recommended gear from the comfort of Path of Building, available here.
Included in the Path of Building are skill trees, all gem links and possible variations, and an example set of mid-level gear with room for upgrades. For simplicity’s sake, Elemental Resistances are not included on gear, and you can fill them in as you like depending on available gear.
We use the Path of Building Community Fork for all of our builds, which is highly recommended. If you are encountering errors importing the build, please ensure you are using the Community Fork.
Gear Summary / TL;DR
Our basic recommendation:
| Item Slot | Item Name |
| Head | Rare 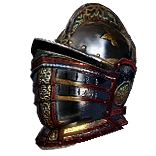 Royal Burgonet Royal Burgonet |
| Amulet | Rare Amulet |
| Chest | Rare  Astral Plate with Crusader Influence Astral Plate with Crusader Influence |
| Gloves | Rare  Spiked Gloves Spiked Gloves |
| Boots | Rare Boots |
| Belt | Rare  Stygian Vise Stygian Vise |
| Rings | Rare Rings ( Steel Rings or Steel Rings or  Vermillion Rings if you don’t need Resistances anymore) Vermillion Rings if you don’t need Resistances anymore) |
| Weapon | Rare 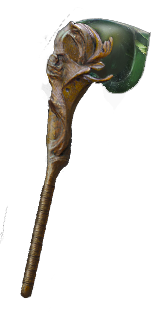 Karui Chopper or Karui Chopper or 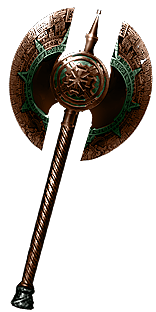 Atziri's Disfavour Atziri's Disfavour |
Gear
As with most melee builds that utilize pure Physical damage, your Weapon is the primary factor in determining your damage output. To this end, we recommend focusing on getting a strong weapon as soon as possible before focusing on other expensive upgrades.
For all non-Unique crafting, we recommend our Affix tool.
Armour
Body Armour
Our best option in the late game is a Crusader influenced  Astral Plate that causes Bleeding enemies to explode and deal a percentage of their Life as Physical damage. This is helpful in allowing us to chain together kills more reliably and further smooth out clear. Until you can afford this piece or craft it yourself, you can opt to use a Rare without this affix or use
 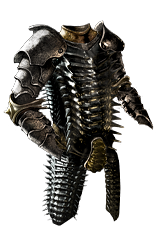 Belly of the Beast as a stopgap. Prioritize affixes on Rares as follows:
- Enemies you Kill Explode, Dealing 3% of Their Life as Physical Damage (Crusader)
- [Uncapped] Elemental Resistance
- +# to Maximum Life
- +# to Maximum Life / +# to Armour
- % Increased Armour
There are some really powerful  Astral Plates that are often crafted through the league, some even boasting strong combinations of influences using
  Awakener's Orbs to craft them. For simplicity and realism not all affixes have been included here, but if you have a question about a crafted chest feel free to ask in the comments for clarification. Just having a plate with a very high Life roll, some Armour, and the Explode affix would be a very strong item to acquire, so start with that.
Helmet
A Rare helmet is generally our best option throughout all stages of the game. The  Royal Burgonet is the best available base as it has the highest base Armour value.
- [Uncapped] Elemental Resistance
- +# to Maximum Life
- +# to Maximum Life / +# to Armour
- % Increased Armour
- +# to Armour
The enchant for  Earthquake is no longer very important, as the strongest variant was pruned from the live game. Some options are:
 Earthquake deals 40% Increased Damage
- Attacks Exerted by
 Seismic Cry deal 50% Increased Damage
 - 30% Increased
 Vulnerability Curse Effect
These enchants are all very low priority and should not be sought after unless they are very cheap or all your core items have been obtained.
Gloves
 Spiked Gloves are the ideal base in the end-game, but prioritize getting a pair of gloves that have the proper affixes early in the league.
- [Uncapped] Elemental Resistances
- +# to Maximum Life
- Adds # to # Physical Damage to Attacks
- % Increased Damage While Leeching (Crafted)
- +# to Maximum Life / +# to Armour
- % increased Attack Speed
- +# to Armour
- +# to Strength
Boots
You can choose your base as you see fit.  Titan Greaves offer the highest possible Armour, but you could also opt for a nice pair of
 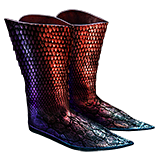 Two-Toned Boots (Fire and Lightning Resistances) to splash out on as much Resistance as possible. This can free up some affix priority on other pieces or give you more freedom to use
  Steel Rings, depending on how much Resistance you have already.
- % Increased Movement Speed (minimum 25%, recommended 30%)
- [Uncapped] Elemental Resistance
- +# to Maximum Life
- +# to Armour
- +# to Strength
Weapon
As stated at the start of the gear section, the Weapon has the heaviest influence on your damage output when contrasted with any other possible upgrade in the build. Having a high Physical DPS weapon is critical to your damage output and it should be the piece that you look to upgrade whenever you have the currency to trade up.
 Atziri's Disfavour is also an option but ultimately gets outpaced by Rares. Depending on the cost of this unique, it may be worth using along your way to a top end Rare, but often it is too expensive to justify buying and linking.
Our preferred base is the  Karui Chopper, as it has the highest possible top-end Physical damage. When you are starting out you will want a Rare with at least 450 Physical DPS, but you will want to seek out as high a number as you can afford. 650 pDPS is a good number to aim for as you reach mid-game mapping. Prioritize affixes as follows:
- % increased Physical Damage
- Adds # to # Physical Damage to Attacks
- Hits With This Weapon Having Culling Strike Against Bleeding Enemies (Elder)
- % increased Attack Speed
- % increased Physical Damage / +# to Accuracy
- % Chance to Deal Double Damage (Crafted)
Accessories
Amulet
A Rare amulet with a base of your choosing should be used. We prefer the  Turquoise Amulet, as this build does not naturally acquire much Dexterity or Intelligence, and this can free up some restrictions.
- [Uncapped] Elemental Resistance
- +# to Maximum Life
- Adds # to # Physical Damage to Attacks
- +% to Physical Damage over Time Multiplier (Hunter)
- +1 to Level of All Strength Skill Gems (Hunter)
- % Increased Damage with Ailments
- # to Strength
The Hunter mods are far from necessary, but give you a late game goal to sink some currency towards that can result in a noticeable damage increase. There are other Conqueror affixes to keep an eye out for as well, though too many to properly list and prioritize. In general, your goal should be to get as much Resistance on your other items as possible to give yourself as much room as possible to itemize full offense on your amulet once you reach the late game.
Rings
 Steel Rings are the best choice for damage if you can cap Resistances, while
  Vermillion Rings can get you to very high levels of health. Resistance rings should be your choice when starting out to help your cap smoothly.
- [Uncapped] Elemental Resistances
- +# to Maximum Life
- Curse Enemies With Level 8 Vulnerability on Hit (Warlord — on one ring only for
 Vulnerability application)
 - Adds # to # Physical Damage to Attacks
- % Increased Damage (Crafted)
- # to Dexterity / Intelligence (if needed)
Belt
The  Stygian Vise is far and away the best choice.
  Belt of the Deceiver is a good option while levelling but quickly loses out in the later portion of the game due to our use of
  Intimidating Cry to acquire Intimidate. The Rare Affix priority is:
- [Uncapped] Elemental Resistance
- +# to Maximum Life
- % Increased Global Physical Damage
- % Increased Damage (Crafted)
- +# to Armour
- +# to Strength
Jewels
Unique Jewels
 Intuitive Leap is a good option to acquire some extra points near Golem’s Blood for less skill investment.
 Watcher's Eye is also a great ultra late game acquisition, as the
  Pride mods can add some serious damage to your exile. Check in Path of Building to see what works best for your exile as there is some flux depending on gear level.
Standard Jewels
Virtually any Jewel with % Increased Maximum Life and some damage affixes is suitable to slot in. Upgrades should be made in the late game once your key pieces are acquired.
- % Increased Maximum Life
- % Increased Damage with Axes
- % to Physical Damage over Time Multiplier
- % Increased Melee Damage
- % increased Damage with Bleeding
Abyssal Jewels
- # to Maximum Life
- Adds # to # Physical Damage to Axe Attacks
- Adds # to # Physical Damage to Attacks
- % Increased Damage if You’ve Killed Recently
- % Increased Attack Speed
Any other useful affixes you can fit in are also perfectly fine, such as additional Resistances, or using an Onslaught on kill chance Jewel to swap out your  Silver Flask for more defense.
Flasks
If you are overcapped on Resistances you could opt to swap out your Warding flask for a Dousing suffix, as we are unaffected by  Temporal Chains maps by default due to our Ascendancy.
Early Mapping
- Seething
 Divine Life Flask of Staunching
  Lion's Roar
- Chemist’s
 Silver Flask of Adrenaline
 - Chemist’s
 Basalt Flask of Grounding
 - Experimenter’s
 Quicksilver Flask of Warding
End Game
- Experimenter’s
 Sulphur Flask of Staunching
  Lion's Roar
- Chemist’s
 Silver Flask of Adrenaline
 - Chemist’s
 Basalt Flask of Grounding
 - Experimenter’s
 Quicksilver Flask of Warding
To find out to easily craft your own non-Unique flasks yourself, we recommend reading our flask-crafting guide.


