TbXie's Voidfletcher Ice Shot / Barrage Deadeye Gear, Jewels and Flasks (PoE Crucible)
Summary – TL;DR
As per usual, nothing matters more than capping your Elemental Resistance before anything else. This means modifiers on gear are subordinate to Resistances as long as you’re not capped. Since you’ll be running a decent amount of Unique items, it’ll be important to look out for a lot of resistances on your Rare pieces!
We’re providing you with an extensive analysis further down the page but chose to start off with an overview / recommendation.
Our recommendation:
| Item Slot | Item Name |
| Head | 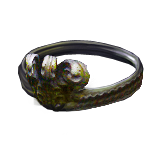 Asenath's Mark Asenath's Mark |
| Amulet |  The Pandemonius The Pandemonius |
| Chest | 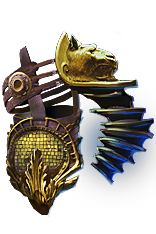 Hyrri's Ire Hyrri's Ire |
| Gloves | Rare Gloves with Life, Damage, Attack Speed & Spell Suppression |
| Boots | Two Toned Boots with high Life, Movement speed and Resistances |
| Belt |  Stygian Vise with Strength, Life and Elemental Damage with Attacks Stygian Vise with Strength, Life and Elemental Damage with Attacks |
| Rings |  Mark of the Elder and Shaper Ring with Life/Resists Mark of the Elder and Shaper Ring with Life/Resists |
| Weapon | 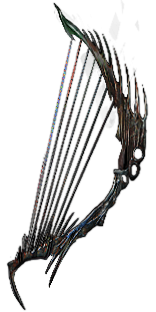 Death's Harp Death's Harp |
| Quiver | 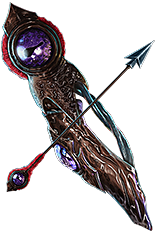 Voidfletcher Voidfletcher |
For crafting Rare items, you can check out all the affixes that can roll on an item base, depending on its level, influence, and many other factors, using our affix tool.
Armour Pieces
Helmet
Let’s kick of the gear overview with one of the more interesting items right away! Your Helmet slot most likely requires you to do some of your own crafting, unless you’re lucky enough to be able to cap your resistances with a Helmet that is listed on the trade websites that also has the “Barrage fires an additional Projectile” Enchant and has a really high Life modifier. Worry not, crafting this is easy and not too expensive!
Method A: You’re going to have to pick up an item level 83  Lion Pelt with the enchant, and you’re going to try and roll for T1 Life with a 1 T1 or T2 Resistance. This can be done by using
  Orb of Alterations and
  Orb of Augmentation. If you hit those two modifiers (which are really common), you’re going to use a
  Regal Orb to make the item Rare. If you hit any resistance, or a hybrid life roll you can call yourself done by crafting the one you didn’t get. Otherwise, you’re going to try and use an
  Orb of Annulment to get a Rare item with your two initial modifiers. Once you have that two modifier Rare helmet, you can craft “Can have up to 3 Crafted Modifiers” and craft whatever Resistance you need an a hybrid Evasion + Life roll to get a perfect helmet.
Method B: After picking up your item level 83  Lion Pelt with enchant, you can also opt to just spam
  Shrieking Essence of Greed. Buying those in bulk is annoying, and I’d estimate the cost of it to be perhaps just a little bit cheaper. You’re going to be on the look out for the Life roll provided by the Essence, 1 45%+ Resistance, and either another resistance or the hybrid Life roll so you can craft the other. More tedious, but highly likely to be cheaper.
So, the affixes you want are:
- Barrage fires an additional Projectile
- +# to maximum Life (at least 90)
- Elemental Resistances (at least 60)

Optionally, I recently have been a big fan of the  Asenath's Mark helmet. The main downside is that given how pressured for Resistances the build already is due to low amount of rare items, this only extrapolates that even further. If you however can find a way (through Jewels, Belt, Ring) max your resistances, I do think this is a far better option than the beforementioned. It offers you another, more reliable layer of defenses through Focal Point as it pretty much guarantees 100% uptime of
  Sniper's Mark. This is most definitely better than Wind Ward as that has some down time. Other than that, it scales your damage through Power Charges and potentially Ensnaring Arrow and doesn’t rely on Cast when Damage taken to guarantee Cold Exposure on Bosses / tough targets. This overall is the better pick but getting one of these with a Barrage Enchant as well as capping resists will be very challenging and a late game upgrade.
Body Armour
Since you’re trying to scale  Voidfletchers Void Shot’s as well as your Barrage damage,
  Hyrri's Ire is uncontestable. Potentially, at incredibly insane levels of gear, it could get beaten by a
  Farrul's Fur, but that’s practically almost never going to happen. Because of the damage effectiveness of Void Shots, the added Cold Damage that Hyrri’s adds is incredibly valuable. Try to find one with a very high “Cold Damage to Bow Attacks” roll.
Gloves
This is the slot where you top of your Spell Suppression Chance. Get as much of it as possible whilst respecting the option to grab the other necessary affixes.
- +# to maximum Life (at least 80)
- Adds # to # Cold Damage (To Attacks)
- +#% chance to suppress spell damage
- #% increased Attack Speed
- Elemental Resistances (until cap)
Boots
Arriving to the boot slot, you’re getting another one of your Rare pieces. Two-Toned Boots are almost a necessity because of how easy it makes capping Resistances. If you can cap without them, obviously, you can use whatever base item is available to you. Additionally, you want 30% Movement Speed and as much Life as possible. Note: a boot slot nowadays can get over 100 Maximum Life! If you feel like going towards the Suppression route, 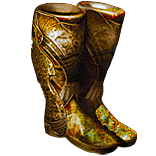 Atziri's Step are a really really solid item too.
- +# to maximum Life (at least 80)
- #% increased Movement Speed (at least 25)
- Elemental Resistances (until cap)

Belt
Because of how good flat damage is for us, you could have expected how badly we wanted a  Stygian Vise. This is the slot where you fix your Strength problems as well. Because of it being a Stygian Vise and you wanting a very high Life roll, combined with Strength and Elemental Damage with Attacks, I don’t think you should be expecting any kinds of resistances or flask modifiers on the belt if you want to keep it affordable.
- +# to Strength (at least 40)
- +# to maximum Life (at least 85)
- #% increased Elemental Damage with Attack Skills (preferably 40+)

Accessories
Amulet
You’re playing a Cold Build that has no requirement for another amulet. That means that  The Pandemonius is always on the table. On this build, I think it does too much to pass up on. There’s generally not a lot of Damage Penetration in the build, which makes the 24% Cold Penetration it gives invaluable (you achieve this amount Catalyzing your amulet). Additionally, you’re going to guarantee chills and blinds on all enemies which makes them so much less dangerous that this amulet is as good defensively as it is offensively.
Anoint
Heart of Ice is the best damage you can find, and pathing to it is not an option since it is a really far way out. Perfect to anoint on your Amulet!
Rings
You’re using a combination of a Shaper-base Ring with high amount of life, Intelligence and Resistances, as well as some Damage to Attacks modifier, if you can afford it. This needs to be a Shaper base because you want it to activate the effect of your second Ring, the  Mark of the Elder. A Mark of the Elder, when Catalyzed with Attack modifiers, grants up to 90% Attack Damage as well as 25% Elemental Damage, some flat Damage to attacks and a decent chunk of Life. This is definitely a piece that’s worth having! The affix priority for your Shaper-base Ring is as follows:
- +# to Intelligence (as much as needed)
- Elemental Resistances (until capped)
- +# to maximum Life (at least 70)
- #% increased Elemental Damage with Attack Skills
- Adds # to # Cold Damage to Attacks
- Adds # to # Cold Damage to Spells and Attacks

Weapon
This is where we chose the  Death's Harp. If you check the Path of Building I delivered I made a mirror-tier Rare
 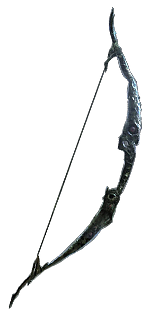 Harbinger Bow to check how much it would actually be doing, and the difference is laughable. Sure,
  Death's Harp was removed, and we now have to settle for its little brother, but the bow still remains in a very potent spot.
Quiver
The uncontestable  Voidfletcher goes in your quiver slot. Now, this quiver, as mentioned on the introduction, offers tremendous amounts of damage to your build through scaling its More multipliers up effectively, and adding a ton of projectiles to our
  Barrage to offload a lot of Void Charges for maximum DPS!
Flasks
I believe flasks are highly preference-based. One isn’t just outright better than another one for specific / certain builds. Obviously, sometimes, there’s a set in stone set of Flasks you should be using just because they synergize with your build so well. I wouldn’t say those really exist in this setup, but I’d strongly advise you to stick with the setup listed here.
In this particular case, I’d argue a  Dying Sun is fairly mandatory. It amplifies you clear speed by a bunch and it’s effectively a more multiplier for both your Void Shot and your Barrage. Next up, since you’re playing a Crit Build, you can’t go without a
  Diamond Flask. The amount of effective critical strike chance it adds is just through the roof and shouldn’t be skipped over!
From here on out, most of your options are flexible. You could go with a defensive setup in a  Quartz Flask and a
  Basalt Flask or you could go the Damage and Movement Speed route by running a
  Quicksilver Flask and an
  Atziri's Promise. On builds like this one, I generally always opt for the Movement Speed and Damage options.
The last Flask is a bit of preference again but since we aren’t the most tanky build and there’s no source of instantaneous recovery, I think a  Divine Life Flask with a Seething or Bubbling Prefix could suit you well for those panic-button-moments.
Regardless of which utility Flasks you go for and whether you follow our recommendations or not, you’ll need to stick to the suffixes we have picked for you (Staunching, Warding, Heat). The affixes on your non-unique Flasks can be changed around, but I recommend the following setup (based on the Flask duration, charges, and affix priorities):
Our recommendation:
| Slot | Flask |
| 1 | Bubbling  Divine Life Flask of Staunching Divine Life Flask of Staunching |
| 2 | Chemist’s  Diamond Flask of Heat Diamond Flask of Heat |
| 3 | Chemist’s  Quicksilver Flask of Warding Quicksilver Flask of Warding |
| 4 |  Dying Sun Dying Sun |
| 5 |  Atziri's Promise Atziri's Promise |
Be sure to check out our Flask Crafting Guide to learn everything you need to know about how to set up your non-Unique flasks.
Jewels
Cluster Jewels
Cluster Jewels generally are not too amazing in bow builds, but they do scale  Voidfletcher a lot better than they do other skills. Therefore, we did opt into running a single
  Large Cluster Jewel and two
  Medium Cluster Jewels.
If you are looking for the most optimal way to acquire your Cluster Jewels, or have any other questions whatsoever about them, such as how to craft or price them, we refer you to our complete guide on Cluster Jewels.
Since this build really likes skill points, and doesn’t really care much about which of the potential options you get on a  Large Cluster Jewel, I’d advise you find one with 3 Notables. I’d argue that Prismatic Heart is your safest bet, as it offers you a decent chunk of damage as well as some much needed Elemental Resistances. Here’s a list of notables you can find on Large Clusters that are perfectly fine to use:
- Prismatic Heart
- Disorienting Display
- Doryani’s Lesson
- Widespread Destruction
- Blanketed Snow
- Calamitous
- Smite the Weak

For your Medium Cluster Jewels, we opted for the obvious choice. Eye to Eye and Repeater both are incredibly solid notables and are just far ahead of the other options!
- Repeater
- Eye to an Eye

Regular Jewels
Feels like I’m being a little repetitive, but Flat Damage to Attacks is the name of the game here. We’re trying to “abuse” the high effectiveness of added damage on Void Shots by stacking as much of it as possible. You might need to find some Jewels with a single resistance roll, or some Strength + Intelligence rolls. Otherwise, you want to look for Life and Cold Damage to Attacks. Do note that this scales incredibly well, and that higher Cold Damage rolls are significantly better than lower ones!
*Note : Ever since the changes to Endless Munitions, you might need a single roll of Accuracy on a piece of gear – or on one of your Jewels! Make sure to always try and have 100% chance to hit.
- +# to Maximum Life
- Adds # to # Cold Damage to Bow Attacks
- Adds # to # Damage to Bow Attacks


