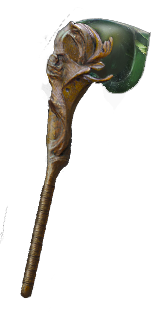
Earthquake Juggernaut Build Guide (PoE Sentinel 3.18)
Introduction
Due to the latest balancing changes, we do not recommend playing this build anymore, as it does not meet the high standards we apply to our guides in terms of fun and performance. We are leaving it up as a reference and it might be revived in a later patch.
The  Earthquake Juggernaut is a formidable classic, seemingly only improving with age as improvements to slams and Warcries have made their way into the game. Boasting the extreme durability of the Juggernaut Ascendancy, this build excels at farming the Labyrinth and smashing through enemies without fear. Though it attacks slowly, each attack is accompanied by a brutal slam and an even nastier bleed, ensuring that any enemies tough enough to survive the initial impact are washed away in an instant.
One advantage of this build is its extreme adaptability. Hardcore leagues? Extremely safe. Solo Self-Found? No problem. It is most prolifically used for farming the Eternal Labyrinth to generate very high amounts of currency, but it can be built into a powerful mapper and deals with late-game bosses, such as Awakener, moderately well. There are enough investments available to take it from a potent league starter to an end-game brute that any exile can respect, but few enough requirements that it can function on any level of budget.
This build focuses on stability, power, and consistency, and is a great choice for exiles of all levels. Whether as a Labyrinth Farmer, SSF project, or end-game jack of all trades, the EQ Juggernaut is a perennial powerhouse that shouldn’t be overlooked.
3.14 Ultimatum League Changes
Big buffs to  Vaal Earthquake:
- Now deals 70% of base Attack Damage at gem level 1 (previously 60%) and 85% of base Attack Damage at gem level 20 (previously 71%)
- Ongoing effect now ends after 9 Aftershocks (previously 7).
- Now has a Soul Gain Prevention duration of 9 seconds (previously 12).
This is quite significant for the build, particularly for league mechanics where you need a big burst of damage to help push through a large number of really formidable enemies.
Build Assessment
Pros
+ Extreme durability; high Life pool, regeneration, Endurance charges, Juggernaut keystones
+ Excellent Labyrinth farmer
+ League starter, strong Solo-Self Found & Hardcore candidate
+ Moderately high damage output
+ No required Uniques, easy gearing path, cost efficient
+ Warcries are very powerful with recent improvements
Cons
– Mapping clear speed cannot match S-Tier mappers due to  Earthquake‘s limited size and attack speed
– Damage does not scale as well as critical strike builds
Path of Building
This PoB will provide you with a good outline of the build Path Of Building.
Included in the Path of Building are skill trees, all gem links and possible variations, and an example set of mid-level gear with room for upgrades. For simplicity’s sake, Elemental Resistances are not included on gear, and you can fill them in as you like depending on available gear.
We use the Path of Building Community Fork for all of our builds, which is highly recommended. If you are encountering errors importing the build, please ensure you are using the Community Fork.
Playstyle
 Earthquakers have a satisfying playstyle that sets it apart from most other melee skills when it comes to clearing the room; hit hard, hit once. Anything that isn’t killed by your initial smash will be mopped up in short order by the coming aftershock. With your satisfyingly hard impacts comes a powerful bleed, which helps us deal with durable enemies without having to turn around for a second swing. When it comes to bossing we rely on this bleed heavily, as it is damage we can count on to always be ticking, even when we might have to skirt out of melee range to avoid a mechanic.
Dealing with large packs in a single punch is undoubtedly satisfying, but it comes with its downsides as well. Builds with slower attack speed rely more heavily on player precision, as any monsters you miss with your ground shattering smash will escape unscathed, forcing you to expend additional attacks to clean them up. In order to minimize this weakness,  Earthquake should always be used in a position where it will capture the greatest amount of enemies and damage per swing — the center of the action. This is where the powerful layered defense of our build and the Juggernaut Ascendancy really shine, allowing you to get up close without the risk.
Another way to accommodate this playstyle is to target specific tilesets that play to  Earthquake‘s strengths. One of the reasons that it makes a great lab farmer is that most of the Labyrinth is indoors or in tight corridors. A build that has massive ricochet in an open area — such as our Kinetic Blast Pathfinder — will favor an open playing field, but could feel threatened and cramped when there are many monsters packed into a tight space. This
  Earthquake Juggernaut is just the opposite, and favoring tilesets with tight environments and high mob density will allow us to capitalize on the moderate AoE capabilities of
  Earthquake.
Use  Leap Slam to fly into packs before delivering devastating damage with your
  Earthquake, and
  Vaal Earthquake if available. Use your Warcries as often as possible, as we build to greatly empower their effectiveness and they can go a long way in increasing your damage, defense, and flexibility in approaching any given situation.
Passive Tree
Click here for our recommended Level 100 Passive Skill Tree.
For more details on the Passive Tree, an earlier game version, skill acquisition order, and more, be sure to check out the Passive Skill Tree section for in-depth information.
Ascendancy, Bandits, and Pantheons
Our Ascendancy, Bandit, and Pantheon Power page goes into detail about all the choices you need to make in these regards.
Gems
We go over all of the gem links this build uses in the end-game on our Gem Link page.
Gear Summary / TL;DR
These items strike a balance between power and cost-effectiveness. If you want to explore more options for Gear (both budget and high-end), Flasks, or get more information on alternatives and specialty items, please ensure you read the Gear, Jewels, and Flasks section in its entirety.
Our recommendation:
| Item Slot | Item Name |
| Head | Rare  Royal Burgonet Royal Burgonet |
| Amulet | Rare Amulet |
| Chest | Rare  Astral Plate with Crusader Influence Astral Plate with Crusader Influence |
| Gloves | Rare  Spiked Gloves Spiked Gloves |
| Boots | Rare Boots |
| Belt | Rare  Stygian Vise Stygian Vise |
| Rings | Rare Rings ( Steel Rings or Steel Rings or  Vermillion Rings if you don’t need Resistances anymore) Vermillion Rings if you don’t need Resistances anymore) |
| Weapon | Rare  Karui Chopper or Karui Chopper or  Atziri's Disfavour Atziri's Disfavour |
Leveling
As a reminder, we have several guides to help you level up a character.
- Our step-by-step leveling walkthrough, which allows even more experienced players to save time and speed through the leveling process.
- Our guide to Unique Items for leveling, which helps you gear up your characters for the leveling process.
- Our beginner leveling guide, which answers many of the questions new players might have and will set you on the right path.
Leveling the build is pretty straight forward. You should not have any issues on your way to Act X, the damage and survivability should be more than comfortable as long as you replace items frequently.  Earthquake is decent early game so you can start playing with it as soon as you get it, at level 28, and its Vaal version is also very useful when it comes to boss killing. Until level 28 you can play with
  Ground Slam and
  Sunder.
Leveling Trees
With this passive skill tree you should have more than enough offense and defense in order to get to maps. First you should head to Resolute Technique, picking all of the Life and damage on the way. Then focus on picking the Impale nodes along with more Life when needed. Having 300HP per act will ensure you a smooth levelling experience.
Gem Progression
Using  Tabula Rasa will allow you to have 6-Link gem setups early on, which is why we show such examples below. If you cannot get Tabula Rasa (or another item with a 6-Link), then simply prioritize the first gems in each link provided below.
In order to acquire gems that are not available to your class as a quest reward, simply ask a friend to buy them off vendors for you, or buy them yourself from Siosa in The Library in Act III Library.
From level 1, you should use the following link.
 Ground Slam
- ###item:onslaught-support###
At level 4, add  Ancestral Protector for additional single target damage. At this point your
  Ground Slam link should look like this.
 Ground Slam
- ###item:onslaught-support###
 Chance to Bleed Support
At level 10, add  Leap Slam for additional mobility.
At level 12, you should replace  Ground Slam with the following
  Sunder link.
 Sunder
 Maim Support
 Chance to Bleed Support
- ###item:onslaught-support###
 Ruthless Support
At level 16, add  Herald of Purity for additional damage.
At level 18, your  Sunder link should look like this.
 Sunder
 Melee Physical Damage Support
 Maim Support
 Chance to Bleed Support
- ###item:onslaught-support###
 Ruthless Support
At level 24, you should add  Pride.
At level 28, finally, you can transition to  Earthquake, your signature skill. We recommend the following link.
FAQ
What Amulet Anointment Should we go for?
Rampart is currently our recommended choice, but there are other suitable contenders you could leverage based on playstyle and preference. Hematophagy improves our leeching capability and damage, while Wrecking Ball works on further empowering damage and bleeds.
How much Life should I have to safely farm Uber/Eternal Labyrinth?
Juggernaut has very powerful defenses, so you could feasibly start farming the Eternal Labyrinth with as little as 4500 Life and stay relatively safe.


 Less Duration Support
 Pulverise Support