TbXie's Chaos DoT Soulrend Trickster Gear, Jewels and Flasks (PoE Trial of the Ancestors 3.22)
Summary – TL;DR
As per usual, nothing matters more than capping your Elemental Resistance before anything else. This means modifiers on gear are subordinate to Resistances as long as you’re not capped. Since you’ll be running a decent amount of Unique items, it’ll be important to look out for a lot of resistances on your Rare pieces!
We’re providing you with an extensive analysis further down the page but chose to start off with an overview / recommendation.
Our recommendation:
| Item Slot | Item Name |
| Head | 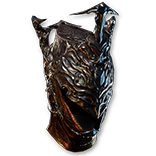 Crown of the Inward Eye Crown of the Inward Eye |
| Amulet |  Citrine Amulet with +2 to Int / Chaos Skills Citrine Amulet with +2 to Int / Chaos Skills |
| Chest | 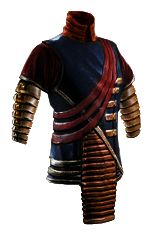 Sadist Garb with as much Evasion and Energy Shield as possible Sadist Garb with as much Evasion and Energy Shield as possible |
| Gloves |  Sorcerer Gloves with Chaos DoT Multi and as much Energy Shield as possible Sorcerer Gloves with Chaos DoT Multi and as much Energy Shield as possible |
| Boots | 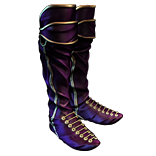 Sorcerer Boots with Movement Speed and as much Energy Shield as possible Sorcerer Boots with Movement Speed and as much Energy Shield as possible |
| Belt |  Bated Breath or Bated Breath or  Crystal Belt Crystal Belt |
| Rings | Rare rings with Energy Shield, Mana, Mana Regeneration and Attributes |
| Weapon | Rare Wand with +1(or2) to Spell Skills, Chaos DoT Multi and DoT Multiplier |
| Shield | Rare 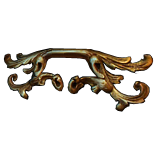 Titanium Spirit Shield with Energy Shield when you Block and as much Energy Shield as possible Titanium Spirit Shield with Energy Shield when you Block and as much Energy Shield as possible |
For crafting Rare items, you can check out all the affixes that can roll on an item base, depending on its level, influence, and many other factors, using our affix tool.
Armour Pieces
Helmet
 Crown of the Inward Eye is just extremely solid for the build while being super cheap / easy to buy or find. While it costs you about 200 Energy Shield, it gets you about 15% damage which is about 5% more for then you’d get from a BiS Rare Helmet. In case you’re paying SSF, this helmet drops from Sirus really commonly and it’s hardly worth every investing your currency into a well crafted Hubris Circlet. Should you insist, you’re aiming for 300 Energy Shield and a “Nearby Enemies have -9% to Chaos Resistance” modifier which only appears on Hunter-influenced items.
If you play trade league and you can find one, a  Crown of the Inward Eye with a “Soulrend fires an additional Projectile” is extremely useful for map clear. It’s not a big deal if you can’t get the enchant, but if you have some extra currency, its really really nice to have!
Body Armour
The best in slot piece here is a  Sadist Garb because it has the best Evasion on an Evasion / Energy Shield chest. This means that you’ll make more use out of it than any other base on a Trickster. Try focusing on getting one with really high Energy Shield and Evasion. The rest of the stats absolutely don’t matter.
- #% increased Evasion and Energy Shield (at least 100%)
- +#to Evasion Rating (at least 250)
- +#to maximum Energy Shield (at least 70)

Gloves
This is one of your only slots where you can find some additional damage. If you can pick up a Hunter-influenced modifier “Chaos Damage over Time Multiplier” on a high pair of Sorcerer Gloves, you would like to get one. This is a small upgrade and one that should generally come later on in the gearing process. Otherwise you’re just trying to focus on high Energy Shield and perhaps some Resistances.
- +# to Maximum Energy Shield
- #% increased Energy Shield
- +#% to Elemental Resistances (until cap)
- #% to Chaos Damage over Time Multiplier

Boots
Other than wanting high Increased Movement Speed and high Energy Shield, you’d like to find at least one Resistance here to help you cap your Resistances. Obviously, a pair of Sorcerer Boots is best as that is the highest Energy Shield base. Optionally, you can go for a Hybrid ES/EV base to up your Evasion as long as you maintain the movement speed, necessary resistances, and over 100 Energy Shield, any bonus evasion is a win.
- #% increased Energy Shield
- +# to maximum Energy Shield
- #% increased Movement Speed (at least 20 – preferably 30)
- +# to Elemental Resistances (until cap)

Belt
 Bated Breath is just incredibly hard to beat for how easy it is to acquire. It’s basically free in a trade-league, and in Solo Self-Found it’s generally not that uncommon to have one of these. However, should you find yourself in a scenario where you don’t have one of these, the best alternative would be a
  Crystal Belt with as much Energy Shield and Resistances as you can find. Bated Breath, however, just offers so much “hidden quality of life” in the increased Energy Shield Recharge Rate that you’d almost always take it over a Rare belt anyway.
Accessories
Amulet
This is one of two slots where the main throughput of the build sources from. You want to Awaken 2 +1 to Level of Gems modifiers together here on an amulet. This requires an  Awakener's Orb. Before you acquire this, a single of these modifiers will do you fine up to that point. Whenever you awakener orb those modifiers together depending on how your Mana Sustain feels, you’re going to want to craft Mana Regeneration, Energy Shield or % increased Maximum Energy Shield.
- +# to Level of all Chaos Skill Gems
- +# to Level of all Intelligence Skill Gems
- Crafted Mana Regeneration (if needed)
- % increased maximum Energy Shield (if needed)

Anoint
Deflection is the anointment required for the build. It gives you an incredible amount of Block and Spell Block chance which you need to reach cap. Additionally, you’re getting a decent amount of Energy Shield from the Increased Defenses from Equipped Shield. It’s also relatively cheap so there’s no point in delaying this whatsoever.
Rings
This is where you find most of your Resistances, Mana Sustain, and, whenever possible, some extra Energy Shield. Ideally you get some kind of Resistance base, an extra Energy Shield roll, as much Resistance as you can find a high Mana or Mana Regeneration roll, crafting whichever one of those you’re missing. If you want to save a Skill Point, you’re probably going to need to find a little bit of Dexterity here too.
- +# to Dexterity (as much as needed)
- #% increased Mana Regeneration Rate / #+ to maximum Mana (at least 50)
- +# to Elemental Resistances (until cap)
- +# to maximum Energy Shield

Shield
Your shield is one of your main Energy Shield slots. Your goal here is to find as much Energy Shield as possible while getting “Recover 5% of Energy Shield when you block” as well. This is a Shaper modifier, so it’s a little tricky as you ideally want a  Titanium Spirit Shield base because of its much greater Energy Shield potential. Should you get a base, you can easily use
  Orb of Alterations and eventually multimod the remaining affixes to make the Shield decently strong!
- Recover #% of Energy Shield when you Block (5)
- +# to maximum Energy Shield (at least 80)
- #% increased Energy Shield (at least 70)
- +#% to Quality (crafted)

Weapon
Since you’re able to get double DoT modifiers here, you only require a single modifier to gem levels being either +1 to Level of all Chaos Spell Skill Gems or +1 to Level of all Spell Skill Gems. Additionally, you’re looking for either #% to Chaos Damage over Time Multiplier or #% increased Damage over Time. Whenever you get two of those, you’re going to just craft the other one on the crafting bench. Otherwise, you can get just the level modifier and multi-mod the two other bench-stats.

Flasks
I believe flasks are highly preference-based. One isn’t just outright better than another one for specific / certain builds. Obviously, sometimes, there’s a set in stone set of Flasks you should be using just because they synergize with your build so well. I wouldn’t say those really exist in this setup, but I’d strongly advise you to stick with the setup listed here.
In a Trade-League environment you’d be running a Unique Flask in  Dying Sun. Dying Sun is really nice because together with the Helmet enchant it enables you to not have to run some source of multiple projectiles in your Links. If you don’t have the Helmet enchant or a Dying Sun you probably would swap out one of your green gems for a
  Greater Multiple Projectiles Support while mapping to re-swap it on the boss.
For your non-unique Flasks, the first one you want to run is a  Jade Flask. A Jade Flask scales your Evasion which in turn makes you recover more Energy Shield when you lose your Ghost Shrouds. It is mandatory in every single Trickster Build that picks up Ghost Dance in my opinion. Next up is a
  Granite Flask, which greatly reduces the incoming Physical Damage. Lastly, a
  Quartz Flask helps capping your Suppression. If you can cap without it, A
  Sulphur Flask is pretty nice for damage.
The last Flask in your setup is an Enduring  Eternal Mana Flask. This makes you never run out of Mana whatever you do. Since Soulrend is a fairly expensive spell, it’s hard to sustain Mana otherwise. If you really push Mana and Mana Regen on your Jewellery (and maybe on your shield) you could eventually, with really good gear, drop this Flask. Whenever you do, swap it out for a
  Quicksilver Flask for faster mapping.
Regardless of which utility Flasks you go for and whether you follow our recommendations or not, you’ll need to stick to the suffixes we have picked for you (Bleed, Curses, Freeze, Evasion, Armour, …). The affixes on your non-unique Flasks can be changed around, but I recommend the following setup (based on the Flask duration, charges, and affix priorities):
Our recommendation:
| Slot | Flask |
| 1 | Masochist’s  Jade Flask of the Walrus Jade Flask of the Walrus |
| 2 | Masochist’s  Granite Flask of Iguana Granite Flask of Iguana |
| 3 | Masochist’s  Quartz Flask of the Impala Quartz Flask of the Impala |
| 4 |  Dying Sun Dying Sun |
| 5 | Enduring  Eternal Mana Flask of Warding Eternal Mana Flask of Warding |
Before having the Despair on hit Ring, you should swap out either the Quartz (if you can find suppression elsewhere) or the Granite for witchfire brew.
Be sure to check out our Flask Crafting Guide to learn everything you need to know about how to set up your non-Unique flasks.
Jewels
Cluster Jewels
Cluster Jewels are amazing for this Build. When perfectly optimized, they make up a huge portion of your total damage. Worry not though, generally, they wont be incredibly expensive.
If you are looking for the most optimal way to acquire your Cluster Jewels, or have any other questions whatsoever about them, such as how to craft or price them, we refer you to our complete guide on Cluster Jewels.
Because most of the power comes from Large Cluster Notables, you’re running a Single Large Cluster with just one Medium Cluster. Additionally, you’re running two Small Cluster Jewels to give your Energy Shield a huge boost! On your  Large Cluster Jewel you’re looking for 3 Notables. Any combination of the following notables is fine, as long as you get an 8-Passives Cluster Jewel.
- Touch of Cruelty
- Wicked Pall
- Unwavering Evil
- Dark Ideation
- Unholy Grace
- Unspeakable Gifts

The single Medium Cluster Jewel you want to run most optimally has Exposure Therapy and Eldritch Inspiration. If you want you can add a second one of those, as it provides you with a huge amount of damage but it’s just really hard to find the skill points in this build as there are so many awesome nodes on the tree as well.

The Small Cluster Jewels are just there to provide you with Energy From Naught modifiers which greatly improve your overall Energy Shield. They generally are super easy to roll yourself or buy for a couple of  Chaos Orb on trade.

Rare Jewels
Because you want to stay relatively tanky, I really like grabbing #% increased maximum Energy Shield on every single one of my Rare jewels. Your best modifiers are Damage over time Multiplier followed by any generic increases to Chaos Damage. Therefore, I suggest you pick up one Multiplier modifier alongside a generic damage mod.
- #% increased maximum Energy Shield
- +#% to Chaos Damage over Time Multiplier
- +#% to Damage over Time Multiplier
- #% increased Chaos Damage
- #% increased Spell Damage while holding a Shield
- #% increased Spell Damage
- #% increased Damage over Time
- #% increased Projectile Damage


